Advertisement
Available languages
Available languages
Quick Links
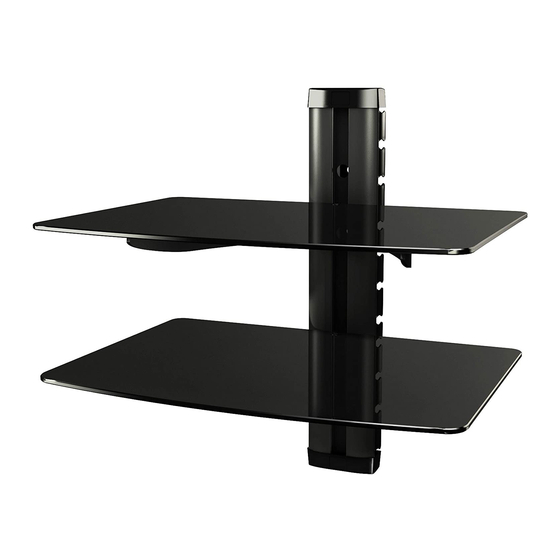
DVD Wandregal
MONTAGEANLEITUNG
v.16.12
DVD-2
ACHTUNG: NIEMALS DAS MAXIMAL
ZULÄSSIGE BELASTUNGSGEWICHT
8kg
ÜBERSCHREITEN. MISSACHTUNG
alle Farbvarianten
(17.6lbs)
KANN ZU SACHSCHÄDEN ODER
alle Größen
SCHWEREN VERLETZUNGEN FÜHREN!
MAX
Advertisement

Related Manuals for ricoo DVD-2


Summary of Contents for ricoo DVD-2
- Page 1 DVD Wandregal MONTAGEANLEITUNG v.16.12 DVD-2 ACHTUNG: NIEMALS DAS MAXIMAL ZULÄSSIGE BELASTUNGSGEWICHT ÜBERSCHREITEN. MISSACHTUNG alle Farbvarianten (17.6lbs) KANN ZU SACHSCHÄDEN ODER alle Größen SCHWEREN VERLETZUNGEN FÜHREN!
- Page 2 ACHTUNG: Lesen Sie die gesamte Bedienungsanleitung durch, bevor Sie mit der Montage beginnen. WARNUNG • Beginnen Sie nicht mit der Montage, bis Sie alle Anweisungen und Warnungen, welche in dieser Montageanleitung vorhanden sind, durchgelesen und verstanden haben. Wenn Sie Fragen zu den Anweisungen oder Warnungen haben, kontaktieren Sie bitte Ihren Händler.
- Page 3 Lieferumfang WICHTIG: Stellen Sie vor der Montage sicher, dass alle Teile welche hier aufgeführt sind, bei der Lieferung dabei sind. Sollten Teile fehlen oder defekt sein, kontaktieren Sie Ihren Händler. A (x2) B (x2) C (x1) E (x2) D (x2) M5 (x4) M5 (x4) F (x8)
- Page 4 1-A. Befestigung an der Holzbalkenwand 55mm 50mm (2") ø 4mm (ø 0.16") Holzbalken mit Balkenfinder finden und die Montagelöcher markieren. Montagelöcher bohren. Wandplatte an die Wand anschrauben. WARNUNG • Stellen Sie sicher, dass die Befestigungsschrauben in der Mitte der Balken verankert sind. Die Verwendung eines Balkenfinders wird dringend empfohlen.
- Page 5 1-B. Befestigung an der Massivbetonwand 60mm 55mm 2.4" (2.2") ø 8mm (ø 0.31") Achtung: Mitgelieferte Dübel sind nur für Massivbetonwände geeignet! Montagelöcher markieren. Montagelöcher bohren. Wandplatte an die Wand anschrauben. WARNUNG Installateure müssen sicher stellen, dass die Anbaufläche das Gesamtgewicht von diesem Produkt inkl.
- Page 6 2. Zusammenbau des Glashalters Vormontieren wie abgebildet. Mind. 3mm zwischen Glashalter "B" und Verbindungselement "E" lassen. Schrauben „H“ nicht fest anziehen. 3. Montage des Glashalters Ansicht von oben Glashalter von oben in die Wandschiene einführen. Gewünschte Position einstellen. Schrauben „H“ fest anziehen.
- Page 7 4. Montage der Plastik-Glaspads 5. Montage der Glasplatte Glasplatte auf Glashalter auflegen, Plastikscheiben "J" einlegen und mit Schrauben "G" fixieren. Schrauben „G“ nicht überziehen, da ansonsten die Glasplatte zerbricht! Wiederholen Sie Schritte 2, 3, 4, 5 für jeden weiteren Glashalter mit Glasplatte.
- Page 8 6. Montage der dekorativen Abdeckungen Fertig DVD-Player nicht im Lieferumfang enthalten. Das Bild dient nur zur Showzwecken Wartung • Prüfen Sie in regelmäßigen Abständen (mindestens alle drei Monate), ob alle Schrauben an dem Produkt fest angezogen sind. • Bei Fragen kontaktieren Sie Ihren Händler.
- Page 9 DVD Wall Mount INSTALLATION MANUAL v.16.12 DVD-2 CAUTION: DO NOT EXCEED RATED LISTED WEIGHT. SERIOUS all color variations INJURY OR PROPERTY DAMAGE (17.6lbs) MAY OCCUR! all sizes...
- Page 10 NOTE: Read the entire instruction manual before you start installation and assembly. WARNING • Do not begin the installation until you have read and understood all the instructions and warnings contained in this installation sheet. If you have any questions regarding any of the instructions or warnings, please contact your local distributor.
-
Page 11: Component Checklist
Component Checklist IMPORTANT: Ensure that you have received all parts according to the component checklist prior to installation. If any parts are missing or faulty, telephone your local distributor for a replacement. A (x2) B (x2) C (x1) E (x2) D (x2) M5 (x4) M5 (x4) - Page 12 1-A. For Wood Stud Wall Mounting 55mm 50mm (2") ø 4mm (ø 0.16") Find and mark the exact location of mounting holes. Drill pilot holes Screw the wall plate onto the wall WARNING • Make sure that mounting screws are anchored into the center of the studs. The use of a stud finder is highly recommended.
- Page 13 1-B. For Solid Brick and Concrete Mounting 60mm 55mm 2.4" (2.2") ø 8mm (ø 0.31") Warning: Supplied plastic anchors are only suitable for solid concrete walls! Mark the exact location of mounting holes. Drill pilot holes Screw the wall plate onto the wall WARNING Installers must verify that the supporting surface will safely support the combined weight of...
- Page 14 2. Installing the Glass Holder Pre-assemble as shown. Leave at least 3mm between the glas holder "B" and the connecting element "E". Don‘t tighten the screws „H“ too strong. 3. Installing the Glass Holder Top view Put the glas holder from top into wall plate. Set the desired position. Tighten the screws "H"...
- Page 15 4. Installing the Plastic Glass Pad 5. Installing the Glass Shelf Attach the glass shelf to the holder, insert plastic washers "J" and tightening with the screws "G". Do not overtighten the screw "G"! By overtighting the glass plate can be damaged! Repeat the steps 2, 3, 4, 5 for each additional holder with glass shelf.
- Page 16 6. Installing the Decorative Covers Done DVD-Player is not included. The image is just for show purposes. Maintenance • Check that the bracket is secure and safe to use at regular intervals(at least every three months). • Please contact your distributor if you have any questions.
Need help?
Do you have a question about the DVD-2 and is the answer not in the manual?
Questions and answers