Advertisement
Quick Links
Please Contact Moen First
For Installation Help, Missing or
Replacement Parts
(USA)
1-800-BUY-MOEN (1-800-289-6636)
Mon - Fri 8:00 AM to 7:00 PM, Eastern
Sat. 9:00 AM to 3:00 PM Eastern
WWW.MOEN.COM
(Canada)
1-800-465-6130
Mon - Fri 7:30 AM to 7:00 PM, Eastern
WWW.MOEN.CA
Por favor, contáctese primero con Moen
Para obtener ayuda de instalación, piezas
faltantes o de recambio
01-800-718-4345
Lunes a viernes de 8:00 a 20:00 hs.
(Costa Este)
Sáb. 8:00 a 18:30 hs. (Costa Este)
WWW.MOEN.MX
Veuillez d'abord contacter Moen
en cas de problèmes avec l'installation, ou pour
obtenir toute pièce manquante ou de rechange
1-800-465-6130
Du lundi au vendredi:
de 7 h 30 à 19 h, HE
WWW.MOEN.CA
HELPFUL TOOLS
For safety and ease of faucet replacement, Moen
recommends the use of these helpful tools.
Installation Guide
Guía de Instalación
Guide d'installation
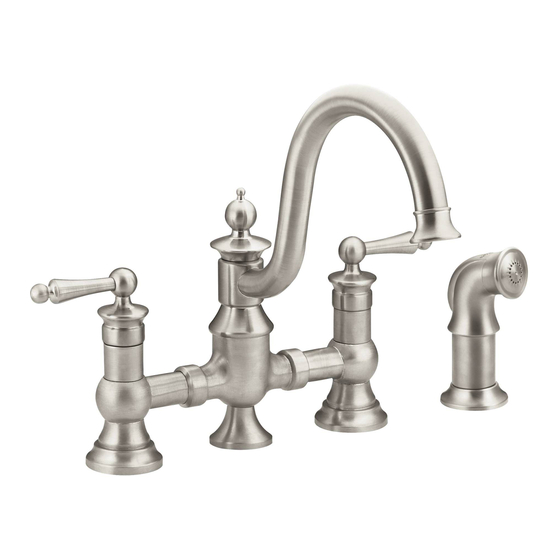
TWO-HANDLE KITCHEN BRIDGE FAUCET
MODEL S713 SERIES
MEZCLADORA EN PUENTE PARA COCINA
DE DOS MANERALES
MODELO SERIE S713
ROBINET DE CUISINE EN PONT À DEUX
POIGNÉES
MODÈLE DE LA SÉRIE S713
HERRAMIENTAS ÚTILES
Para que el cambio de la llave sea fácil y
seguro, Moen le recomienda usar estas útiles
herramientas.
INS919F - 1/14
OUTILS UTILES
Par mesure de sécurité et pour faciliter
l'installation, Moen suggère l'utilisation des
outils suivants.
Advertisement

Related Manuals for Moen S713 Series


Summary of Contents for Moen S713 Series
- Page 1 MODÈLE DE LA SÉRIE S713 HELPFUL TOOLS HERRAMIENTAS ÚTILES OUTILS UTILES For safety and ease of faucet replacement, Moen Para que el cambio de la llave sea fácil y Par mesure de sécurité et pour faciliter recommends the use of these helpful tools.
-
Page 2: Parts List
Parts List A. Side Spray B. Faucet Body C. Hose Guide D. Gasket E. Hose Guide Mounting Nut F. Mounting Nut G. Nut H. Hardware Plug I. Lubricant J. Hex Wrench K. Quick Connect Adapter L. Faucet Body Escutcheon Lista de piezas A. - Page 3 INS919F - 1/14 Option/Opción/Option Option/Opción/Option Go to step Go to step Vaya al paso Vaya al paso Aller à l'étape Aller à l'étape Insert Faucet Body (B) with attached Faucet Body Escutcheon (L) into sink openings. Go to step number 9. Inserte el cuerpo de la mezcladora (B) con el chapetón (L) conectado al mismo en las aberturas Vaya al paso número 9.
- Page 4 Install Mounting Nuts (F) onto Faucet Body (B) shanks and tighten firmly by hand. Secure Faucet Body Escutcheon (L) by tightening to sink deck. Instale las tuercas de montaje (F) en los tubos roscados del cuerpo de la mezcladora (B) y apriete Sujete el chapetón del cuerpo de la mezcladora (L) apretándolo a la cubierta del fregadero.
- Page 5 INS919F - 1/14 Insert Side Spray (A) into Hose Guide (C) until Side Spray is fully seated. 1) Install Side Spray (A) Hose into Quick Connect Adaptor (K). Push in as far as possible till a click is heard. Tug downward to test engagement. Inserte el rociador lateral (A) en la guía de la manguera (C) hasta que el rociador lateral quede 2) Install Adaptor (K) onto Faucet Body (B).
- Page 6 For no side spray/Sin Rociador Lateral/ Pour Sans Rince - Légumes For no Side Spray installation: Use Hex Wrench (J) to remove Faucet Body Escutcheon (L). Apply a small amount of Lubricant (I) to Hardware Plug (H). Insert into bottom of Faucet Body (B).
- Page 7 INS919F - 1/14 Cold Frio Froid Caliente Chaud Attach Flexible Supply Lines (not included) to Faucet Body (B) shanks. Secure with wrench. Attach other ends of Flexible Supply Lines (not included) to shut off stops. Tighten with wrench. Turn on water and check for leaks. Conecte las líneas de suministro flexibles (no incluidas) a los tubos roscados del cuerpo de la mezcladora (B).
- Page 8 Defects or damage caused by the par l’utilisation de pièces non fournies par Moen ne use of other than genuine Moen parts is not covered hacer efectiva la garantía, cualquier reclamación deberá ir acompañada por el comprobante de sont pas couverts par cette garantie.
Need help?
Do you have a question about the S713 Series and is the answer not in the manual?
Questions and answers