Logitech K800 Setup Manual
Hide thumbs
Also See for K800:
- User manual ,
- Getting started (102 pages) ,
- Setup instructions (64 pages)
Table of Contents
Advertisement
Available languages
Available languages
Quick Links
Advertisement
Table of Contents

Related Manuals for Logitech K800


Summary of Contents for Logitech K800
- Page 1 K800 Setup Guide | Guide d’installation...
- Page 2 English Français Español Português www.logitech.com/support/k800...
-
Page 3: What's In The Box
WHAT’S IN THE BOX Important Safety, Compliance and Warranty Information Informations importantes concernant la sécurité, la mise en conformité et la garantie English... - Page 4 SET UP Software installation logitech com/options English...
-
Page 5: Keyboard Features
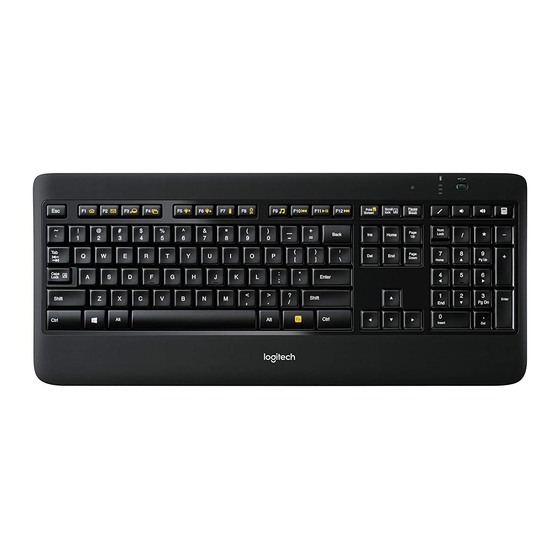
KEYBOARD FEATURES 1. Application zone 3. Multimedia navigation zone + F1 Launch Internet 6. Automatic light browser + F9 Launch media sensor (ALS) + F2 Launch e-mail + F10 Previous track 7. Battery status application + F11 Play/Pause + F3 Launch Search indicator + F12 Next track + F4 Flip... - Page 6 ® Recharging the keyboard connects up to six compatible Typically, you can expect about Logitech mice and keyboards 10 days of battery life before you to the same receiver, using only will need to recharge the keyboard one USB port for multiple devices...
-
Page 7: Troubleshooting
5. Try reconnecting the keyboard to Off and then On The keyboard’s and Unifying receiver using battery status indicator LEDs the Logitech Unifying software should light up (see the Unifying section) 2. Confirm that the keyboard 6. Restart the computer... - Page 8 BATTERY REMOVAL INFORMATION 1. Remove 1 screw and battery door 2. Remove bottom panel 3. Remove 17 screws 4. Remove top case 5. Remove 6 screws 6. Remove keyframe, light guide panel and metal plate 7. Remove tape, then disconnect the battery cables from the main circuit board, remove battery from the bottom case...
-
Page 9: Contenu Du Coffret
CONTENU DU COFFRET Important Safety, Compliance and Warranty Information Informations importantes concernant la sécurité, la mise en conformité et la garantie Français... - Page 10 CONFIGURATION Installation du logiciel logitech com/options Français...
- Page 11 FONCTIONNALITÉS DU CLAVIER 1. Zone d'applications 3. Zone de navigation 5. Touche multimédia + F1 Lance le navigateur 6. Capteur de luminosité Internet + F9 Lance un dispositif automatique + F2 Lance l'application multimédia 7. Témoin de charge de courrier + F10 Piste précédente électronique des piles...
- Page 12 Unifying ® Recharge du clavier permet de connecter jusqu'à Généralement, vous pouvez compter six claviers et souris Logitech sur environ 10 jours d'autonomie compatibles au même récepteur, avant de devoir recharger les piles le tout avec un seul port USB...
-
Page 13: Dépannage
5. Reconnectez le clavier Off du clavier en position Off, au récepteur Unifying à l'aide puis en position On Le témoin du logiciel Logitech Unifying lumineux de charge des piles (voir la section Unifying) du clavier doit s'allumer 6. Redémarrez l'ordinateur 2. - Page 14 INSTRUCTIONS DE RETRAIT DE LA BATTERIE 1. Retirez une vis et le capot du compartiment de la batterie 2. Retirez la partie inférieure du boîtier 3. Retirez les 17 vis 4. Retirez la partie supérieure du boîtier 5. Retirez les 6 vis 6.
-
Page 15: Contenido De La Caja
CONTENIDO DE LA CAJA Important Safety, Compliance and Warranty Information Informations importantes concernant la sécurité, la mise en conformité et la garantie Español... -
Page 16: Instalación
INSTALACIÓN Instalación de software logitech com/options Español... - Page 17 CARACTERÍSTICAS DEL TECLADO 1. Sección de 3. Sección 5. Tecla aplicaciones de navegación 6. Sensor de luz multimedia + F1 Abrir navegador de automático Internet + F9 Abrir multimedia 7. Indicador de estado + F2 Abrir aplicación de + F10 Pista anterior correo electrónico de batería + F11 Reproducir/Pausa...
- Page 18 Recarga del teclado conecta hasta seis mouse y teclados Por lo general, la carga de la batería Logitech al mismo receptor, debería durar 10 días antes de con lo que se usa un solo puerto USB la siguiente recarga * Si el nivel de para varios dispositivos retroiluminación está...
-
Page 19: Resolución De Problemas
5. Vuelve a conectar el teclado encendido/apagado del teclado y el receptor Unifying mediante a la posición de apagado y luego el software Logitech Unifying a la de encendido Los LED (consulta la sección Unifying) indicadores de estado de la batería 6. -
Page 20: Extracción De La Batería
EXTRACCIÓN DE LA BATERÍA 1. Quita 1 tornillo y la tapa del compartimento 2. Quita el panel inferior 3. Quita 17 tornillos 4. Quita la tapa superior 5. Quita 6 tornillos 6. Extrae el armazón, el panel de guía luminosa y la placa metálica 8. - Page 21 ITENS INCLUÍDOS NA EMBALAGEM Important Safety, Compliance and Warranty Information Informations importantes concernant la sécurité, la mise en conformité et la garantie Português...
- Page 22 INSTALAÇÃO Instalação do software logitech com/options Português...
- Page 23 RECURSOS DO TECLADO 1. Zona de aplicativos 3. Zona de navegação 5. Tecla de multimídia + F1 Iniciar browser 6. Sensor de iluminação da Internet + F9 Iniciar mídia automático + F2 Iniciar aplicação + F10 Faixa anterior (Automatic light de e-mail + F11 Reproduzir/Pausar sensor - ALS)
- Page 24 Geralmente, pode-se esperar cerca seis mouses e teclados compatíveis de 10 dias de duração de bateria até da Logitech, usando somente uma ser necessário recarregar a bateria porta USB para vários dispositivos do teclado * Se a luz de fundo estiver Para saber mais, visite: definida para 100%, você...
-
Page 25: Solução De Problemas
5. Experimente reconectar o teclado (Ligar/Desligar) do teclado para e o receptor Unifying utilizando a posição Off e, em seguida, o software Logitech Unifying para a posição On O LED (Consulte a seção Unifying) do indicador do status da bateria 6. - Page 26 INFORMAÇÕES SOBRE A REMOÇÃO DA BATERIA 1. Retire 1 parafuso e a porta do compartimento da bateria 2. Retire o painel inferior 3. Retire os 17 parafusos 4. Retire a cobertura superior 5. Retire os 6 parafusos 6. Retire a estrutura, o painel luminoso e a placa metálica 8.
- Page 27 © 2020 Logitech, Logi and the Logitech Logo are trademarks or registered trademarks of Logitech Europe S A and/or its affiliates in the U S and other countries Logitech assumes no responsibility for any errors that may appear in this manual Information contained herein is subject to change without notice ©...
Need help?
Do you have a question about the K800 and is the answer not in the manual?
Questions and answers