Table of Contents
Advertisement
Quick Links
CONTENTS
WELCOME & INTRODUCTION ............. 1-1
End Of Life Vehicle Directive .................. 1-1
Elddis Technical Approvals ...................... 1-2
GENERAL SAFETY ............................... 2-1
Motorhome. ............................................. 2-1
Areas In Motorhomes .............................. 2-1
Ventilation ............................................... 2-2
High-Level Ventilation ............................. 2-2
Low-Level Ventilation .............................. 2-2
Ventilation in Separate Bedrooms ........... 2-2
Gas Dispersal Holes ............................... 2-2
Fire Safety ............................................... 2-2
Fire Extinguishers ................................... 2-2
In Case Of Fire ........................................ 2-2
Fire Retardant Foams ............................. 2-2
Habitation Door ....................................... 2-2
PREPARING FOR THE ROAD ............... 3-1
Motorhome Weights Explained ............... 3-1
Mass in Running Order ........................... 3-1
Laden Mass ............................................ 3-1
User Payload .......................................... 3-1
Loading ................................................... 3-1
Before Moving Off ................................... 3-1
Pulling Off ................................................ 3-2
Bicycle Racks .......................................... 3-2
Tow Bars ................................................. 3-2
MOTORWAY HANDLING ....................... 4-1
Best Practice ........................................... 4-1
Speed Limits ........................................... 4-1
Towing Your Motorhome ......................... 4-1
ARRIVING ON SITE ............................... 5-1
Check Site Regulations ........................... 5-1
Selecting A Pitch ..................................... 5-1
Lateral Levelling (Side To Side) .............. 5-1
Leveller Jack ........................................... 5-1
Ramp ...................................................... 5-1
GETTING STARTED .............................. 6-1
Electricity ................................................. 6-1
Power Supply Charger ............................ 6-1
12v Systems: .......................................... 6-1
Generator/Charger .................................. 6-1
Electricity Mains Supply .......................... 6-1
Arrival at Site ........................................... 6-1
When Leaving Site .................................. 6-2
Overseas Electrical Connection .............. 6-2
Gas Supply ............................................. 6-3
Connection .............................................. 6-3
Changing a Gas Cylinder ........................ 6-3
Gas Regulator ......................................... 6-3
High Pressure Gas Hoses ...................... 6-4
Water System .......................................... 6-4
Filling your Fresh Water Tank ................. 6-4
Waste Water Tank ................................... 6-4
Draining Down Your Water System ......... 6-4
GAS SAFETY ADVICE ........................... 7-1
Facts about LPG ..................................... 7-1
Exhaust ................................................... 7-1
LPG Gas System .................................... 7-1
ELECTRICAL SYSTEM .......................... 8-1
Battery Installation .................................. 8-1
Battery Maintenance ............................... 8-1
Generators / Charger .............................. 8-1
230v Power Supply ................................. 8-1
Mains Unit ............................................... 8-1
Resetting the RCD .................................. 8-2
Automatic Charging System ................... 8-2
Schaudt WA 121525 Booster Unit ........... 8-2
General ................................................... 8-2
Function .................................................. 8-2
Location .................................................. 8-3
Internal Lights ......................................... 8-3
EQUIPMENT ........................................... 9-1
Control Panel .......................................... 9-3
Vegas Button Control Panel .................... 9-3
Gas Level ................................................ 9-4
Cooking Equipment ................................. 9-5
Gas Hob .................................................. 9-5
Gas Grill .................................................. 9-6
Gas Oven ................................................ 9-6
Electrical Operation ................................. 9-8
Gas Operation (Liquid Gas) .................... 9-8
Temperature ............................................ 9-8
Mains Power (230V) ............................... 9-9
Gas operation (Liquid Gas) ..................... 9-9
Door Locking ......................................... 9-10
Whale Duo Control - Heat Air ................ 9-15
Instructions for Use ............................... 9-15
Electric Power Management ................. 9-17
CONTENTS-1
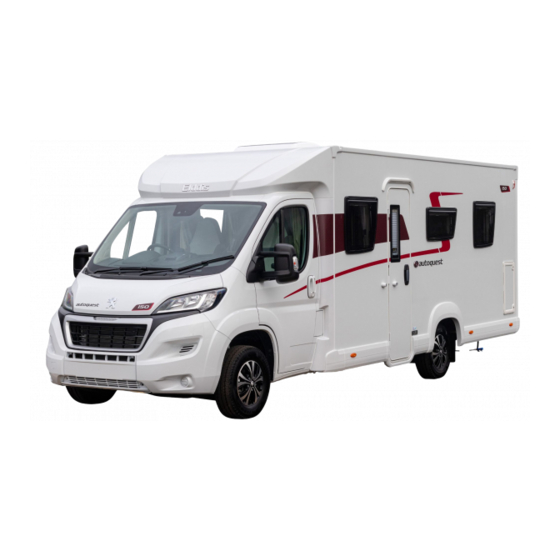
MY2021 Elddis Accordo Motorhome
Advertisement
Table of Contents
Troubleshooting

Related Manuals for elddis Accordo 2021


Summary of Contents for elddis Accordo 2021
-
Page 1: Table Of Contents
WELCOME & INTRODUCTION ..... 1-1 Overseas Electrical Connection ....6-2 End Of Life Vehicle Directive ....1-1 Gas Supply ..........6-3 Elddis Technical Approvals ...... 1-2 Connection ..........6-3 Changing a Gas Cylinder ......6-3 GENERAL SAFETY ....... 2-1 Gas Regulator ......... 6-3 Please read before using your New High Pressure Gas Hoses ...... - Page 2 CONTENTS Troubleshooting - Whale Duo Control ... 9-17 SECURITY ..........10-1 Maintenance / Repairs ......9-18 Tracker (Option) ........10-1 Whale Duo Control Panel - Expanse ..9-20 Motorhome Theft ........10-1 Operating Instructions - Drain Valve ..9-22 VIN CHIP ..........10-1 Winterising ..........
-
Page 3: Welcome & Introduction
Your feedback is incredibly important to us habitation. Elddis accepts no liability if and helps shape the future of our leisure the motorhome is used for any purpose vehicles. We would be delighted if you would other than recreational/holiday use. -
Page 4: Elddis Technical Approvals
All Elddis Motorhomes have been European Commission Whole Vehicle Type approved. In order to ensure your new motorhome is safe to use Elddis are members of and have been inspected by the following bodies. NCC who operate a certification scheme to ensure compliance with the European safety standards for motorhomes. -
Page 5: General Safety
Then • Such that the weight distribution of the contact your nearest Elddis Retailer to vehicle means non-compliance with the arrange for them to check the gas vehicle axle loads. -
Page 6: Ventilation
Fire Retardant Foams Low-Level Ventilation All motorhomes are equipped with polyurethane (PU) foam which are All Elddis Motorhomes have fixed low level combustion modified foam cushions, foam ventilation provided. These ventilators are mattresses and fire retardent fabric. All covered with plastic covers designed to... -
Page 7: Preparing For The Road
PREPARING FOR THE ROAD Note: Light items are considered as clothing PREPARING FOR THE ROAD and bedding. It is not recommended to travel Before venturing out on to the road with your with tinned items in overhead lockers. motorhome, it is important that you prepare IMPORTANT: Do not exceed maximum correctly. -
Page 8: Pulling Off
Bicycle Racks before moving off. Your motorhome is fitted with bike rack rails. (xv) Your new Elddis motorhome has been The rails are compatible with the Fiamma designed to carry passengers in carry-bike pro M. designated passenger seats only. The... -
Page 9: Motorway Handling
MOTORWAY HANDLING MOTORWAY HANDLING Best Practice To gain the most enjoyment and ensure a long life for your motorhome, the following should be observed: • Do not bump kerbs with wheels. • When overtaking ensure sufficient clearance is given to other vehicles. •... - Page 10 MOTORWAY HANDLING...
-
Page 11: Arriving On Site
ARRIVING ON SITE RAMP ARRIVING ON SITE CHECK SITE REGULATIONS On arrival at a campsite, you should always check the site regulations. This will help avoid any unnecessary conflict with site management and other site users. SELECTING A PITCH Carefully select where you wish to place your motorhome. - Page 12 ARRIVING ON SITE...
-
Page 13: Getting Started
GETTING STARTED (ii) Your motorhome is properly earthed. GETTING STARTED Never accept a supply from a socket You have arrived at your destination and now outlet or plug having only two pins, or want to start to enjoy your new motorhome. from a lighting outlet. -
Page 14: Disconnecting Mains Supply When Leaving Site
GETTING STARTED WIRING OF CONNECTING CABLE AND MOTORHOME MAINS INLET WARNING: It is essential that connections are made exactly as shown. If terminal markings are not in accordance with the above diagram they must be ignored. (x) Finally in order to get your 12V system OVERSEAS ELECTRICAL operational, ensure the master 12V CONNECTION... -
Page 15: Gas Supply
GETTING STARTED GAS SUPPLY Changing a Gas Cylinder Your motorhome is designed to operate using Before commencing to change a gas cylinder either propane or butane liquefied petroleum ensure that the valve on the cylinder is turned gas at 30M/bar. Gas can be obtained from fully off. -
Page 16: High Pressure Gas Hoses
Elddis Retailer. These hoses are connected Please take care not to over fill your tank it is using screw thread fittings, which will make a... -
Page 17: Gas Safety Advice
GAS SAFETY ADVICE LPG GAS SYSTEM GAS SAFETY ADVICE Elddis does not recommend the use of any In the event of a suspected gas leak the gas external cylinders. All cylinders in use should must be turned off using the isolation valve be within the gas locker provided. - Page 18 GAS SAFETY ADVICE...
-
Page 19: Electrical System
ELECTRICAL SYSTEM figure will cause permanent damage. ELECTRICAL SYSTEM Overheating and gassing will occur when re- 12V POWER SUPPLY connected to the mains supply. Battery Installation 12 Volt Battery State of Charge Your motorhome will be fitted with a charging and power distribution unit. -
Page 20: Resetting The Rcd
ELECTRICAL SYSTEM place of the conventional fuse but are more AUTOMATIC CHARGING SYSTEM convenient. In the event of a fault the MCB The battery charger will operate automatically ‘trips’ i.e. automatically moves to the OFF when the motorhome is connected to the position. -
Page 21: Location
ELECTRICAL SYSTEM Location MAXIMUM BULB RATINGS FOR The location of the booster will vary INTERNAL LIGHTS depending on each vehicle layout, but will Type of Light Maximum Bulb Rating always be located within 1m of the vehicle’s Downlighters ........1.2 watts power distribution unit. - Page 22 ELECTRICAL SYSTEM...
-
Page 23: How To Use Your Motorhomes Equipment
HOW TO USE YOUR MOTORHOME’S EQUIPMENT HOW TO USE YOUR MOTORHOMES EQUIPMENT Within this section of your motorhomes handbook we will give you brief details on how to operate all of the motorhomes equipment from the gas cooking equipment to the window blinds. For further details on the major equipment within your motorhome please read the individual appliance instructions contained with your user... -
Page 24: Main Entrance Door Handle Operation
HOW TO USE YOUR MOTORHOME’S EQUIPMENT MAIN ENTRANCE DOOR HANDLE OPERATION Your new Accordo Motorhome will be fitted with the following type of door handle and it is operated as described below. Figure 1 shows the internal lever in the unlocked position. -
Page 25: Control Panel
HOW TO USE YOUR MOTORHOME’S EQUIPMENT CONTROL PANEL Your new Elddis Motorhome is fitted with the control panel shown below. Vegas Button Control Panel Master Button Pump Button Awning Button Lights Button Master Button Display When the Master Button is pressed, the... -
Page 26: Vegas Voltmeter Without Water Or Gas Level
HOW TO USE YOUR MOTORHOME’S EQUIPMENT Water Level Calibration 3. To cancel calibration mode, press and hold Leisure Battery Voltage Button for Before the Water Level Button is used for the two seconds. first time, you will need to calibrate the Control Panel to your water tank. -
Page 27: Cooking Equipment
HOW TO USE YOUR MOTORHOME’S EQUIPMENT COOKING EQUIPMENT Gas Hob WARNINGS (i) Turn the individual control knob for the burner you wish to light. (i) All pans should be mounted centrally (ii) The depressing of the control knob over the burners, even when cooling, overrides the flame failure device fitted to to protect adjacent walls. -
Page 28: Gas Grill
HOW TO USE YOUR MOTORHOME’S EQUIPMENT Gas Grill Gas Oven (i) Turn the grill control knob to the high (i) Turn the gas oven control knob to flame position and with the knob maximum then depress the knob then depressed light the burner using a gas light the burner using a gas safety safety lighter. - Page 29 HOW TO USE YOUR MOTORHOME’S EQUIPMENT REFRIGERATOR Your new Elddis Motorhome is fitted with a Dometic refrigerator. Details of how to operate your fridge are shown below: Operating controls. Door locking button. Freezer compartment (removable) Insertable grid shelf (available as option, to be used when freezer compartment is removed).
-
Page 30: Electrical Operation
HOW TO USE YOUR MOTORHOME’S EQUIPMENT Work on gas and electrical equipment Gas operation (Liquid gas) shall be carried out by qualified personnel only. It is recommended that this is carried out by an authorised customer services department. We recommend maintenance following an extended shutdown of the vehicle. -
Page 31: Mains Power (230V)
HOW TO USE YOUR MOTORHOME’S EQUIPMENT The scale starts with MIN position (small bar Prior to starting the refrigerator in gas = highest temperature) and climbs up to MAX mode: position (large bar = lowest temperature). • Open the gas cylinder valve. Note: The temperature levels do not relate to •... -
Page 32: Door Locking
HOW TO USE YOUR MOTORHOME’S EQUIPMENT Door locking Note: If the vehicle is stationary for a long period, the locking hook may be clamped by Open the door by pressing the locking button means of a lockbar. The door may now be and pull open. - Page 33 HOW TO USE YOUR MOTORHOME’S EQUIPMENT An additional shelf (3) may be installed, if 3mm thick, the refrigerator should be required. This may be obtained from defrosted. To do this: Dometic. • Switch off the refrigerator as described later. Storing food in the cooling compartment •...
- Page 34 HOW TO USE YOUR MOTORHOME’S EQUIPMENT Winter operation In winter, check that the ventilation grilles and the exhaust duct have not been blocked by snow, leaves etc. When the outside temperature falls below +10 C the winter covers should be fitted. This protects the unit from excessively cold air which could have adverse effects on the performance of the unit.
- Page 35 HOW TO USE YOUR MOTORHOME’S EQUIPMENT Troubleshooting Before contacting your dealer or authorised service centre, please check whether: • The instructions for correct operation of the refrigerator have been observed. • The refrigerator is standing level. • It is possible to operate the refrigerator with any available power source. Failure: The refrigerator does not cool sufficiently Possible cause Action you can take...
- Page 36 HOW TO USE YOUR MOTORHOME’S EQUIPMENT Troubleshooting (continued) Failure: The refrigerator does not cool in 230V operation Possible cause Action you can take • On-board fuse defective. • Fit new fuse. • Vehicle not connected to mains supply • Make a connection to a mains power supply. voltage.
-
Page 37: Whale Duo Control - Heat Air
HOW TO USE YOUR MOTORHOME’S EQUIPMENT Whale Duo Control - Heat Air Instructions for Use Icon Description Space heater on/off & power source selection button 0.75kW electric selected 1.50kW electric selected 3.00kW electric selected Gas selected Gas + electric selected External control from alternative source* Increase temperature button Decrease temperature button... - Page 38 HOW TO USE YOUR MOTORHOME’S EQUIPMENT 1. Select Temperature 2. Select Power Setting X 1-6 3. Gas Power On 9-16...
-
Page 39: Electric Power Management
HOW TO USE YOUR MOTORHOME’S EQUIPMENT Usable Electric Settings 0.75kW 230V a.c. 1.50kW 230V a.c. 3.00kW 230V a.c. Electric Power Management When selecting a high electric setting on the space or water heater, the control panel may automatically step down the other Whale space/water heater to a lower electric setting or turn off if at risk of exceeding 16A. -
Page 40: Maintenance / Repairs
HOW TO USE YOUR MOTORHOME’S EQUIPMENT Troubleshooting - Whale Duo Control (continued) Step 2 - Identify Lockout Step 3 - Recommended Action Inadequate supply voltage 10.5 - 15.9V d.c. Heater inoperable under 10.1V ≥10.5 / ≤15.9V d.c. <10.5 / >15.9V d.c. X Go to step 4 Flue blockage 1. - Page 41 HOW TO USE YOUR MOTORHOME’S EQUIPMENT • Failure to follow the installation and operating instructions • Use of the appliance for non-leisure purposes The heat exchanger must be replaced with a Whale original spare part every 10 years from date of registration.
-
Page 42: Whale Duo Control Panel - Expanse
HOW TO USE YOUR MOTORHOME’S EQUIPMENT Whale Duo Control Panel - Expanse Icon Description Water heater on/off & power source selection button Frost protection mode (approx 5°C) 0.75kW electric selected 1.50kW electric selected Gas selected Gas + 0.75kW electric selected Gas 1.50kW electric selected External control from alternative source* Increase temperature button... - Page 43 HOW TO USE YOUR MOTORHOME’S EQUIPMENT 1. Select Power Setting X 1-6 2. Gas Power On Electric Power Management When selecting a high electric setting on the space or water heater, the control panel may automatically step down the other whale space/water heater to a lower electric setting or turn off if at risk of exceeding 16A.
-
Page 44: Operating Instructions - Drain Valve
HOW TO USE YOUR MOTORHOME’S EQUIPMENT Operating Instructions - Drain Valve The Water Heater must be drained before travelling or if it is not being used for a period of more than 3 days, or if there is a danger of freezing (unless Frost Protection setting is active). Check the heater has fully drained if there is a risk of freezing. -
Page 45: Whale Duo Control Panel - Troubleshooting
HOW TO USE YOUR MOTORHOME’S EQUIPMENT Whale Duo Control Panel - Troubleshooting In the unlikely event of a failure, the red ‘!’ symbol on the Control Panel will light. To identify the lockout, press and hold the Water Heater Function Button. The temperature control bars will light to indicate the fault code e.g. -
Page 46: Winterising
HOW TO USE YOUR MOTORHOME’S EQUIPMENT Water Heater Fault Finding (continued) Number of Bars lit Fault Remedy Attempt to clear lockout as described below. Other/ If this fails, contact Whale Support on +44 Internal Fault (0)845 217 2933. Two faults have occurred at the same time General or at least five lockout clearing attempts Fault... -
Page 47: Smoke Alarm
HOW TO USE YOUR MOTORHOME’S EQUIPMENT SMOKE ALARM • The unit will give an audible alarm consisting of 2 cycles of 3 loud beeps, Operation then stop automatically. Normal Condition The red LED on the front should flash every 40 seconds to show that the alarm is active. Lower Power Pack Condition IMPORTANT: Your smoke alarm requires the power pack to have sufficient capacity of... - Page 48 HOW TO USE YOUR MOTORHOME’S EQUIPMENT ALARM SMART SILENCE • During the reduced sensitivity reset cycle, the red LED on your alarm will continue to DANGER: If your smoke alarm emits the full flash more rapidly than normal, alarm signal and you are not testing the unit, approximately once every second.
-
Page 49: Carbon Monoxide Alarm
HOW TO USE YOUR MOTORHOME’S EQUIPMENT MAINTENANCE CARBON MONOXIDE ALARM Your smoke alarm has been designed to be Carbon monoxide and how it can affect as maintenance-free as possible, however you and your family there are several things you must do to keep Carbon monoxide is a dangerous poisonous it working properly. - Page 50 HOW TO USE YOUR MOTORHOME’S EQUIPMENT 800ppm Dizziness, nausea and convulsions Do not: within 45 minutes. • IGNORE ANY WARNING FROM YOUR Unconsciousness within 2 hours. CO DETECTOR! Death within 2-3 hours. • Burn charcoal inside your home, Should you suspect CO may be affecting you caravan, tent or cabin.
- Page 51 HOW TO USE YOUR MOTORHOME’S EQUIPMENT Operating Features Cover the sounder vents with one hand. Press and hold the Test/Reset Your detector offers many features which set button down with your thumb/finger it apart from other CO detectors on the until the Power LED illuminates market today.
- Page 52 HOW TO USE YOUR MOTORHOME’S EQUIPMENT four loud beeps and the Power LED batteries and the product is still within to illuminate green for a short time. warranty then contact Technical Support for This is the end of the test. The Power advice.
-
Page 53: Rooflights
HOW TO USE YOUR MOTORHOME’S EQUIPMENT ROOFLIGHTS Closing The Blinds: Your motorhome is fitted with at least one Take hold of the end rod (without type of the following roof lights: rocker) in the recessed grip and engage in the opposite end rod (with The Heki 2 (Option) rocker). -
Page 54: Midi Heki Rooflight
HOW TO USE YOUR MOTORHOME’S EQUIPMENT Midi Heki Rooflight The Omnivent (12v) Rooflight (Option) Fig 1 (i) To open, push the large central button (Fig 2). Fig 2 The Omnivent is a double-glazed roof light constructed from a synthetic ultra-violet (ii) Whilst depressed, slide the bar to the screened material. -
Page 55: Taps
HOW TO USE YOUR MOTORHOME’S EQUIPMENT (ii) The Polyplastic window should remain in TAPS the open position once opened, however Kitchen Taps if it does not then tighten the friction Your new motorhome will be fitted with a control on the window stays to increase mixer tap. -
Page 56: Internal Doors
Inside the bathroom Small lever Your new Elddis Motorhome is fitted with positive locking locker doors at high level. Outside the bathroom These are operated by pressing down on the tab within the centre of the handle to release the internal catch. -
Page 57: Thetford C-260 Cassette Toilet Range
HOW TO USE YOUR MOTORHOME’S EQUIPMENT THETFORD C-260 CASSETTE TOILET last page of this manual. Screw the cap RANGE back onto the emptying spout and turn back to its original position. Introduction Note: The Emptying Spout Measuring Cap is The Thetford Cassette Toilet is a high quality supplied in the same packaging as this product. - Page 58 HOW TO USE YOUR MOTORHOME’S EQUIPMENT Standard Optional features Note: Optional features can be bought from Thetford dealerships. PARTS Control panel (with optional features) Removable Seat and Lid Swivelling Toilet Bowl Blade Handle Flush Button Waste Holding Tank Level Indicator Water Filling Door (only if toilet has own flush-water tank) Rotating Emptying Spout...
-
Page 59: Emptying
HOW TO USE YOUR MOTORHOME’S EQUIPMENT approximately 5 minutes. Run some capacity for approximately 2 more litres, water into the bowl by pressing the flush which is no more than two to three further button again briefly. uses. 12. The toilet may be used with the blade Make sure that the blade is closed. -
Page 60: Cleaning And Maintenance
HOW TO USE YOUR MOTORHOME’S EQUIPMENT 20. Waste Pump-Out System: When holes. After cleaning, replace the seat activating the control panel this feature and lid by positioning the round pins in automatically lights up. When the Waste front of the pin holes and push the lid and Holding Tank Level Indicator illuminates, seat downwards. -
Page 61: Cleaning And Maintenance For Optional Features
HOW TO USE YOUR MOTORHOME’S EQUIPMENT for any length of time, it is important to treat and maintenance. To allow the Waste the seals with Thetford High Grade Seal Holding Tank to dry, do not place the cap Lubricant after cleaning. back on the emptying spout of the tank. - Page 62 HOW TO USE YOUR MOTORHOME’S EQUIPMENT 9-40...
-
Page 63: Teleco Tv Aerial
HOW TO USE YOUR MOTORHOME’S EQUIPMENT TELECO TV AERIAL Instructions for the reception of horizontal or vertical polarity signals In some areas certain TV signals are transmitted with horizontal polarity while others are transmitted with vertical polarity. This antenna can be positioned both horizontally and vertically by simply turning the knob at the bottom of the mast. - Page 64 HOW TO USE YOUR MOTORHOME’S EQUIPMENT Connection to the amplifier Connect the lead exiting from the pole to the ANT input of the amplifier. Connect with the relevant lead, the TV connector of the amplifier with the television. Connect the amplifier to 12 Vdc source, making sure you do not invert the + and - terminals.
-
Page 65: How To Use Your Tv Aerial
HOW TO USE YOUR MOTORHOME’S EQUIPMENT HOW TO USE YOUR TV AERIAL TROUBLESHOOTING GUIDE Digital TV set-up guide Check aerial/radio fuse If there is no power, check the 5 amp fuse Connect aerial and power located within the PDU marked radio is in Fix the TV to a working order. - Page 66 HOW TO USE YOUR MOTORHOME’S EQUIPMENT Note: Sometimes transmitters are being repaired or upgraded Go to: http://www.digitaluk.co.uk/help_and_advice/engineering_works Check if signal is OK that day / week. Check there are no obstructions Is the vehicle outside in an open space? Check that the vehicle has no obstructions: House lean to/canopy Trees (also blowing in the wind) House or other buildings...
-
Page 67: How To Make Up Your Beds
HOW TO USE YOUR MOTORHOME’S EQUIPMENT HOW TO MAKE UP YOUR BEDS The front double bed in the 105 is made up by lifting the two side beds up and pulling them together to meet in the centre. Accordo Day and Night 105 9-45... - Page 68 HOW TO USE YOUR MOTORHOME’S EQUIPMENT HOW TO MAKE UP YOUR BEDS Accordo Day and Night 120 9-46...
- Page 69 HOW TO USE YOUR MOTORHOME’S EQUIPMENT HOW TO MAKE UP YOUR BEDS Accordo Day and Night 135 9-47...
-
Page 70: Whale Easi-Slide Socket
HOW TO USE YOUR MOTORHOME’S EQUIPMENT Whale Easi-Slide Socket Additional Safety Information for Main In, Mains Out and Multimedia 3 in 1 Sockets How to open the socket lid (Where Applicable) All work must be carried out by a competent person as defined by BS7671 Part 2/IEC 60364. - Page 71 HOW TO USE YOUR MOTORHOME’S EQUIPMENT WARNING: Care must be taken when using the external BBQ outlet socket. NEVER barbeque next to an awning or tent. WARNING: Only for use as an outlet point for gas, never connect a gas bottle directly to the outlet.
- Page 72 HOW TO USE YOUR MOTORHOME’S EQUIPMENT 9-50...
-
Page 73: Security
Elddis. That is why we have provided a driveway. Secure all windows and doors combination of standard features and when your motorhome is unoccupied, even if optional extras designed to deter and prevent only for a short length of time. - Page 74 SECURITY 10-2...
-
Page 75: Care Of Your Motorhome
CARE OF YOUR MOTORHOME essential that the following cleaning CARE OF YOUR MOTORHOME instructions are strictly adhered to: Road grit, This section of the guide is devoted to the dust, sand, flies, bird droppings etc., should care, cleaning and general preservation of be washed off using plenty of cold water do your motorhome in order to retain its not use a sponge to clean off heavy dirt... -
Page 76: Carpets, Upholstery And Curtains
(iv) Suitable sterilising chemicals are nose, throat, and eye or skin infections. It is available from your Elddis Retailer. It is therefore important that you carry out the not, however, recommended to use following procedure prior to using the bleach or sodium metabisulphide. -
Page 77: Thetford Toilet
CARE OF YOUR MOTORHOME Thetford Toilet WARNINGS Cold Weather Use - To prevent freezing during cold weather use, add antifreeze to the toilet system fresh water tank. Use a non-toxic (propylene glycol) type of antifreeze. Refer to chart on container to obtain level of protection. -
Page 78: Pre-Season Water System Preparation
CARE OF YOUR MOTORHOME PRE-SEASON WATER SYSTEM PREPARATION Over the winter months bacteria can grow in • Remain in your van after the pump has your water system. Particles of minerals and stopped and inspect all the taps and dirt gather in joins and any undrained areas. shower heads for leaks. -
Page 79: Getting Ready For The Winter
CARE OF YOUR MOTORHOME GETTING READY FOR THE WINTER Before following this guide, ideally carry out this procedure prior to moving the motorhome to its winter storage location. (The movement of the vehicle will encourage residual water to drain from the system). - Page 80 CARE OF YOUR MOTORHOME 11-6...
-
Page 81: Storage
Motorhome Covers Covers may be used to protect your new Elddis motorhome provided that the cover used is of a breathable type. Lower the TV antenna and ensure the cover is well tied down to avoid the cover being punctured. - Page 82 STORAGE 12-2...
-
Page 83: Motorhome Habitation Warranty Cover
Introduction product specification excluding normal wear and tear. At Elddis we are confident that our new motorhomes are engineered using the latest Year 2 and 3 warranty – Covers all original manufacturing techniques and advanced... - Page 84 Conditions attached to the warranty Should you choose to have your service cover carried out by a non Elddis Approved agent, • You must retain the original sales invoice an additional charge may be payable by the for the motorhome.
-
Page 85: Non Warranty Repairs
Elddis reserve the right to inspect the (i) Model and make of motorhome motorhome at any time. (ii) VIN number... - Page 86 WARRANTY 13-4...
-
Page 87: Motorhome Construction - Main Components
Windows are all of a double glazed acrylic construction and the door frames are extruded aluminium. INSULATION Elddis motorhomes are built to comply with grade 3 thermal insulation in accordance with the European Standard BSEN 1645 part 1. This states that an average temperature difference of at least 35ºC between the inside... - Page 88 MOTORHOME CONSTRUCTION 14-2...
-
Page 89: Electrical Drawings
ELECTRICAL DRAWINGS ELECTRICAL DRAWINGS ACCORDO 15-1... - Page 90 ELECTRICAL DRAWINGS 15-2...
-
Page 91: General Questions
For details request form can also be completed should of your nearest Elddis Retailer please refer to you wish to receive a printed copy of our our Find A Retailer section on our website, or latest brochures. - Page 92 Who Can Help Me? A. We would always recommend that you contact your supplying Retailer. Your local Elddis Retailer or Elddis Approved Service Centre may be able to assist. An inspection can then take place and the necessary course of action agreed.
-
Page 93: Glossary
GLOSSARY Control Panel GLOSSARY Used as the description for the panel of ABS - plastic electrical switches and gauges governing Acrylonitrile Butadiene Styrene Plastic the 12V and mains electricity systems. material used for most of the large plastic Dinette components within your motorhome. This is a popular style of seating Actual Laden Weight arrangement where two seats or settees face... - Page 94 Jack Optional Equipment Payload This is a device for raising the vehicle so that a wheel can be changed. The payload provided by Elddis for any factory fitted options that may be available. Kerb Weight Owners’ Club This is the empty weight of a motor vehicle as defined by the manufacturer.
- Page 95 GLOSSARY Pitch Torque Wrench A designated area of a motorhome site A form of spanner used to set nuts and bolts allocated for the use of one outfit. Most sites to a specified degree of tightness. It is will be arranged with defined pitches. recommended for adjustment of wheel fixings on motorhomes.
- Page 96 GLOSSARY 17-4...
- Page 97 Elddis will not pay any unapproved Service Centre for the undertaking of any warranty work. Minimum service requirements The service must be undertaken by suitably qualified personnel.
- Page 98 SERVICE DOCUMENTS ELECTRICAL SYSTEMS (continued) Item Condition RCD unit - check operation of RCD test button and operations of MCBs 230V appliances - check operation 3 pin plug - check condition GAS SYSTEMS Item Condition Regulator and gas hose - check age performance and security Perform a gas pressure check LPG Tank (if fitted) - check security Flame failure devices - check operation...
- Page 99 SERVICE DOCUMENTS VENTILATION Item Condition Rooflights - check all are free from obstructions, cracks and have a free air flow Floor vents - remove protective cover and check they are clear from obstruction then refit covers FIRE & SAFETY Item Condition Smoke and carbon dioxide detectors - check for operation via the test buttons fitted, check battery condition.
-
Page 100: Annual Habitation Service Records
SERVICE DOCUMENTS ANNUAL HABITATION SERVICE RECORDS ANNUAL SERVICE RECORD MOTORHOME MODEL ......................VEHICLE IDENTIFICATION NUMBER ..........YEAR ..... 1st SERVICE 2nd SERVICE DATE: DATE: RETAILERS STAMP: RETAILERS STAMP: I/We certify that an annual service has I/We certify that an annual service has been carried out in accordance with the been carried out in accordance with the manufacturers’... - Page 101 SERVICE DOCUMENTS 7th SERVICE 8th SERVICE DATE: DATE: RETAILERS STAMP: RETAILERS STAMP: I/We certify that an annual service has I/We certify that an annual service has been carried out in accordance with the been carried out in accordance with the manufacturers’...
- Page 102 SERVICE DOCUMENTS 15th SERVICE 16th SERVICE DATE: DATE: RETAILERS STAMP: RETAILERS STAMP: I/We certify that an annual service has I/We certify that an annual service has been carried out in accordance with the been carried out in accordance with the manufacturers’...
-
Page 103: Notification Of Change Of Ownership
* In order for you warranty to remain valid, your motorhome must have been serviced annually by an Approved Retailer / Service Centre, NCC Approved Workshop or NCC equivalent standard as set out in this handbook. If you do not want to receive information about products and services from Elddis, please tick. 19-1... - Page 104 CHANGE OF OWNERSHIP 19-2...
-
Page 105: Notification Of Change To Name And Address
Daytime telephone number: ........Date of purchase: ........Email: ............................. Details of your Motorhome: Range: ..............Model: ............. Vehicle identification number (17 digits): ..................If you do not want to receive information about products and services from Elddis, please tick. 20-1... - Page 106 CHANGE OF ADDRESS 20-2...
-
Page 107: Index
INDEX INDEX Alarm system ......10-1 Gas ..........6-3 Automatic Charging System..8-2 Connection ......6-3 Hoses ........6-4 Regulator ........ 6-3 Gas Regulator ......6-4 Battery Installation ...... 8-1 Gas Safety Advice ...... 7-1 Battery Maintenance ..8-1, 12-1 Generators / Charger .... - Page 108 INDEX RCD ........... 8-2 Refrigerator ........ 9-7 Safety, general ......2-1 Security ........10-1 Service records ......18-4 Site Regulations ......5-1 Storage Long Term & Winter ....12-1 Taps .......... 9-33 Toilet Thetford C260 ....... 9-35 Ventilation ........2-2 Water System ......
Need help?
Do you have a question about the Accordo 2021 and is the answer not in the manual?
Questions and answers