Code 3 C3100 Installation Manual
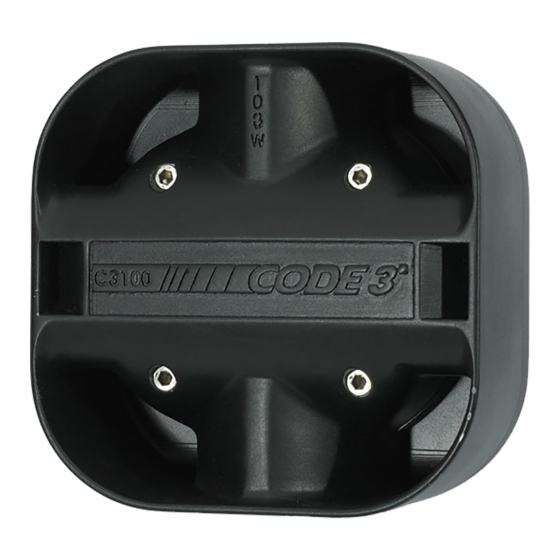
Passenger side speaker mounting bracket for impala ppv
Hide thumbs
Also See for C3100:
- Installation and operation instructions manual (8 pages) ,
- Installation & operation manual (4 pages) ,
- Installation and operation instructions (4 pages)
Advertisement
Quick Links
INSTALLATION
MANUAL
C3100 PASSENGER SIDE SPEAKER
MOUNTING BRACKET
2005 - PRESENT IMPALA PPV
For future reference record your product's serial no. here __________________________________________
CONTENTS:
Installation & Mounting.........................................................2-4
Parts List...............................................................................5
Notes:...................................................................................6-7
Warranty................................................................................8
Utilizing non-factory supplied screws and/or mounting brackets and/or the improper number of
screws may result in loss of warranty coverage on the equipment.
Read all instructions and warnings before installing and using.
This manual must be delivered to the end user of this equipment.
INSTALLER:
Advertisement

Related Manuals for Code 3 C3100


Summary of Contents for Code 3 C3100
-
Page 1: Table Of Contents
INSTALLATION MANUAL C3100 PASSENGER SIDE SPEAKER MOUNTING BRACKET 2005 - PRESENT IMPALA PPV CONTENTS: Installation & Mounting............2-4 Parts List................5 Notes:...................6-7 Warranty................8 Utilizing non-factory supplied screws and/or mounting brackets and/or the improper number of WARNING! screws may result in loss of warranty coverage on the equipment. -
Page 2: Installation & Mounting
Remove the screw for later steps in the process. Step 5. Attach the C3100 Speaker to the mounting bracket using the (4) supplied #12 Phillips Pan Head Screws with (4) 1/4" internal tooth star washers (See Figure 8). NOTE: The speaker must be oriented with the speaker wires exit- ing the bottom of the speaker and the CAUTION label at the top (See Figure -9 on page 3). - Page 3 Installation Instructions - Cont: Step 6. Drop the speaker assembly into the headlight cavity (See Figure -10) then rotate the speaker bracket mounting flange forward & down into the headlight cavity while lowering the speaker deeper into the space below the headlight (See Figure -11).
- Page 4 Installation Instructions - Cont: Step 10. Reconnect the wiring connector to the bottom horn. Position the New Horn Assembly with both horn flares facing down as shown in Figure -18. Thread the supplied 1/4" X 5/8" Long Slot/Hex head sheet metal screw with a sup- plied 1/4"...
-
Page 5: Parts List
PARTS LIST: Item No Part Description Qty: Part Number C3100 Speaker Mounting Bracket-Passenger Side 2005+Impala T17154 C3100 Speaker Assembly S71684 Horn Relocation/Mounting Bracket T17155 1/4" X 5/8" Long Slot Hex Washer Head SMS STL Zinc T16222 1/4" Internal Tooth Star Washer T11253 #12 X 1"... -
Page 6: Notes
NOTES:... - Page 7 NOTES:...
-
Page 8: Warranty
*Code 3, Inc. reserves the right to repair or replace product at its discretion and assumes no responsibility or liability for expenses incurred for the removal and/or reinstallation of products requiring service and/or repair. - Page 9 This equipment is intended for use by authorized personnel only. It is the user’s responsibility to understand and obey all laws regarding emergency warning devices. The user should check all applicable city, state and federal laws and regulations. Code 3, Inc., assumes no liability for any loss resulting from the use of this warning device.
- Page 10 Installation and Mounting: Step 1. Attach speaker to bracket using supplied hardware WARNING! Sirens produce loud sounds that may damage hearing. NOTE: The speaker MUST be oriented with the speaker wires exiting the bottom of the speaker. The exit holes for the wires •...
- Page 11 Notes: Page 3 of 4...
- Page 12 *Code 3®, Inc. reserves the right to repair or replace at its discretion. Code 3®, Inc. assumes no responsibility or liability for expenses incurred for the removal and /or reinstallation of products requiring service and/or repair.;...
-
Page 13: Warning
Installation & Owners Manual C3100 Speaker Bracket Kit 2006 Chevy Impala WARNING Sirens produce loud sounds that may damage hearing • Wear hearing protection when testing • Use siren only for emergency response • Roll up windows when siren is operating •... - Page 14 The user should check all applicable city, state and federal laws and regulations. Code 3, Inc., assumes no liability for any loss resulting from the use of this warning device. Proper installation is vital to the performance of the siren and the safe operation of the emergency vehicle.
- Page 15 Installation: Mount the speaker to the bracket using the mounting hardware supplied (Fig. 1). WARNING! The speaker wires must exit through the bottom of the speaker. The speaker wire hole is also the drainage hole. Improper mounting will damage the driver and void the warranty.
- Page 16 *Code 3, Inc. reserves the right to repair or replace at its discretion. Code 3, Inc. assumes no responsibility or liability for expenses incurred for the removal and /or reinstallation of products requiring service and/or repair.;...
Need help?
Do you have a question about the C3100 and is the answer not in the manual?
Questions and answers