Table of Contents
Advertisement
Quick Links
Advertisement
Table of Contents

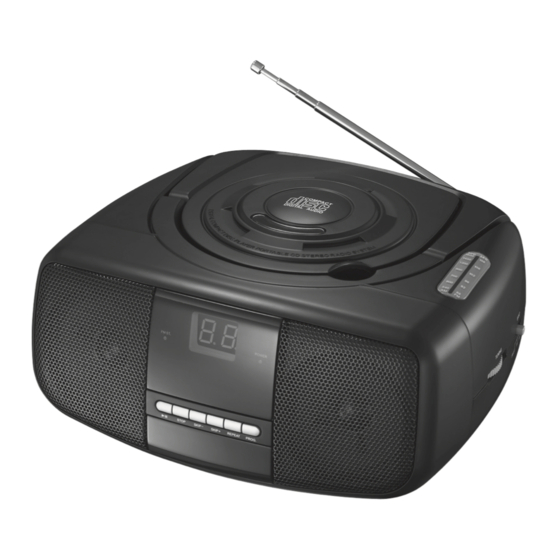
Summary of Contents for Currys Essentials CCDSTR10
- Page 1 P ORTABLE CD STE REO I N S TR UC T I O N MAN UAL C C DSTR 10...
-
Page 3: Table Of Contents
Content Unpacking ..........................4 Product Overview .........................5 Front View ...............................5 Top View ................................5 Power Source ........................6 Mains Power ..............................6 Battery Power ..............................6 Radio Operation ........................7 General Operation ............................7 FM / FM-Stereo Reception .........................7 For Better Reception ...........................7 CD Operation ........................8 PLAY/PAUSE ..............................8 SKIP + and SKIP –... -
Page 4: Unpacking
Congratulations on the purchase of your new Currys Essentials Portable CD Stereo. We recommend that you spend some time reading this instruction manual in order that you fully understand all the operational features it offers. You will also find some hints and tips to help you resolve any issues. -
Page 5: Product Overview
Product Overview Front View 5 6 7 8 9 10 STOP Button LED Display FM Stereo Indicator SKIP – Button SKIP + Button Power Indicator Speakers REPEAT Button PLAY/PAUSE 10. PROG Button Button Top View BAND Selector FM Aerial TUNING Control FUNCTION Selector VOLUME Control Dial Pointer... -
Page 6: Power Source
Power Source Insert 6 x “C” size batteries into the Bottom view battery compartment To the mains socket Mains Power Check that the voltage marked on the rating label matches your mains voltage. Connect the mains cable at the back of the Portable CD Stereo into a mains socket. Battery Power Insert 6 x “C”... -
Page 7: Radio Operation
Radio Operation General Operation • Set the FUNCTION selector to RADIO mode. • Select desired band by using the BAND selector. • Adjust radio frequency to your desired station by using the TUNING control. • Adjust the sound with the VOLUME control. FM / FM-Stereo Reception • Set the BAND selector to FM mode for MONO reception. -
Page 8: Cd Operation
CD Operation PLAY / PAUSE • Press to start playing CD. • Press again to stop playing CD temporarily. • Press again to resume playback. SKIP + and SKIP – • Press to go to the next track or back to the previous track. • Press and hold while playing until you find the place on the track you want. -
Page 9: Program
Program • Up to 20 tracks can be programmed for disc play in any order. • Be sure to press the STOP button before use. Press the PROG button, the display will show 01 and flash. Select desired track by using the SKIP + or SKIP – button. Press the PROG button again to confirm desired track into the program memory. -
Page 10: Maintenance
Maintenance Handling Discs • Do not touch the playback side of the disc. • Do not attach paper or tape to the disc. Playback side Cleaning Discs • Fingerprints and dust on the disc cause picture and sound deterioration. Wipe the disc from the centre outwards with a soft cloth. -
Page 11: Hints And Tips
Hints and Tips If a problem does occur, it may often be due to something very minor. The following table contains various tips. PROBLEM CAUSE / SOLUTION No power supply Check that the mains cable is correctly connected to the mains. -
Page 12: Specifications
Specifications Model CCDSTR10 General Power Supply 230V ~ 50Hz (mains operated) DC9V (6 x “C” size batteries) Power Consumption Output Power 2 x 1W Dimension Main unit - 236 (L) x 227 (W) x 118 (H) mm S/N Ratio FM: >40dB, CD: >45dB... -
Page 13: Safety Warnings
Safety Warnings • Retain the manual. If you pass the unit • Do not install or place this unit in a onto a third party make sure to include this bookcase, built-in cabinet or in another manual. confined space. Ensure the unit is well ventilated. - Page 14 Service • To reduce the risk of electric shock, do not remove screws. The unit does not contain any user-serviceable parts. Please leave all maintenance work to qualified personnel. Do not open any fixed covers as this may expose dangerous voltages. Maintenance • Ensure to unplug the unit from the mains socket before cleaning.
- Page 16 NOTE: If you require a replacement for any of the items listed below, please quote their corresponding part numbers: Replacement Part Part Number Mains Cable 171-062059-70 Instruction Manual 642-100201-10 Visit Partmaster.co.uk today for the easiest way to buy electrical spares and accessories. With over 1 million spares and accessories available we can deliver direct to your door the very next day.


Need help?
Do you have a question about the CCDSTR10 and is the answer not in the manual?
Questions and answers