
Related Manuals for Stoneridge digipostpro


Summary of Contents for Stoneridge digipostpro
- Page 1 ADMINISTRATIVE GUIDE CONTENT OVERVIEW Assembly and mounting • Administrative functions • Interaction with digivu and digifobpro • Data management and housekeeping •...
-
Page 3: Table Of Contents
Table of contents Hardware Setup digipostpro Controls Configuration 7-14 Basic Preferences Networking 10-12 Files & Analysis 12-13 Other Configuration Options Maintaining and Transferring Files 15-20 Driver Cards and Driver Card Analysis 15-16 digivu 17-19 digifobpro Archived Files Configuring Your digivu... -
Page 4: Hardware Setup
Hardware Setup Removing the Frame Remove the outer frame to access the mounting plate. Apply pressure with your thumbs on the face and pull the frame upwards with your fingers. Power and USB Connection USB connection for programming Power connection (use included 9V power supply) Page - 4... - Page 5 Inserting the module and fixing to the wall The digipostpro has a connection module pre-installed in the device. The digipostpro detects which module is inserted and displays the appropriate menu options. There are four screw points in the base.
-
Page 6: Digipostpro Controls
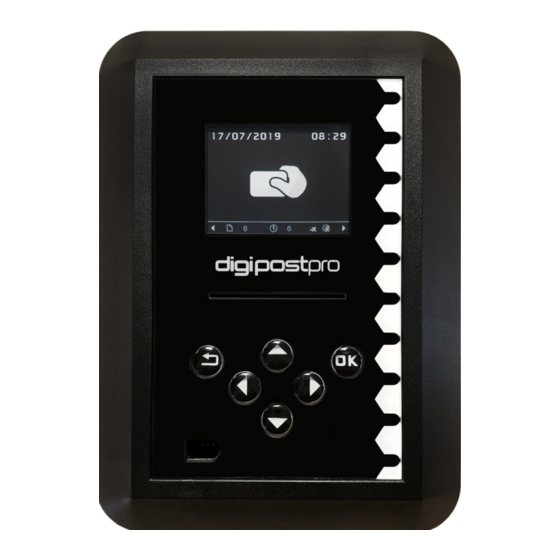
Controls digipostpro Controls Display Screen Card slot Six button control (Up, Down, Left, Digivu or Right, OK and digifobpro Return ) connection Screen icons Screen icons Description Description Modem Status Card files pending LAN Status Clocking logs Server Connection... -
Page 7: Configuration
Please contact the reseller of your device to get supplied with the required configuration code. In order to enter the code on a digipostpro, from the main screen press OK. This will bring up a menu prompting you to enter the activation code, scroll through the numbers by using the up and down arrows. -
Page 8: Basic Preferences
Press to save the settings selected. Please note that the digipostpro has an internal battery which will keep the clock accurate if power is removed from the device. Actual time is set from the server. - Page 9 Configuration Menu Sound Use left/right arrows to turn device sounds on or off. To save the setting, press the button. Highlight Colour Adjust the RGB settings using the right/left arrows) to choose the required highlight colour. To save the setting, press the ...
-
Page 10: Networking
This forwards any files received by the digipostpro to an account on digiCentral. The digipostpro must be registered on digiCentral to enable a connection with the device. Please contact your reseller for more information on how to set up an account on digiCentral. - Page 11 Configuration Menu digiConnect Specific to the LAN version of the digipostpro. You can forward your files locally via digiConnect. Select digiConnect and enter the port number (hostname is not required for this option). Standard Server Options Hostname: To set the hostname highlight the option and press the OK button.
-
Page 12: Files & Analysis
(Driver Name, Driver Card Number, date and time of VU download). Further analysis of those files on the digipostpro is not available through the configuration menu, only immediately after the card has been read (please see pages 15-16 for more information). - Page 13 Enable Analysis: Use this option to enable or disable analysis of driver cards. Working Time: When this option is on, the digipostpro will display working time infringements. POA as Break: Set POA (Period of Availability) as break as on or off depending on how this applies in your region.
-
Page 14: Other Configuration Options
Configuration Menu Clocking For information on how to use your digipostpro for clocking, please contact Tachosys. If you already have the clocking module for your digipostpro, please use your digipostpro Clocking user guide for information on how to utilise this function. This user guide will be available for download from www.tachosys.com. -
Page 15: Maintaining And Transferring Files
Transferring Driver Card Files To transfer files from a driver card make sure that the digipostpro is on the main screen (displaying the present card icon). Simply insert the driver card with the chip facing up. The file transfer will begin automatically and a progress bar will indicate the transfer status. - Page 16 Maintaining and Transferring Files Second level Driver Card Analysis icons Drive Rest All modes; Drive, Rest, Work, POA. Work Availability Time overlap Third Level Driver Card Analysis icons Weekly 2 Weekly Within 24 Hours. Break Putting analysis icons together (example) The three levels of icon used in the driver card analysis are put together to give an at a glance view of summarised data.
- Page 17 Your digivu may may be supplied with a USB adaptor. This enables the digivu to be directly connected to a PC so is not for use with the digipostpro. You can download digiConnect from Tachosys.com should you wish to configure your digivu using this method.
- Page 18 Connecting digivu to the Vehicle Tachograph Unit Insert a valid Company Card into Slot 1 or Slot 2 of the Vehicle Tachograph. Insert the digivu into the Stoneridge appropriate download socket of your specific Tachograph unit as indicated. The digivu is powered by the Tachograph.
-
Page 19: Digivu
If your digivu is running an old version of firmware, when it first connects to the digipostpro it will ask whether you want to update it. To update it, select the green tick and press OK. A bar will indicate the progress of the update. -
Page 20: Digifobpro
Archived Files Once files from a digifobpro or digivu have been transferred to a digipostpro, it will mark the transferred files on the digifobpro and digivu as archived. If the download device is plugged in again, it will not transfer archived files. Only new or unarchived files will be transferred. -
Page 21: Configuring Your Digivu
Configuring Your digivu Configuring your digivu via the digipostpro To configure a digivu via your digipostpro, the digivu menu option must be turned on in the configuration menu. Connect your digivu to the digipostpro ensuring that the digipostpro is powered. Once any upload has been completed, to enter the digivu configuration menu, press OK. - Page 22 Configuring Your digivu Delete All Use this option with caution as if you have not uploaded files to the main server they will be permanently lost. Under File System in the digivu configuration menu, you are given the option of deleting all files from the device. To do so, press the OK button.
- Page 23 Configuring Your digivu Driver Card By turning on the Driver Card option, this will enable the digivu to download driver card files from the tachograph unit. This saves the driver having to download his information separately on another occasion. Download Speed Scrolling left/right on this option reveals three choices;...
-
Page 24: Troubleshooting
Troubleshooting Information on digivu vehicle file sections (TREPS) Overview: includes data such as vehicle ID, Last Section 01 VU download and by which type of card. Activities: all tachograph recordable actions Section 02 performed in the use of the truck by a driver or other card holder. - Page 25 Troubleshooting Server Errors If you suspect an error concerning connection with a server, there is a helpful diagnostic tool to help identify whether this is the case. From the main screen press down, down, OK. This will return the last error message from the server for the current connection. Please be aware that this will only return the last error message from the server, so check the date on the error message to determine whether it has bearing on your issue.
- Page 26 Stoneridge Electronics Ltd. Charles Bowman Avenue, Claverhouse Industrial Park, Dundee DD4 9UB, Scotland Tel: +44 (0) 1382 866 400 Email: amsales@stoneridge.com www.stoneridge-electronics.com...
Need help?
Do you have a question about the digipostpro and is the answer not in the manual?
Questions and answers