Table of Contents
Advertisement
Advertisement
Table of Contents

Related Manuals for Compaq C120

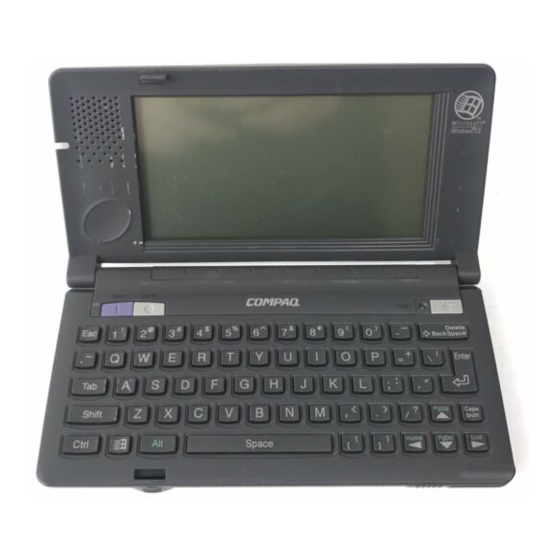
Summary of Contents for Compaq C120
- Page 2 Notice The information in this guide is subject to change without notice. COMPAQ COMPUTER CORPORATION SHALL NOT BE LIABLE FOR TECHNICAL OR EDITORIAL ERRORS OR OMISSIONS CONTAINED HEREIN; NOR FOR INCIDENTAL OR CONSEQUENTIAL DAMAGES RESULTING FROM THE FURNISHING, PERFORMANCE, OR USE OF THIS MATERIAL.
-
Page 3: Table Of Contents
Resetting the C 120/C 140 ................16 Normal Reset ..................16 Memory Reset ..................16 To reset the C 120/C 140 ..............16 Connecting the C120/CI40 to a Desktop Computer ….…………….…. 17 Replacing a PC Card ………………………………………………………. 18 Troubleshooting ………………………………………………………….. 20 Appendix A - Regulatory Notices... -
Page 4: Introduction
Introduction Congratulations on your selection of the C120/CI40. Before trying to use the C120/CI40, be sure to read the contents of this manual. Keep this manual in a safe place for future reference. Important! Memory contents can be corrupted or even lost due to mishaps caused by malfunction, repair procedures, or battery replacement. -
Page 5: Battery Life Note
C120/C140 immediately and contact your Compaq authorized dealer, reseller, or service provider, or call 1-800-345-1518. • Never drop the C120/C140, allow it to be hit by other objects or otherwise subject it to strong impact. • Never place heavy objects on top of the C120/C140. -
Page 6: Documentation
Documentation The C120/CI40 comes with the following documentation. Getting Started Manual (this manual) User's Guide How to Use the Documentation Read this manual first. It covers how to set up the C 20/C 140 and load batteries to power it. -
Page 7: Unpacking
Unpacking Check to make sure all of the following items are included with your C120/CI40 when you unpack it. • 120/Cl4O Unit Stylus The stylus is inserted into the C 20/C 140 unit. • • Dummy Card Auto-Sync Cable The dummy card is inserted in the C1 20/C 140 unit. -
Page 8: Desktop Computer System Configuration
• • Manuals A A -size Alkaline Batteries (Getting Started Manual, User's Guide) (two) • Options Flyer • Owner Registration Card • Warranty Card • Diskette Fulfillment Card Desktop Computer System Configuration You should check to make sure that the configuration of your desktop computer is as described below to support the installer and the software applications contained on the CD-ROM and the floppy diskette. -
Page 9: General Guide
General Guide... - Page 10 ...
-
Page 11: Setting Up
Use the following procedure to set up the C 120/C 140 before using it for the first time. Load batteries. Load the two batteries that come with the C120/CI40 into its main battery holder. After loading the main batteries, pull the insulating tape out from... -
Page 12: Replacing Batteries
Important • Never remove both the main batteries and the back-up battery from the C120/CI40 at the same time. If you do, data stored in memory can be corrupted or lost entirely. • Whenever the main batteries and the back-up battery both require replacement, be sure to replace the main batteries first, before replacing the back-up battery. - Page 13 4 Remove both of the old batteries from the main battery holder, and load two new ones. When loading new batteries, make sure that their positive (+) and negative (-) ends are facing correctly. 5 Insert the main battery holder into the C120/CI40 until the holder is fully seated.
- Page 14 6 Slide the release (both buttons) of the main battery holder towards "NORMAL OPERATION" to lock the main battery holder release. 7 If you are loading batteries into the C120/CI40 for the first time after purchasing it, pull the insulating tape out from under the back-up battery compartment cover.
-
Page 15: Replacing The Back-Up Battery
• Never remove both the main batteries and the back-up battery from the C120/CI40 at the same time. If you do, data stored in memory can be corrupted or lost entirely. A back-up battery comes installed in the C120/CI40 when you purchase it. -
Page 16: Optional Battery Pack - Nimh
Use only the types of batteries specified in this manual. Optional Battery Pack - NiMH Main power can also be supplied to the C120/C140 using the Battery Pack - NiMH that is available as an option. Charging of the optional Battery Pack - NiMH is performed using an... -
Page 17: Resetting The C120/C140
Memory Reset Performing the reset operation after memory data has been corrupted clears memory contents and settings, and causes the welcome wizard screen to appear. Set up the C120/C140 in accordance with the on-screen guidance. To reset the C120/C140 1 Press the power switch to turn on the C120/CI40. -
Page 18: Connecting The C120/Ci40 To A Desktop Computer
2 Use the Auto-Sync Cable to connect the C120/C140 to your desktop Computer. The Auto-Sync Cable has a 16-pin connector on one end for connection to the C120/C140, and a 9-pin connector on the other end for connection to your desktop computer... -
Page 19: Replacing A Pc Card
The C1 20/C 140 comes equipped with a card slot that supports PC Cards. § Be sure to keep the dummy card that comes with the C120/CI40 inserted in the card slot whenever you are not using a PC Card. - Page 20 Take care that the card is oriented correctly when you insert it into the card slot. The top of the card should be facing in the same direction as the top of the C120/C140. If the card is oriented incorrectly, it will not slide all the way into the card slot.
-
Page 21: Troubleshooting
Nothing happens when the touch screen is pressed. Possible Cause Recommended Action Page Touch screen is Contact your nearest Damaged. Compaq authorized dealer, reseller, or service provider, or call 1-800-345-1518. Electrostatic charge Reset the C 120/C 140. Page 16 is interfering with operation. -
Page 22: Appendix A - Regulatory Notices
Modifications The FCC requires the user to be notified that any changes or modifications made to this device that are not expressly approved by Compaq Computer Corporation may void the user's authority to operate the equipment. Cables... - Page 23 Do not attempt to recharge, disassemble, immerse in water, or dispose of it in fire. Replace the backup battery with the Compaq spare part for this computer.
-
Page 24: Appendix B - Hardware Specifications
Hardware Specifications Model: C120/C140 Display: 480 x 240 dots/0.24 dot pitch FSTN LCD 4 grayscale monochrome CPU: SH3 Memory RAM: (C120) 2MB (C140) 4 MB ROM: 4 MB Speaker: Sound Interfaces: RS-232C: 115.2k BPS Data communication jack PC Card slot...
Need help?
Do you have a question about the C120 and is the answer not in the manual?
Questions and answers