Table of Contents
Advertisement
Quick Links
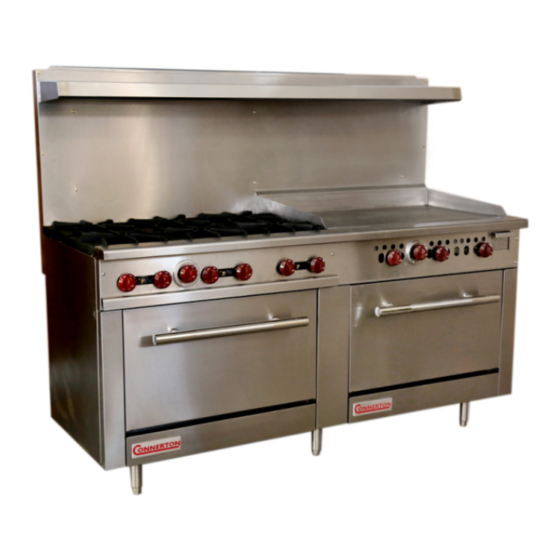
INSTALLATION & OPERATION MANUAL
GAS RESTAURANT RANGES
MODEL NUMBERS and BTU CONSUMPTION
CN-24-2-12G 1@ 25,000 2@32,000 1@18,000
CN-24-4
1@ 25,000 4@32,000
CN-24-24G
1@ 25,000 2@18,000
CN-36-2-24G 1@35,000 2@32,000 2@18,000
CN-36-4-12G 1@35,000 4@32,000 1@18,000
CN-36-6
1@35,000 6@32,000
CN-36-36G
1@35,000 3@18,000
CN-48-2-36G 1@35,000 2@32,000 3@18,000
CN-48-4-24G 1@35,000 4@32,000 2@18,000
CN-48-6-12G 1@35,000 6@32,000 1@18,000
CN-48-8
1@35,000 8@32,000
CN-48-48G
1@35,000 4@18,000
CN-60-2-48G 1@35,000 2@32,000 4@18,000
CN-60-4-36G 1@35,000 4@32,000 3@18,000
CN-60-6-24G 1@35,000 6@32,000 2@18,000
CN-60-8-12G 1@35,000 8@32,000 1@18,000
CN-60-10
1@35,000 10@32,000
CN-72-4-48G 2@35,000 4@32,000 4@18,000
CN-72-6-36G 2@35,000 6@32,000 3@18,000
CN-72-8-24G 2@35,000 8@32,000 2@18,000
CN-72-10-12G 2@35,000 10@32,000 1@18,000
CN-72-12
2@35,000 12@32,000
www.connertoncooking.com
11990 Rivera Rd. Santa Fe Springs CA 90670
!
! 1
Advertisement
Table of Contents

Related Manuals for Connerton CN-24-2-12G

Summary of Contents for Connerton CN-24-2-12G
- Page 1 INSTALLATION & OPERATION MANUAL GAS RESTAURANT RANGES 11990 Rivera Rd. Santa Fe Springs CA 90670 MODEL NUMBERS and BTU CONSUMPTION CN-24-2-12G 1@ 25,000 2@32,000 1@18,000 CN-24-4 1@ 25,000 4@32,000 CN-24-24G 1@ 25,000 2@18,000 CN-36-2-24G 1@35,000 2@32,000 2@18,000 CN-36-4-12G 1@35,000 4@32,000 1@18,000...
-
Page 2: Important For Your Safety
3/25/2020 IMPORTANT FOR YOUR SAFETY THIS MANUAL HAS BEEN PREPARED FOR PERSONNEL QUALIFIED TO INSTALL GAS EQUIPMENT, WHO SHOULD PERFORM THE INITIAL FIELD START-UP AND ADJUSTMENTS OF THE EQUIPMENT COVERED BY THIS MANUAL. POST THIS INFORMATION IN A PROMINENT LOCATION THE INSTRUCTIONS TO BE FOLLOWED IN THE EVENT THE SMELL OF GAS IS DETECTED. -
Page 3: Gas Restaurant Range Models
GAS RESTAURANT RANGE MODELS CN36 CN72... -
Page 4: Installation
If the supply and equipment requirements do not agree, do not proceed with the installation. Contact your dealer or Connerton Company (714-547-9218) immediately. - Page 5 Remove the backsplash components from the crating materials. 1. Check the backsplash component parts to ensure that all the required parts for the backsplash installation have been obtained. (See Fig's. .) If any parts are missing, contact your dealer or Connerton (714-547-9218) immediately.
- Page 6 Assemble the required components as shown in Fig's. and 9. Lift the assembly up, sliding the channels into the space provided at the rear of the range (this may require two people). ...
- Page 7 LEVELING Check the leveling of the range. Place a carpenter's level inside the oven cavity across the oven rack(s). Level front-to- back and side-to-side. To adjust the leveling, tilt the range to one side and, using channel locks, unscrew the adjustable leg insert as required. Repeat this procedure as necessary for each leg.
-
Page 8: Operation
WARNING: PRIOR TO LIGHTING, CHECK ALL JOINTS IN THE GAS SUPPLY LINE FOR LEAKS. DO NOT USE AN USE SOAP AND WATER SOLUTION. OPEN FLAME After piping has been checked for leaks, all piping receiving gas should be fully purged to remove air. Before operation, verify thermocouple is securely seated in the valve. -
Page 9: Before First Use
BEFORE FIRST USE GRIDDLE SEASONING NOTE: This griddle plate is steel, but the surface is relatively soft and can be scored or dented by the careless use of a spatula or scraper. Be careful not to dent, scratch, or gouge the plate surface. -
Page 10: Open Top Burners
Fig. 16 If pilot fails to light, turn main gas supply OFF. Wait 5 minutes and repeat the above procedures. Turn one griddle or top burner valve ON to remove air from the gas line. Turn burner valve OFF when gas begins to flow. Nightly Shutdown Turn burner valve OFF;... -
Page 11: Rack Arrangement - Standard Oven
The standard oven has four rack positions and is supplied with one oven rack. Additional racks may be obtained through your selling dealer or Connerton. (714-547-9218) or email orders@connertoncooking.com. For best results when baking cakes and pastries, it is recommended that only a single rack position be utilized. - Page 12 Fig.18 Fig.19 ! 1 2...
- Page 13 INSERTING AND REMOVING STANDARD OVEN RACKS The oven rack has a stop to keep the rack from being pulled all the way out when unloading product. To install rack, place rack along the top of side liner runners and slide rack completely to the rear of the oven compartment until rack drops into place (Fig's.
- Page 14 PREHEATING STANDARD OVEN Turn thermostat control to the desired cooking temperature and preheat oven for 25 minutes. To save on gas consumption, do not operate oven at maximum heat when it is not necessary. Turn thermostat down to 250°F (121°C) or OFF when oven is not in use or during idle cooking periods. OPEN TOP BURNERS Open top burners ignite quickly and do not require any preheating time.
- Page 15 Do not use Dawn dish detergent to clean the exterior or interior components of the range. Do not use scouring powder. It is extremely difficult to remove completely. It can build up accumulations that will damage the oven. DAILY Remove nickel-plated racks and clean in a sink. While still warm, wipe top with a soft cloth or other grease absorbing material to remove spillovers, grease, etc., before they burn in.
-
Page 16: Griddle Plate
OVEN VENT When cool, the oven vent should be checked every six months for obstructions. SERVICE AND PARTS INFORMATION To obtain service and parts information concerning this model, contact Connerton, (714-547-9218), Your local Service Agency or refer to our website, www.connertoncooking.com for a complete listing of parts and service information. -
Page 17: Troubleshooting Guide
TROUBLESHOOTING GUIDE STANDARD AND CONVECTION OVEN RESTAURANT RANGE OVEN PROBLEM CAUSES 1. Too much bottom heat a) Insufficient ventilation b) Improper fluing 1a. Too low temperature c) Improper thermostat bypass setting 1 b. S ide burning d) Thermostat out of calibration 1c. -
Page 18: Limited Warranty
LIMITED WARRANTY effective January 2020 CONNERTON (Company) warrants to the original owner that the product be free from defects in materials and/or workmanship. This warranty shall apply to units properly installed in a static location only and be in effect for two (2) years from the date of purchase but shall not exceed 30 months from date of shipment from the Company. - Page 19 Only the replacement parts and standard delivery charges are covered. When the above information is available, Owner or technician, Please contact CONNERTON at… 562-464-9901 or service@connertoncooking.com ** (excluding special order items)...most parts can ship within 24 hours. ! 1 9...
Need help?
Do you have a question about the CN-24-2-12G and is the answer not in the manual?
Questions and answers