Advertisement
Quick Links
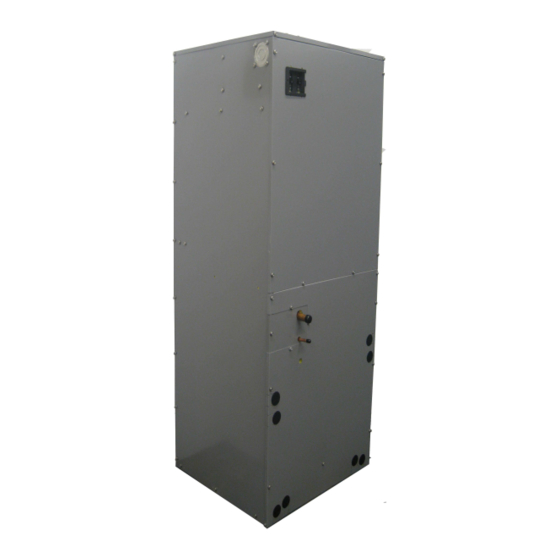
MULTI-POSITION, UPFLOW, AND HORIZONTAL DX AND CHILLED
WATER COOLING WITH ELECTRIC OR HOT WATER HEATING
MODELS: MS, MM, US, UM SERIES
1 – General
2 – Safety
3 – Owners Information & Seasonal Information
1 – Safety
2 – Air Handler Maintenance
3 – Air Handler Controls
4 – Sequence of Operation
5 -
– Trouble Shooting
1 – Air Handler Examination Check Points
2 – Front Access Panel Circuit Breaker Locations
3 – Home Owner / Users Cleaning Points
4 – Accessory Air Filter Box – Upflow
5 – Accessory Air Filter Box – Air Filter Access - Upflow
6 – Accessory Filter Box – Adjustment for 1" and 2" Filters
7 – Downflow / Horizontal Filter Location – Wall or Ceiling
8 – No Electric Heat Control Box
9 – Hydronic Heat Control Box
10 – Electric Heat Control Box
11 – Blower Assembly and Mounting Screw Location
12 – Component Locations – Electric Heat Models
13 – Component Locations – Hydronic Heat Models
14 – Motor Speed Tap Isolation Relay - X-13 and PSC Motors
1 – X-13 Motor Terminal Connections
2 – 208 / 240 VAC Blower Motor Current Chart
3 – 120 VAC Blower Motor Current Chart
4 – MSVE Blower Performance - ECM 2.3 Motor
5 – MSVE Blower Amp Data - ECM 2.3 Motor
6 – MSVT Blower Performance – X-13 Motor
7 – MSVT Blower Amp Data – X-13 Motor
8
– MSPS Blower Performance – PSC Motor
9 – MSPS Blower Amp Data – PSC Motor
Contact us by mail: Manufactured and Distributed by
SECTION I: GENERAL
The following list includes important facts and information regarding
the air handler and its inclusions.
1.
Air Handler is rated at 240 volts AC at 60 Hertz for electric
heat models or 120 volts AC at 60 Hertz for hydronic models.
2.
Air Handler is available in a small, medium, or large cabinet
size.
3.
All air handlers are equipped with a blower for A/C or Heat
Pump operation.
4.
Multi-position models are designed for upflow, downflow and
horizontal application. All other models are designed for
upflow and horizontal application.
5.
This air handler must not be operated without the doors
installed.
NOTE: This air handler and its components are listed as a
combination AC or Heat Pump system by ETL for sale in the United
States and Canada.
MORTEX PRODUCTS INC
USERS INFORMATION MANUAL
LIST OF SECTIONS – USERS INFORMATION MANUAL
LIST OF SECTIONS – SERVICE AND MAINTENANCE MANUAL
CONTACT INFORMATION
FORT WORTH, TX 76106
1
4 – Start Up & Shutdown Instructions
2
5 – Owner Maintenance
3
8
6 – Blower Performance
9
7 – ECM 2.3 Climate Profiles
10
8 – Accessories Parts
10
9 – Replacement Parts
13
LIST OF FIGURES
4
15 – ECM Motor Control Pin Out
5
16 – Adjustable Time Delay Relay (TDR) Terminals
X-13 Motor Terminals
6
17 –
6
18 – Heater Relay Terminal Designations
6
19 – Blower Mounting Plate and Screw Locations
6
20 – ECM Control Board Diagram
7
ECM Climate Profiles figure 1 and figure 2
9
21 – MS 18-24 Electric Heat Replacement Parts Drawing
9
22 – MS 25-30-36 Electric Heat Replacement Parts Drawing
9
23 – MS 37-42-48-60-72 Electric Heat Replacement Parts Drawing 24
9
24 – MS 18-24 Hydronic Heat Replacement Parts Drawing
11
25 – MS 25-30-36 Hydronic Heat Replacement Parts Drawing
11
26 – MS 37-42-48-60-72 Hydronic Heat Replacement Parts Drawing 27
13
LIST OF TABLES
15
10 – Blower CFM - Heat & Cool Jumper Pin Taps ECM Cntrl Board 19
15
11 – MSVE, MSVT, MSPS Accessory Parts List
15
12 – MS 18-24 Electric Heat Replacement Parts List
16
13 – MS 25-30-36 Electric Heat Replacement Parts List
16
14 – MS 37-42-48-60-72 Electric Heat Replacement Parts List
17
15 – MS 18-24 Hydronic Heat Replacement Parts List
17
16 – MS 25-30-36 Hydronic Heat Replacement Parts List
18
17 – MS 37-42-48-60-72 Hydronic Heat Replacement Parts List
18
Mortex Products Inc.
501 Terminal Rd
Fort Worth, TX 76106
FIRE OR ELECTRICAL HAZARD
Failure to follow the safety warnings exactly could result in
serious injury, death, or property damage.
A fire or electrical hazard may result causing property
damage, personal injury or loss of life.
Do not store or use gasoline or other flammable vapors and
li id i h
USERS MUST READ ALL INSTRUCTIONS IN THIS MANUAL AND
THIS MANUAL MUST BE SAVED FOR FUTURE REFERENCE
For Installation In:
1. Modular Homes & Buildings
2. Residential Homes
www.mortx.com
i i i
f hi
h
5
5
16
20
21
22
14
14
14
15
15
19
20
22
23
25
26
21
22
23
24
25
26
27
li
Page 1
Advertisement

Related Manuals for Suntherm MS Series


Summary of Contents for Suntherm MS Series
- Page 1 USERS INFORMATION MANUAL MULTI-POSITION, UPFLOW, AND HORIZONTAL DX AND CHILLED For Installation In: WATER COOLING WITH ELECTRIC OR HOT WATER HEATING 1. Modular Homes & Buildings MODELS: MS, MM, US, UM SERIES 2. Residential Homes LIST OF SECTIONS – USERS INFORMATION MANUAL 1 –...
- Page 2 SECTION II: SAFETY SAFETY REQUIREMENTS 1. This air handler must be kept clear and free of combustible materials, gasoline and other flammable This is a safety alert symbol. When you see this symbol vapors and liquids. on labels or in manuals; be alert to the potential for personal 2.
- Page 3 located or protected to avoid physical damage by space(s). When the thermostat is satisfied the circulating pump vehicles. is de-energized. The blower is also de-energized after an “OFF” time delay, the heating cycle has ended and the air handler is ready for the next call for heat to start the next cycle.
- Page 4 4. Problems caused by installation and operation of any air conditioning unit, heat pump, or other air quality devise which is not approved for use with this air handler. 5. Adjusting or calibrating the thermostat. 6. Problems caused by construction debris which has fallen into the air handler.
- Page 5 SECTION IV: STARTUP AND SHUTDOWN INSTRUCTIONS Read the instructions below before trying to start the appliance. If you do not follow these instructions exactly, a fire may result causing property damage, personal injury, and/or loss of life. A. BEFORE OPERATING; check around perimeter of the furnace to make sure there are no flammable materials in the area.
- Page 6 Figure 4: Accessory Air Filter Box NOTE: Make sure the flow arrow on the air filter is pointing towards the coil. Figure 3: Home Owner / Users Cleaning Points Upflow Air Filter Replacement – Accessory Filter Box Kit Follow these easy steps to replace the air filters. 1.
- Page 7 Downflow / Horizontal Air Filter Replacement 13. Place the new air filter back into the grille assembly, push Appliances that are installed in a downflow or horizontal the grille door closed and tighten the thumb screw or push position generally have the filters in filter grilles located in the the latches in on each side of the door until the door is ceiling or the wall next to the ceiling.
- Page 8 SERVICE AND MAINTENANCE MANUAL SECTION I: SAFETY THE HOME OWNERS AND / OR APPLIANCE USERS MUST STOP HERE! This product must be serviced and maintained as specified This section has been designed to assist a qualified service in these instructions and/or to any applicable local, state, agency in performing service and maintenance on this and national codes including, but not limited to building, appliance.
- Page 9 7. Check the evaporator condensate drain pan for any debris and ensure the pan is properly draining by pouring water into the drain to check it. 8. Remove any excess water that may have spilled from FIRE HAZARD checking the evaporator condensate drain. 9.
- Page 10 10. Check the blower wheel for dust and debris. Use the field supplied circuit breakers or fuses sized to protect the brush and the vacuum cleaner to remove any dust or wire connected to the air handler circuit breakers. debris from the wheel. Be careful not the move or 5.
- Page 11 operation. This setting causes the thermostat to complete the circuit between “R” and “G” terminals causing the sequencer relay to start the time delay cycle. Once the time delay relay has completed the on-delay cycle the contacts will close sending voltage to the isolation relay coil. The isolation relay Control Box will close the normally open contacts (Terminals #2 and #4) sending voltage to selected indoor blower motor speed tap...
- Page 12 normally open contacts (Terminals #2 and #4) will close and terminal is de-energized and the heat relay and the pump relay the motor will operate on the selected speed tap that has been open turning off the water pump and the PSC blower motor. placed on terminal #4.
- Page 13 (Terminal #6) of the normally closed terminal is connected to If the motor is not running, check for 240 volts and 24 volts at the low speed tap blower motor. the motor terminals. If the 240 volts and 24 volts is present at X-13 motor has a red wire is connected from the 24 VAC coil the motor terminals but the motor is not operating, then of the heat relay (Terminal #0) to the normally closed terminal...
- Page 14 PSC Motor Check – Hydronic Heat Models If the motor is not running, check for 120 volts at the motor speed tap terminal. If the 120 volts is present at the motor speed tap terminal but the motor is not operating, then replace the motor.
- Page 15 Replacing the Blower Te rminal Conne ction Speed Tap Common - 24 VAC Common 1. Follow the instructions exactly as shown in Startup and Supply Voltage - 240 Vac Line 1 Shutdown Section in this manual to properly shutdown Ground Connection this appliance.
- Page 16 SECTION VI: BLOWER PERFORMANCE Nominal Motor Volts 1 Ph. Motor Blower CFM @ CFM @ CFM @ CFM @ CFM @ Model Number Jumper Tons 50/60 Hz. Code Wheel 0.10" 0.20" 0.30" 0.40" 0.50" MSVE18,24 1.5 & 2.0 0.33 9 X 6 Electric MSVE18,24 1.5 & 2.0 0.33 10X7 Hydronic 1422 1421 1421 1416 1416 1.5 ...
- Page 17 Nominal Motor Volts 1 Ph. Motor Blower Motor CFM @ CFM @ CFM @ CFM @ CFM @ Model Number Tons 50/60 Hz. Code Wheel 0.10" 0.20" 0.30" 0.40" 0.50" MSVT18,24 1.5 & 2.0 0.33 9 X 6 1002 Electric 1088 1048 1114 1073 1018 MSVT18,24 1.5 & 2.0 0.33 9 X 6 Hydronic 1.5 MSVT25,30,36 Thru 0.50 10 X 7 1059...
- Page 18 Nominal Motor Volts 1 Ph. Motor Blower Motor CFM @ CFM @ CFM @ CFM @ CFM @ Model Number Tons 50/60 Hz. Code Wheel 0.10" 0.20" 0.30" 0.40" 0.50" MSPS18,24 1.5 & 2.0 0.33 9 X 6 Electric High MSPS18,24 1.5 & 2.0 0.33 9 X 6 Hydronic High 2.0 1087 1070 1035 MSPS25,30,36 Thru 0.50 10 X 7 1280 1230...
- Page 19 Figure 20 ECM Control Board Diagrams Blower Performance Data ‐ Variable Speed (High Efficiency) ECM 2.3 Motor Thermostat Terminals Control Board Taps √ = Energized Terminal Cool Heat Unit Size Operating Mode Hi Cooling / HP Heating √ √ 1000 √ Low Cooling / HP Heating MSVE18,24 √ √ √ Auxiliary Heat 1000 Emergency Heat √ 1000 √ Continuous Blower Hi Cooling / HP Heating √ √ 1600 1400 1200 1100 Low Cooling / HP Heating √ √...
- Page 20 heating coils or if coils are staged, then the On slew, PreRun SECTION VII: ECM 2.3 CLIMATE PROFILES heating, and Off slew can be set at different rates to match Background relay performance. The GE ECM 2.3 motor has an extensive array of Unique requirements of heat pumps can also be programmable features for varying airflow as a function of accommodated by matching delays to individual system...
- Page 21 SECTION VIII: ACCESSORY AND REPLACEMENT PARTS LISTS MSVE, MSVT, MSPS Part # Description DFK44-12-DX Downflow Conversion Kit - Small Cabinet - 12 Tubes High - DX Coil DFK44-14-DX Downflow Conversion Kit - Small Cabinet - 14 Tubes High - DX Coil DFK44-16-DX Downflow Conversion Kit - Small Cabinet - 16 Tubes High - DX Coil DFK44-16-CW...
- Page 22 SECTION IX: REPLACEMENT PARTS LISTS Figure 21: MS 18–24 Electric Heat Air Handler Repair Parts Schematic MS**18, 24 COOL ONLY OR ELECTRIC HEAT Item # Qty. Part # Description R69AD0001 9 X 6 Blower Assembly R65BV0001 1/3 HP 208/240V ECM Motor 208/240V R65BV0025 1/3 HP 208/240V X-13 Motor 208/240V R65BU0168...
- Page 23 Figure 22: MS 25-30-36 Electric Heat Air Handler Repair Parts Schematic MS**25, 30, 36 COOL ONLY OR ELECTRIC HEAT Item # Qty. Part # Description R69AD0002 10 X 7 Blower Assembly R65BV0002 1/2 HP 208/240V ECM Motor 208/240V R65BV0026 1/2 HP 208/240V X -13 Motor 208/240V R65BU0159 1/2 HP 208/240V PSC Motor 208/240V R68AE0003...
- Page 24 Figure 23: MS 37-42-48-60-72 Electric Heat Air Handler Repair Parts Schematic MS**37, 42, 48, 60, 72 COOL ONLY OR ELECTRIC HEAT Ite m # Qty. Pa rt # De scription R69AD0017 12 x 9 Blower Assembly (MS**37,42,48,60) R69AD0019 12 x 10 Blower Assembly (MS**72) R65BV0003 3/4 HP 208/240V ECM Motor (MS**37,42,48,60) R65BV0027...
- Page 25 Figure 24: MS 18-24 Hydronic Heat Air Handler Repair Parts Schematic MS**18, 24 HYDRONIC HEATING Item # Qty. Part # Description R69AD0002 10 X 7 Blower Assembly R65BV0001 1/3 HP 120V ECM Motor R65BV0021 1/3 HP 120V X-13 Motor R65BU0162 1/3 HP 120V PSC Motor R68AE0003 ECM Motor Control Board...
- Page 26 Figure 25: MS 25-30-36 Hydronic Heat Air Handler Repair Parts Schematic MS**25, 30, 36 HYDRONIC HEATING Item # Qty. Part # Description R69AD0002 10 X 7 BlowerAssembly R65BV0002 1/2 HP120V ECM Motor R65BV0022 1/2 HP 120V X-13 Motor R65BU0163 1/2 HP 120V PSC Motor R68AE0003 ECM Motor Control Board R68DE0001...
- Page 27 Figure 26: MS 37-42-48-60-72 Hydronic Heat Air Handler Repair Parts Schematic MS**37, 42, 48, 60, 72 HYDRONIC HEATING Item # Qty. Part # Description R69AD0017 12 x 9 Blower Assembly (MS**37,42,48,60) R69AD0019 12 x 10 Blower Assembly (MS**72) R65BV0004 1.0 HP 120V ECM Motor R65BV0024 1.0 HP 120V X -13 Motor R65BU0165...
Need help?
Do you have a question about the MS Series and is the answer not in the manual?
Questions and answers