Table of Contents
Advertisement
Quick Links
Advertisement
Table of Contents

Related Manuals for Airel Quetin K2


Summary of Contents for Airel Quetin K2
- Page 1 Manual for Use...
- Page 2 IMP-BU-500_ind L_EN 04/12/2019...
-
Page 3: Table Of Contents
SUMMARY 1. INTRODUCTION 1.1 General Information ................7 1.1.1 Purpose of the manual ..............7 1.1.2 À About K2 equipment ..............7 1.2 Classification/Regulations ..............7 1.3 Safety instructions ................8 1.4 Guarantee .....................8 1.5 IGN®-Calbénium® protocol ..............9 1.6 Logotypes and icons ................9 2. - Page 4 3.3.2 Pneumatic assistance ..............19 3.4 Footrest can be disengaged (option on K2 one) ........19 3.5 Foot pedals ..................20 3.5.1 Progressive pedal ................20 3.5.2 Specific characteristics of the progressive wireless pedal ....21 3.5.3 K2 one pneumatic pedal ..............22 3.5.4...
- Page 5 Importing a user profile Changing the Password/Changing the language Deleting a user 3.9.3 Functions on the home screen ............44 3.9.4 Settings menu ................46 Navigation in the settings menu Chair and basin positions Clock and timer Surgical lighting Glass-filling and bowl rinsing spray Calbépuls Intercom picture Electronic chart diagnostics...
- Page 6 6.2 Foaming of sprays ................76 6.3 Replacing a fuse ..................76 7. TECHNICAL CHARACTERISTICS 7.1 Dimensions of the K2 chair ..............78 7.2 Dimensions of the K2 SIDE chair ............79 7.3 Technical characteristics ..............80 7.4 Wireless pedal ..................80 8. RECYCLING 9. LIST OF COMPATIBLE INSTRUMENTS...
-
Page 7: Introduction
• The numerical values given in this manual and displayed as an example should not be considered as recommended values, except when specified in the text. • The figures are intended to illustrate the different functions of the K2. They are not binding. They do not claim to represent all the equipment variants. -
Page 8: Safety Instructions
All our devices are manufactured with the utmost care and are tested according to the ISO 7494-1 standard before being delivered to our customers. Any new K2 appliance is guaranteed against any defective parts for 2 years from the day of delivery. -
Page 9: Ign®-Calbénium® Protocol
The operations of this protocol are detailed in with a maintenance guide. IGN® and CALBENIUM® are a fundamental pairing for the hygiene of your K2 unit: - No product other than CALBENIUM® should be used in the IGN® system. A study has been carried out on CALBENIUM®... -
Page 10: Description
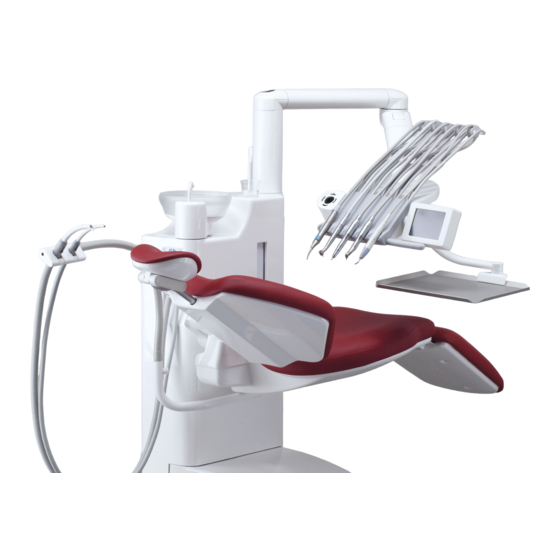
2. DESCRIPTION General description K2 unit Foot pedal Patient chair Instrument console Equipment arm Basin Assistant station This generic view is not representative of the diversity of equipment variants. -
Page 11: Detailed Description
Imitation leather upholstery with memory foam Access door to the unit 2.2.2 Instrument console The K2 console is available in 2 versions, with instruments the right way up or upside down depending on the practitioner's preference. Automatically- activated cords Calbépuls®... -
Page 12: Instruments On Whip Arms
Upgradable console: Option to add other instrument modules (up to 5 instruments). On the K2 SIDE model, the underside of the shelf is equipped with silicone cable clips. This system makes it possible to lower the height of the hanging cords. -
Page 13: Calbépuls (Option)
Variable inclination of instruments: Grasp a block to position it, range of around 45°. 2.2.2.3 Calbépuls (option) ® Calbépuls® is used for the external decontamination of instruments using a pressurised air jet and CALBENIUM® solution It is used to clean instruments during a consultation, as well as after each patient for a pre-cleaning of the instruments before they are sterilised. -
Page 14: Keyboard Or Control Screen
2.2.4 Keyboard or control screen For the K2 equipment there are 3 models of keyboard or control screen: a touch keypad and two models of touchscreen. These 3 models are waterproof, which gives them a long life. 2.2.4.1 Keyboard with keys A polycarbonate keyboard equips the assistant station. -
Page 15: Foot Pedals
(see 2.2.5 Foot pedals The K2 pedal comes in 6 versions with a "tread pedal" option for the progressive pedals. The pedal controls for these different models are detailed in § 3.5, page 20. Electric progressive foot control... -
Page 16: Ign®-Calbenium® System
Filtering cartridge ® Bottle of Water from the network ® Calbénium The IGN® integrated in the K2 unit allows the practitioner to work with a spray water treated with CALBENIUM®. The IGN -CALBENIUM system supplies instrument sprays, Calbépuls and Aspisept ®... -
Page 17: Surgical Lighting
2.4.2 Surgical lighting Optional on the K2, the surgical lighting can be mounted on the unit, suspended from the ceiling or on a floor column. Available in halogen or LED version. The surgical lighting is controlled by the touch screen. -
Page 18: Use
3. USE The K2 unit is delivered with factory settings that were used to check that it is working properly. The practitioner will have to modify these pre-settings in order to adapt the chair and the unit to their setting and working methods. -
Page 19: Adjusting The Headrest
Adjusting the headrest The tilt, rotation and position settings of the headrest are carried out manually. The K2 headrest comes in two versions: mechanically locked or pneumatically assisted. 3.3.1 Mechanical locking Steps Action Illustration Loosen the locking knob. Manually adjust the triple articulation of the headrest. -
Page 20: Foot Pedals
Basin position call No instrument selected Chip blower control On selected instrument Spray control With lever (1) selected (K2 one only) Bowl rinse control No instrument selected On selected instrument Chip blower selection Loop by single presses on the button:... -
Page 21: Specific Characteristics Of The Progressive Wireless Pedal
3.5.2 Specific characteristics of the progressive wireless pedal On-off button The progressive wireless pedal is compatible with the K2 EVO equipment. The pedal controls are identical to those shown in § 3.5.1. • The wireless pedal is equipped with a lithium polymer battery (LiPo). -
Page 22: K2 One Pneumatic Pedal
3.5.3 K2 one pneumatic pedal With/Without spray 3.5.4 Controls under the K2 one shelf Plaque remover power Motor speed Motor rotation direction Water flow of instruments spray... -
Page 23: Assistant Keyboard Controls
Not active for K2 one > 3 seconds Surgical lighting Lighting of the surgical lighting for the K2 one only. Glass-filling spray • Single press → Glass filling for a programmed duration, with simultaneous bowl rinsing. • Long press → Glass-filling spray manual mode. - Page 24 Function Details Illustration Basin position press → Calls the programmed basin position. • 1 • 2 press → Put the chair back to its last position, with bowl rinsing. Chair positions • Single press → Calls one of the programmed positions (4 programmes possible).
-
Page 25: K2 One Control Keyboard
K2 one control keyboard 3.7.1 Using the keyboard Function Details Illustration Assistant call Single press. Assistant call or other function according to the wiring (on request). NB: Dry contact on the 1A maxi connector board Auxiliary Control for the door opening of the practice room, or other function according to the wiring. -
Page 26: Settings
Chair safety Single press on one of the chair movement keys: → Stops any movement of the chair, especially during a programmed movement. The use of the foot control prevents any movement of the chair. 3.7.2 Settings Function Details Illustration Programming the Hold down the "settings"... -
Page 27: Neo" Monochrome Touchscreen Controls
"NEO" monochrome touchscreen controls 3.8.1 Inserting the user card The K2 smart card must be inserted in the reader for the NEO screen to be activated. It can be inserted before or after switching on the K2 unit. Function Details... -
Page 28: Using Icons On Neo Screen
3.8.3 Using icons on NEO screen The controls and settings are carried out by pressing your finger on the icons or bargraphs. Inactive icon Light background Activated Greyed-out background icon Bargraph (*) Drag the slider or tap your finger on the bargraph (*) To validate a bargraph setting: Tap on a free area of the screen, or press the function icon, or wait a few seconds: the previous screen is displayed again. - Page 29 Rep. Function Details Illustration Calbénium warning Presence of Calbénium. light / Decontamination § 4.2, page Calbénium supply is low, see § 4.2, page Calbénium has run out, see Activation of decontamination of sprays (long press). Assistant call Short call or extended call, depending on installation. To change the call mode, contact your installer.
-
Page 30: Navigation In The Settings Menu
3.8.5 Settings menu 3.8.5.1 Navigation in the settings menu Function Description Illustration Access the settings From the home screen. menu • Move the cursor with the icons Navigation • Select with • Set the desired value with + keyboard or bargraph. Settings •... -
Page 31: Surgical Lighting
3.8.5.4 Surgical lighting Function Description Select "Lighting/Chair" Auto lighting • Enable/disable the automatic switching on of the surgical light: mode - Stops when programme 1 and basin position called - Switching on of the surgical light when any other chair programme is requested •... -
Page 32: Glass-Filling And Bowl-Rinsing Spray
3.8.5.6 Glass-filling and bowl-rinsing spray Function Description Illustration Select "Glass-filling spray duration" Glass-filling spray Default display "00: 30" (s/max time) duration setting • Use the cursors and keyboard to set the (for the pedal desired duration. control) • Validate and return to the home screen. ... -
Page 33: Turbine Menu
3.8.6 Turbine menu When a turbine is selected, the following screen is displayed: Rep. Function Details Illustration Chip blower • Display according to the pedal control. status • Loop with 2 statuses: Chip air / Chip spray. Status of the •... -
Page 34: Selecting The Turbine Variation Mode
3.8.6.1 Selecting the turbine variation mode Function Description Illustration Pedal- controlled Select "Turbine Variation". turbine • Enable/disable the turbine variation using the pedal. variation • Validate and return to the home screen. 3.8.6.2 Choice with or without alternospray Function Description Illustration Alternospray... -
Page 35: Motor Menu
3.8.7 Motor menu When a micromotor is selected, the following screen is displayed: Rep. Function Details Illustration Chip blower status • Display according to the pedal control. • Loop with 2 statuses: Chip air / Chip spray. Speed limiter • Adjust the slider to limit the motor speed. -
Page 36: Motor Direction Reversal Selection Using The Pedal
3.8.7.1 Motor direction reversal selection using the pedal Function Description Illustration Motor direction Select "Direction reversal using your foot". reversal • Enable/Disable the option to reverse the motor using the rotation direction using the pedal control. pedal • Validate and return to the home screen. When reversing the motor direction using the foot is selected: - The control is carried out using the right button pedal, by default reserved for the selection of the chip blower. -
Page 37: Plaque Remover Menu
3.8.9 MX micromotor menu This screen will be displayed only if your K2 is equipped with a BIENAIR MX induction micromotor instrument. It is used to adjust the speed and the motor torque as well as the auto-reverse and auto-forward functions.When the MX micromotor is selected, the following screen is displayed:... -
Page 38: Motor Torque As A
Rep. Function Details Illustration Direction of Loop command. motor rotation By default, the direction returns to normal. / Auto reverse 1st press Reversal of motor direction /Auto forward Hold down for 2 seconds Auto-reverse mode. Mode reserved for the endo (max speed 5000 rpm): 2 seconds ... -
Page 39: Auto-Forward Time Setting
3.8.9.2 Auto-forward time setting The auto-forward time is the duration for which the motor will automatically rotate in the opposite direction when the maximum torque is reached. Function Description Auto-forward time setting Select "Auto FWD Time" Default display "00: 10" (tenths of a sec/max time). •... -
Page 40: User Management
3.9.2 User management 3.9.2.1 Creating a user profile Steps Details Illustration On the login screen, select • Enter the password “AIRELQUETIN”. • Confirm: • Enter the name of the profile to be created. • Confirm: • Set the password. •... -
Page 41: Exporting A User Profile
3.9.2.2 Exporting a user profile This function is supported between tablets equipped with Evo.2 screens (Evo.2 -> Evo.2). Steps Details Illustration From the home screen, select the settings menu • Navigate with the buttons at the top right, and • Select the “User management” tab. •... - Page 42 3.9.2.3 Importing a user profile This function is supported between tablets equipped with Evo.2 screens (Evo.2 -> Evo.2). Steps Details Illustration On the login screen, select “Import a profile” • Insert a USB stick into its slot on the tablet. •...
- Page 43 3.9.2.4 Changing the Password/Changing the language Function Description Illustration Change language then “User management” tab • Select “language” • Set the desired language by sliding your fingers up or down. Return to the main menu Change the password then ...
- Page 44 3.9.3 Functions on the home screen Function Details Illustration Clock Cleaning the screen without activating functions: Press and hold the time to freeze the screen. The countdown of the seconds remaining is displayed. Access the To access settings and function programming. settings menu Suction Selection/toggle between 2 suction modes:...
- Page 45 Function Details Illustration Calbénium Presence of Calbénium warning light Calbénium on reserve No more Calbénium. User selection To change your user account (each account is protected by a password). Timer Countdown of a programmed time (access to 4 programmed times). Auxiliary Door opening of the practice room, or other function according to wiring.
- Page 46 3.9.4 Settings menu 3.9.4.1 Navigation in the settings menu Function Description Illustration Access the From the home screen settings menu Navigation To change pages (pages in a loop): • Buttons at the top right and • Select a tab/function to set: Settings •...
- Page 47 3.9.4.2 Chair and basin positions Function Description Illustration Programming chair positions (1 to 4) “Seat position” tab & Basin position • Select “save position 1 - 4” or “save basin position” • Place the chair in the desired position using the buttons on the screen.
- Page 48 3.9.4.4 Surgical lighting Function Description Illustration Auto lighting mode then “Miscellaneous” tab • Select “chair light” • Enable/disable the automatic switching on of the surgical light: - Stops when programme 1 and basin position called - Switching on of the surgical light when any other chair programme is requested ...
- Page 49 3.9.4.6 Calbépuls Function Description Illustration Calbépuls settings: - Flow - Decontamination then “Calbépuls” tab time • Select “water flow” or “duration …” - Drying time • Set the desired value by sliding your fingers directly on the slider bars: ...
- Page 50 3.9.5 Work with user programmes 3.9.5.1 Turbine menu When a turbine is selected, the following screen is displayed: Function Details Illustration Status of the • Display according to the pedal spray control. • Loop with 3 statuses:Spray/ alternospray/no spray.
- Page 51 Function Details Illustration Chip blower • Display according to the pedal status control. • Loop with 3 statuses: Chip air / Chip spray / No chip. Cold light setting • Press the icon: a bargraph appears at the bottom of the screen. •...
- Page 52 3.9.5.3 Choice with or without alternospray Function Description Illustration Alternospray using the pedal then “Miscellaneous” tab • Select “Alternospray” (same for all instruments) • Enable/disable the alternate spray mode using the pedal Return to the main menu Alternospray mode: The spray works for 2 seconds, then stops for 1 second. 3.9.5.4 Selecting spray on chip Function Description...
- Page 53 3.9.6 Plaque remover menu When the plaque remover is selected, the following screen is displayed: Function Details Illustration Status of the • Display according to the pedal spray control. • Loop with 3 statuses:spray/ alternospray/no spray Scaler mode Paro / Endo / Plaque remover mode selection...
- Page 54 Function Details Illustration Plaque remover Adjust the slider to limit the power of power limiter the plaque remover The available power range is automatically adapted to the mode selected: Paro 0 % …… 18 % Endo 19 % ….. 36% Plaque remover 37 % …..
- Page 55 3.9.6.2 Scaler variation selection Function Description Illustration Pedal- controlled scaler then “Miscellaneous” tab variation • Select “scaler variation” • Enable/Disable plaque remover power variation using the pedal Return to the main menu 3.9.7 MX micromotor menu When a micromotor is selected, the following screen is displayed:...
- Page 56 The micromotors that equip the PE9 Evo.2 are of MX type. Function Details Illustration Chip blower • Display according to the pedal status control. • Loop with 3 statuses: Chip air / Chip spray / No chip. Status of the •...
- Page 57 Function Details Illustration Adjustment of • Select the desired option. the chip air/ • Adjust the slider to limit the flow spray air/spray water flow Selecting and Access your preset settings saving the • Save a programme programme • Load a programme •...
- Page 58 3.9.7.2 Motor direction reversal selection using your foot Function Description Illustration Motor direction reversal then “Miscellaneous” tab using the • Select "direction reversal using your foot" \ pedal • Enable/Disable the option to reverse the motor rotation direction using the pedal control ...
- Page 59 K2 dental equipment requires regular maintenance. In addition to the required sterilisation of rotating instruments and suction cannulas, great care must be taken when cleaning and disinfecting. In this chapter a K2 maintenance guide is presented according to the frequency of the operations § 4.3, page 61).
- Page 60 Close the door and turn the unit on again. - Always keep one spare bottle of CALBENIUM®. - Never force the use of the K2 when the bottle is empty. The system may suction in air, causing the solution to dry in the pipes and form plugs.
- Page 61 Instrument rest Cleaning § 4.4.13 Air pressure Verification Water pressure § 4.4.15 Water filter Air compressor Purge if (except K2) necessary Power switch Switch off the K2 unit Filtering Replacement cartridge § 4.4.14 (****) (*) Control via touch keypad or pedal.
- Page 62 Maintenance procedures 4.4.1 Purge the instrument cords Purge the cords every morning and every evening. Place the purge cover on the basin. Insert an instrument into the lid. Adjust the sprays thoroughly. Activate the instrument for 30 seconds. Put the instrument back on its stand. Repeat steps for each instrument.
- Page 63 4.4.4 Using Aspisept Aspisept is a system for the internal decontamination of suction cords using Calbénium ® ® solution. Use the Aspisept when necessary during consultation. ® Also use after each patient. • Insert the 2 aspiration cannula one after the other into the Aspisept for at least 30 seconds.
-
Page 64: Cleaning The Amalgam Separator Filter
4.4.6 Cleaning the amalgam separator filter The photos below illustrate the dismantling of the amalgam separator filter. • Then remove the waste to a bin. Rinse the filter with clean water. • This can be left in soak over a weekend. •... -
Page 65: Replacement Of The Amalgam Separator Cassette
4.4.7 Replacement of the amalgam separator cassette When the alarm of the amalgam separator is triggered, the separator cassette must be replaced. The photos below illustrate the dismantling of the cassette. Refer to the manufacturer's manual to follow the complete recommendations. Steps Details Illustration... -
Page 66: Disinfection Of The Suction Cords
- Do not use foaming products such as household cleaners or instrument disinfectants. - Do not suction bleach into the K2 pipes. This will damage the cords and sealing parts. - Most amalgam separation and recovery systems available on the market are foam sensitive. - Page 67 Steps Details Illustration Screw the cap back on. Shake the Orocup well. Place the Orocup in a vertical position. Open the lid of the Orocup stopper and insert the suction cannula on the tips provided for this in the stopper. If necessary, use adapters.
-
Page 68: Weekly Disinfection - 2 L
4.4.8.2 Weekly disinfection - 2 L Recommended product: OROTOL MD555 from Dürr-Dental. Steps Details Illustration Fill the OROCUP with 2 L of water and suction in to flush the pipe. Unscrew the cap and pour 2 L of warm water into the Orocup bottle. -
Page 69: Maintenance Of External Surfaces
4.4.9 Maintenance of external surfaces - Do not use abrasive products for cleaning surfaces. - Do not suction bleach into the cords. - Do not use alcohol-based products or wipes. - Never spray the shelf or screens with a spray. This may result in premature damage to surface materials, with the appearance of spots or drips. -
Page 70: Decontamination Of Instrument Cords (Beginning/End Of The Day)
Steps Action Illustration Pass the cord under the pulley. A wider area is planned for this passage. Pass the cord through the opening of the pulley. Pull the entire length of the cord upwards through this passage. Fold the cord over the pulley. If necessary, the cord is ready to receive the corresponding instrument. -
Page 71: Intensive Disinfection Of The Instrument Cords
4.4.12 Intensive disinfection of the instrument cords To complete the asepsis of the K2 equipment, the disinfection protocol for the cords is recommended with a frequency of 15 days, especially in hospital settings. Never dilute CALBENIUM® before use. 4.4.12.1 On K2 NEO... -
Page 72: Cleaning The Instrument Holders And Handles
• Clean with soapy water. • Put in the autoclave if necessary (maximum temperature 135°C). 4.4.14 Replacement of the filter cartridge The filter cartridge located in the foot of the K2 unit must be replaced once a year. Steps Details Illustration Switch off the unit (on/off button). -
Page 73: Checking Air And Water Pressures - Water Filter
4.4.15 Checking air and water pressures - Water filter If necessary, call an authorised technician. Open the access door to the K2 unit. The air and water manometers are on the right. Check the settings: • Normal air pressure: 5.5 bar ± 0.5 bar •... -
Page 74: Preventive Maintenance
5. PREVENTIVE MAINTENANCE The following operations are to be carried out annually by an authorised technician. • Replacement of the general water filter. • Replacement of suction hoses and tips. • Checking the pressures. • Checking the solenoid valves • Lubrication of the worm gear of the motor. •... - Page 75 Symptom Remedy The chair does not move • Check the safety of the footrest. • Check on the pedal that the instrument control lever is in the zero position, or that the pedal is not stuck under the chair. • Check that none of the chair movement buttons are being pressed involuntarily (on the assistant station, on the dentist station, or on the foot control).
-
Page 76: Foaming Of Sprays
The fuses are located on the mains filter and on the connector board in the foot of the unit. On the front of the K2 foot cover, remove the screw cover. Unscrew the screw (BTR key no. 3). Remove the cover. - Page 77 Steps Details Illustration Access the fuses on the connector board. NEO connector board EVO connector board List of fuses on K2 Function Location NEO fuses EVO fuses General power supply Mains filter 10 A 6X35 10 A 6X35 Lighting Low connector...
-
Page 78: Technical Characteristics
7. TECHNICAL CHARACTERISTICS Dimensions of the K2 chair Top view of the K2 chair (dimensions in cm) Side view of the K2 chair (dimensions in cm) -
Page 79: Dimensions Of The K2 Side Chair
Dimensions of the K2 SIDE chair Top view of the K2 SIDE chair (dimensions in cm) Side view of the K2 SIDE chair (dimensions in cm) -
Page 80: Technical Characteristics
Technical characteristics Storage temperature 0°C to 50°C Transport temperature 0°C to 50°C Storage humidity 25% to 75% RH without condensation Transport humidity 25% to 75% RH without condensation Operating temperature + 10°C to + 30°C Operating humidity 30% to 75% RH without condensation Load-bearing surface 0.22 m²... -
Page 81: Recycling
8. RECYCLING IMPORTANT INFORMATION FOR DISPOSAL IN RESPECT OF THE ENVIRONMENT This product is subject to separate collection for electrical and electronic equipment in accordance with Directive 2002/96/EC. The crossed out dustbin symbol on the unit indicates that at the end of its life cycle, it must be treated separately from household waste. -
Page 82: List Of Compatible Instruments
9. LIST OF COMPATIBLE INSTRUMENTS... -
Page 83: Wiring Diagrams
WIRING DIAGRAMS... - Page 84 Freins H-468 de bras TABLETTE ARMOIRE DV-431 DC-90 DV-430 P-262/0 U-2111/0 BU-753/0 IG-34/0 IGS-25/0 VANNE Aspi CRACHOIR EN OPTION P-23/0 10/01/2019 Filtre DC-90 ajouté 15/04/2016 Cartouche remplace coxibrome Date Modifications CABLAGE PNEUMATIQUE K2 NEO DESIGNATION Matière 24/03/2014 Date BU-CP01 Echelle...
- Page 88 AIREL-QUETIN 917 rue Marcel Paul – ZA des Grands Godets F-94500 Champigny sur Marne Tel. +33 148 822 222 +33 148 824 613 Email office@airel.com After-Sales department Tel. 01 48 82 58 31 Email sav@airel.com www.airel-quetin.com...
Need help?
Do you have a question about the K2 and is the answer not in the manual?
Questions and answers