
Subscribe to Our Youtube Channel
Related Manuals for Aseptico ADC‑02CF


Summary of Contents for Aseptico ADC‑02CF
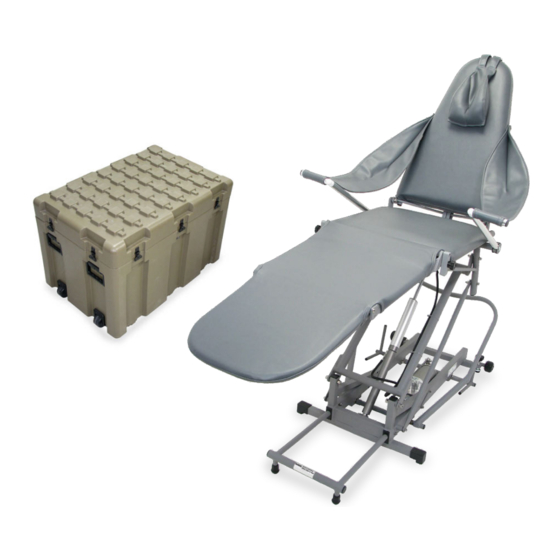
- Page 1 ADC‑02CF Portable Hydraulic Dental Chair NSN: 6520‑01‑652‑8993 OPERATION / MAINTENANCE MANUAL & SCHEMATIC SET...
-
Page 2: Table Of Contents
SETUP AND OPERATION years of reliable service. Please read the instructions provided in this manual to receive the best service from your Aseptico equipment. CLEANING AND MAINTENANCE FEATURES DISASSEMBLY •... -
Page 3: Setup And Operation
ADC-02CF SETUP AND OPERATION SELECTOR LEVER LABELS: Locate the 2 selector lever labels on opposite sides of the chair base. These labels show the selector lever positions for lifting and lowering the seat and UNPACKING: Using the backrest. people, lift the chair from the transport case and set it on the floor. - Page 4 ADC-02CF SETUP AND OPERATION (Continued) 10 CHAIR PANELS: Unfold the leg panel and foot panel B. CONNECTING BACKREST CYLINDER: Lift the backrest upright while simultane‑ ously guiding the clevis pin on the end of the backrest cyl‑ inder into the latch on the backrest frame, until they have securely latched D.
-
Page 5: Cleaning And Maintenance
ADC-02CF 2b. The object now is to force the pump piston all the way into the CLEANING AND MAINTENANCE pump cylinder to purge any trapped air. You will need a flat‑ blade screwdriver with shaft diameter of 3/8” or larger. Push CLEANING the lift lever all the way down with one hand and with the other hand, place the tip of the screwdriver (Fig. - Page 6 ADC-02CF It is important during steps 3 and 4 that the lift lever not be CLEANING AND MAINTENANCE (Cont.) pumped while the chair is tipped back. Any air in the hydraulic oil reservoir will be near the pump intake and can be drawn 3b.
- Page 7 ADC-02CF ADDING OIL TO THE HYDRAULIC SYSTEM Using a small mirror and a flashlight, look down into the oil fill port and observe the oil level. The oil (yellow‑green) should come up to the bottom of the threads (Fig. 11 A). If not, top off With prolonged use, small amounts of oil may leak out of the hy‑...
-
Page 8: Disassembly
462301] (Fig. 14 B) that attach the arm slings [PN 462289] to the (*) The individual components of the hydraulic assembly are not sides of the backrest. customer‑serviceable and shouldn’t be disassembled in the field. Return to Aseptico if repairs are required. SEAT ASSEMBLY Remove the clevis pin Fig. 15 Fig. - Page 9 ADC-02CF Fig. 18 Fig. 18 Unfold the leg and foot Fig. 17 Fig. 17 panels then turn the seat assembly over to expose the underside. Peel back the flaps on the seat cover and check the tie wraps [9x PN 510135] (Fig. 17 A) for tightness.
- Page 10 ADC-02CF DISASSEMBLY (Continued) Use two 1/2” combination Fig. 24 Fig. 24 wrenches to remove the bolts [2x PN 510806], bear‑ Use a 3/16’’ Allen wrench ings [4x PN 520115], spacers Fig. 21 Fig. 21 to remove the bolts [2x PN [2x PN 510823] and nuts [2x 510692] and washers [2x PN PN 510126] that attach the...
-
Page 11: Repacking The Chair
ADC-02CF REPACKING THE CHAIR LOADING CASE: Using two Fig. 29 Fig. 29 people, lift the chair and place it into the transport ARM SLINGS: Remove the arm Fig. 25 Fig. 25 case. Make sure to position slings from the ends of the arm the headrest end (Fig. -
Page 12: Specifications
ADC-02CF SPECIFICATIONS REQUIRED TOOLS LIST Chair Dimensions: Allen Wrenches: Chair, Folded 34’’L x 22’’W x 18’’H (86 4 x 55 9 x 45 7 cm) 3/32” Chair, Extended 76’’L x 24’’W x 36’’H (193 x 60 9 x 91 4 cm) 1/8”... -
Page 13: Troubleshooting Guide
When preparing the chair for shipping, the frame posts or product in part or whole. Aseptico shall be the sole arbiter of won’t lower all the way to the floor: such action. -
Page 14: Schematic Drawings
ADC-02CF... - Page 15 ADC-02CF...
- Page 16 P.O. Box 1548 • Woodinville, WA 98072‑1548 (800) 426‑5913 • (425) 487‑3157 www.aseptico.com • info@aseptico.com P/N: 421020 • Rev. I • ECO 14925 • 02/2020 • Printed in the USA...
Need help?
Do you have a question about the ADC‑02CF and is the answer not in the manual?
Questions and answers