Table of Contents
Advertisement
Quick Links
Advertisement
Table of Contents

Related Manuals for Volk Eye Check

Summary of Contents for Volk Eye Check
- Page 1 INSTRUCTIONS FOR USE Volk® Eye Check Ophthalmic Measurement Device...
-
Page 2: Shipping Contents
Please fill out and return to Volk Optical Optional Accessories The Volk Precision Stickers are an accessory for Volk Eye Check which act as a positioning target aid. They also remove the need to input patient IPD at the start of a session. -
Page 3: Table Of Contents
Application Settings ..........................13 Basic Use – Start Up, Shut Down, and Capturing an Image ..............15 Operational Modes – “Eye Check”, “Contact Lens” and “Oculoplastics” ..........16 Capturing a Patient Session ........................16 Measurements Provided by the Volk Eye Check Device ................21 Reviewing Patient Measurement Data ..................... -
Page 4: Intended Use
Intended Use Volk Eye Check is standalone ophthalmic software, loaded on a mobile electronic platform that is intended to measure ophthalmic characteristics and to aid in the diagnosis of ophthalmic abnormalities. Indications for Use To be used by Ophthalmologists, Optometrists, and other trained health care professionals. Clinical support staff can also use Volk Eye Check. -
Page 5: Important Symbols
United States which certifies that the electromagnetic interference from the device is under limits approved by the Federal Communications Commission. Do not dispose of Volk Eye Check or Volk Eye Check’s battery (Lithium- Ion) as unsorted municipal waste. Recycle Volk Eye Check’s Lithium-Ion battery. -
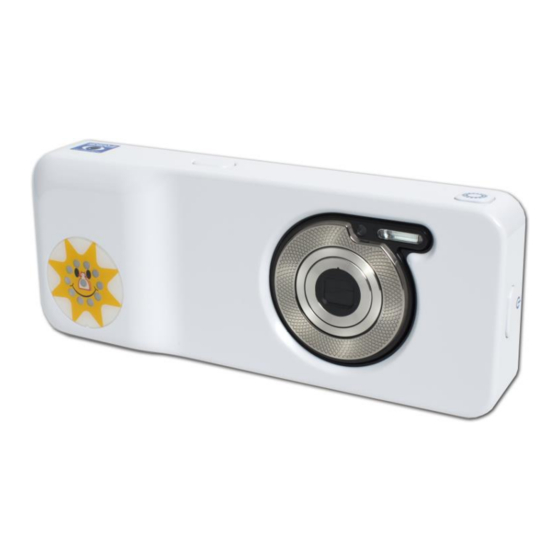
Page 6: Hardware Controls And Connectors
CL or OP mode. FIXATION TARGET Flashes when activated by the Attract Button (See item 4), the 10 Front of device patient should look at this when using Eye Check mode. IM-078 Rev. F Page 6 of 42 1... -
Page 7: Soft Controls
Icon Purpose Eye Check Selects Eye Check (EC) mode when in the Mode Selection screen. Mode Icon: Displays the regulatory labels when in the EC Patient Details screen. Returns to EC Patient Details screen when in any other EC screen. -
Page 8: Environment And Photo-Taking Indicators
Zoom: Lens zoom setting. Preset to Z5. Battery: Indicates percentage remaining battery charge. Gaze indicator – EC: Displayed when in Eye Check mode to remind the user that the subject’s gaze should be directed to the fixation target. Gaze indicator – CL & OP: Displayed when in Contact Lens or Oculoplastics mode to remind the user that the subject’s gaze should be directed to the center of the lens... -
Page 9: Preparation
The device will not function if the remaining battery charge falls below 15%. Language Selection Once the Eye Check device is prepared for first use, power it on with a long press on the power button. The following screen will be displayed –... -
Page 10: Initial Settings
Initial Settings If not already on, power-up the device on with a long press on the power button. After completing a short self- test, the Volk Eye Check Mode Selection screen will appear. Mode Selection Screen Swipe left on the Mode Selection screen to display the Utility screen Utility Screen Swipe right on the Utility screen to return to the Mode Selection screen. -
Page 11: Device Settings
Device Settings From the Utility Screen touch the Device Settings icon. This will display a menu of items relating to the Volk Eye Check hardware as shown below. Scroll the screen to locate the wireless and date/time settings. Device Settings Menu Enable WiFi functionality: 1. -
Page 12: Authorisation Code
Authorization Code The first time any one of the three mode icons (Eye Check, Contact Lens or Oculoplastics) the device will prompt for an authorization code. This code will be provided during the user training session that will be arranged by the device supplier. -
Page 13: Application Settings
Application Settings From the Mode Selection Screen, touch the Eye Check icon to start the Eye Check application. The first screen to be displayed is Patient Details. Eye Check Mode - Patient Details Screen Touch the gear-wheel icon on the right side of the screen to access the main Application Settings screen. - Page 14 Touch the Advanced button to access the second Application Settings screen. Advanced Application Settings screen Setting Purpose User Prefix A 1-3 character prefix which is added to all patient IDs. Useful to distinguish between multiple devices in a common environment. Email address Enter the address where the email reports should be sent.
-
Page 15: Basic Use - Start Up, Shut Down, And Capturing An Image
Setting Purpose Add grid image When checked and Upload is enabled, the grid images produced in CL and OP modes to upload will be uploaded along with the rest of the data and a separate email will be sent containing the full-res image. Password When the grid image is set to be uploaded, checking this option will resulting in the protect grid... -
Page 16: Operational Modes - "Eye Check", "Contact Lens" And "Oculoplastics
The key features of each mode are as follows: Eye Check mode provides measurements of deviation, pupil and iris size and MRD. It is typically used in eye medicine, to assist in the detection, diagnostics and treatment of eye conditions such as strabismus, anisocoria, ptosis and others. - Page 17 IPD Input Dialog Precision Sticker: An optional Precision Sticker may be applied to the patient’s forehead as shown below. Long-press the IPD field to confirm the use of a sticker. Positioning of an optional Precision Sticker This can be used instead of inputting IPD IM-078 Rev.
- Page 18 Long-press the IPD field to confirm the use of a sticker K VALUES: Used only in Contact Lens mode, 1 or 2 K Values per eye may be entered. If all four are input (2 per eye) then the measurements output and reports will include the calculated sag value for each eye.
- Page 19 LEDs will be activated all the time this button is pressed. The patient is required to look at this target throughout an Eye Check mode photo capture session. When using Contact Lens or Oculoplastics modes, the patient must look directly at the camera lens.
- Page 20 Picture-taking screen in Contact Lens mode Note: Patient is looking directly at the camera lens as directed by the gaze indicator Picture-taking screen in Oculoplastics mode Note: Patient is looking directly at the camera lens as directed by the gaze indicator 9.
-
Page 21: Measurements Provided By The Volk Eye Check Device
A measurement report may be saved local for retrieval later or the same report can be emailed automatically. Scrolling measurements display from an Eye Check (EC) mode session IM-078 Rev. F Page 21 of 42 1... - Page 22 Scrolling measurements display from a Contact Lens (CL) mode session Scrolling measurements display from an Oculoplastics (OP) mode session Grid” image as created by an Oculoplastics or Contact Lens session. Each dark square represents 5mm x 5mm on the patient’s face. Each lighter square is 1mm x 1mm IM-078 Rev.
- Page 23 The table below lists all of the ocular measurements provided in the Volk Eye Check session analysis: Each mode will display a targeted sub-set of these measurements in the screen and printed reports. Measurement Abbreviation Definition Mode Pupil size (L&R)
-
Page 24: Reviewing Patient Measurement Data
Four sessions (2x EC, 1x CL and 1x OP) all for the same patient The high-resolution images taken by the device are required only for the analysis stages of each Volk Eye Check session, in order to produce the measurement data. These images are not stored on the device and will not be available to the practitioner. -
Page 25: Wifi Upload
WiFi connectivity permitting. To check if the upload has been successful, Launch Volk Eye Check using any one of the mode icons on the Mode Selection Screen. Open the patient database using the review icon on the left side. The database is organized in numerical/alphabetical patient ID order. - Page 26 Accessing Eye Check files via PC Connection Attaching Volk Eye Check to your Computer 1. Connect the device to a personal computer (PC or Mac) using the supplied USB cable. 2. Once connected return to the device, open the Utilities screen then touch device settings 3.
- Page 27 2. Please note: The session reports will only be generated if the Session Data: Report option is checked () in the Application Settings screen. 3. Please eject the Eye Check device before disconnecting the USB cable (See section 3). IM-078 Rev. F...
- Page 28 Eject device from the computer BEFORE disconnecting It is important that the Eye Check device is properly ejected from the computer before disconnecting the USB cable. This is done as follows – Using Windows: 1. Locate the Media Eject control on the system tray (usually bottom right of the screen) and click it 2.
-
Page 29: Pre-Loading Patient Details
Pre-loading Patient details To pre-load and save patient details to the device database prior to use, follow the instructions below: 1. Enter the patient ID screen via the Eye Check, Contact Lens or Oculoplastics icon on the Mode Selection Screen. - Page 30 6. Return to the Mode Selection Screen; select the EC, CL or OP icon to start a session. 7. Long press the PatientID field, this will display the contents of the uploaded .csv file. Scroll through the database to select the required patient. Once selected the user will be returned to the patient details screen with the other data fields now populated from the chosen record.
-
Page 31: Starting A New Session For A Patient Already In The Database
Choosing Export from the Patient Review long-press menu will gather together all thumbnail images, grid images and report files for that patient in to a folder on the Eye Check memory card. The name of the folder will be the Patient Reference. - Page 32 Options from long press on the start control 3. The lens will extend and automatically be set to the correct zoom setting. There is a short lag as the lens extends out and the device prepares the new session. 4. Hold the camera comfortably but firmly with two hands to avoid shaking. Frame the area of interest on the subject’s face.
-
Page 33: How To Update Volk Eye Check Software
To update your Volk Eye Check to the latest software (when available) follow the steps below: 1. Refer to the section titled Data Transfer via PC connection and connect the Volk Eye Check to a PC using the steps 1-6. -
Page 34: System Messages
System Messages The Volk Eye Check device will display messages for many reasons. The messages usually include an explanation and details of possible corrective actions. List of messages displayed by the Volk Eye Check application: Error message: What to do: A capture session will not be possible unless all mandatory fields (indicated by an ‘*’) -
Page 35: Cleaning Instructions
Device Maintenance and Servicing Volk Eye Check contains a Lithium-ion (Li-ion) battery that operates the camera. The service life of the battery is approximately 2 years, depending on usage. The battery should only be replaced by the Volk Optical or a Volk Optical certified service facility when the battery is approaching the end of its service life, or when it ceases electrical functionality. -
Page 36: Calibration
Volk Optical or a Volk Optical certified service facility. Calibration Volk Eye Check is factory calibrated during the manufacture of the camera. This calibration process will last the lifetime of the product. No further calibration by the user is required. -
Page 37: Technical Description
Technical Description Volk Eye Check Ophthalmic measurements Left and right pupil size Pupil size difference Deviation Inter-pupillary distance (IPD) Left and right horizontal visible iris diameter (HVID) HVID difference Left and right vertical iris diameter Left and right diagonal iris diameter... -
Page 38: Environmental Conditions For Use, Storage And Transportation
500 hPa to 1060 hPa Serial numbering Volk Eye Check is a serialized product. A label indicating the serial number is attached to the base of the device. First screen of the regulatory label sequence The software version and the serial number are both displayed on the device’s display during start up and are accessible via the user interface. -
Page 39: Intellectual Property Rights Information
Warranty Volk Optical provides a 1 year warranty for the parts and labor. Warranty for the Lithium-Ion battery is 6 months. Submitting claim: Any claim under this warranty must be submitted in writing before the end of warranty period to Volk Optical. -
Page 40: Appendix A - Fcc Statement
Appendix A – FCC Statement Electromagnetic compatibility information US notice Wireless LAN frequency range 2412 MHz ~ 2462 MHz Federal Communication Commission Interference Statement This device complies with Part 15 of the FCC Rules. Operation is subject to the following two conditions: (1) This device may not cause harmful interference, and (2) this device must accept any interference received, including interference that may cause undesired operation. -
Page 41: Appendix B - Replacing The Aaa Batteries
Two AAA batteries are included within the device to operate the flashing LED on the front of the camera. The user can follow the instructions below to replace the batteries. Alternatively, Volk Optical, and/or Volk Optical’s retailers will provide battery replacement service. - Page 42 Phone: 440-942-6161 Toll free within the United States: 1-800-345-8655 Fax: 440-942-2257 Email: volk@volk.com Website: www.volk.com Copyright © 2015 Volk Optical Inc. Part No. IM-078 Revision: F Effective: July 6, 2016 Instructions for Use (IFU) available at: http://volk.com/eyecheck/literature/ IM-078 Rev. F...
Need help?
Do you have a question about the Eye Check and is the answer not in the manual?
Questions and answers