Table of Contents
Advertisement
001
LonWorks Airstage Communication Cable Changes
To help eliminate Airstage communication wiring installation issues, Fujitsu is standardizing on a specific
model of LonWorks cable that can be used on all Airstage VRF installations. Fujitsu will be providing the
cable as an Airstage Part. Currently, the cable is available in 250 Ft and 500 Ft spool/reel sizes. This
LonWorks cable shall be the ONLY APPROVED LONWORKS CABLE to be used on any Airstage
system installation. The approval of the Extended Warranty shall be contingent on the use of this cable.
The Airstage Parts for the Fujitsu LonWorks cables are the following:
Cable Type
Level 4 NEMA
22AWG
This addendum information shall supersede any LonWorks cable requirements listed in any of the
Airstage Design & Technical Manuals or Installation Manuals.
Design & Technical Manual for Airstage V-II 208/230V, 60Hz
Design & Technical Manual for Airstage V-II 460V, 60Hz
Design & Technical Manual for Airstage VR-II 208/230V, 60Hz
Design & Technical Manual for Airstage VR-II 460V, 60Hz
Design & Technical Manual for Airstage J-II 208/230V, 60Hz
Design & Technical Manual for Outdoor Air Unit 208/230V, 60Hz
Fujitsu Airstage VRF system wiring detail:
© 2016 Fujitsu General America, Inc.
Pairs
Details
1
250ft LonWorks Shielded cable
1
500ft LonWorks Shielded cable
LonWorks
Transmission line
March 2016
Catalog Number
K00250LW
K00500LW
LonWorks
Transmission line
Remote
controller wire
1
Advertisement
Table of Contents

Related Manuals for Fujitsu AOU36RLAVM


Summary of Contents for Fujitsu AOU36RLAVM
- Page 1 To help eliminate Airstage communication wiring installation issues, Fujitsu is standardizing on a specific model of LonWorks cable that can be used on all Airstage VRF installations. Fujitsu will be providing the cable as an Airstage Part. Currently, the cable is available in 250 Ft and 500 Ft spool/reel sizes. This LonWorks cable shall be the ONLY APPROVED LONWORKS CABLE to be used on any Airstage system installation.
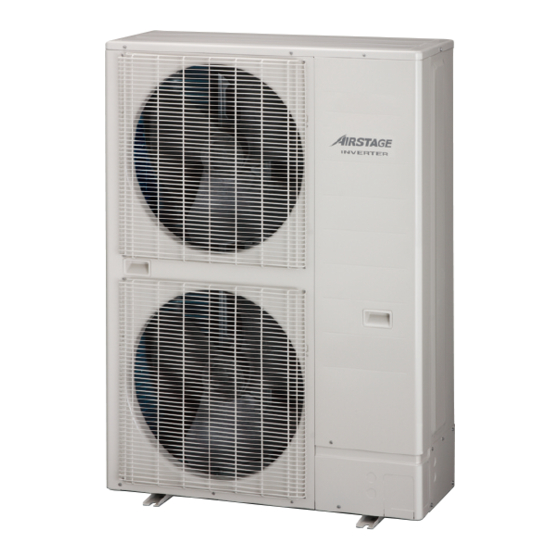
- Page 2 INSTALLATION MANUAL OUTDOOR UNIT For authorized service personnel only. MANUEL D’INSTALLATION UNITÉ EXTÉRIEURE Pour le personnel agréé uniquement MANUAL DE INSTALACIÓN UNIDAD EXTERIOR Solo para personal de servicio autorizado AOU36RLAVM AOU48RLAVM AOU60RLAVM PART NO. 9380545095...
-
Page 3: Table Of Contents
INSTALLATION MANUAL 1. SAFETY PRECAUTIONS OUTDOOR UNIT This installation manual describes how to install the outdoor unit only. To install the PART NO. 9380545095 indoor unit, refer to the installation manual included with the indoor unit. Contents IMPORTANT! SAFETY PRECAUTIONS ………………………………………………………………… 1 Please Read Before Starting This air conditioning system meets strict safety and operating standards. - Page 4 When Connecting Refrigerant Tubing CAUTION • Keep all tubing runs as short as possible. This unit must be installed by qualifi ed personnel with a capacity certifi cate for handling • Use the brazing method for connecting tubing. refrigerant fl uids. Refer to regulation and laws in use on installation place. •...
-
Page 5: About This Product
2. ABOUT THIS PRODUCT 2. 4. Optional parts 2. 1. Precautions for using R410A refrigerant CAUTION The following parts are optional parts specifi c to R410A refrigerant. Pay careful attention to the following points: Do not use parts other than those listed below. Since the working pressure is 1.6 times higher than that of R22 models, some of the pip- 2. -
Page 6: Drain Processing
3. 3. 1. Single outdoor unit installation 3. 2. Drain processing When the upward area is open Unit: in (mm) CAUTION (1) Obstacles at rear only (2) Obstacles at rear and sides only Perform drain work in accordance with this Manual, and ensure that the drain water is properly drained. -
Page 7: Transporting The Unit
3. 3. 3. Outdoor units installation in multi row Unit: in (mm) Do not install directly on the ground, this may result in equipment failure. * The following settings are not recommended in case of cooling by a low outside tempera- Make sure the height of the base is 2 in (50 mm) from the ture. -
Page 8: Protection Of Pipes
*3 [Btu] A : Outdoor unit or Refrigerant branch kit Liquid pipe Gas pipe Liquid pipe Gas pipe B : Indoor unit or Refrigerant branch kit AOU36RLAVM 36,000 3/8 (9.52) 5/8 (15.88) 3/8 (9.52) 3/4 (19.05) AOU48RLAVM 48,000 3/8 (9.52) 5/8 (15.88) -
Page 9: Opening The Knockout Hole
5. 3. Opening the knockout hole Dimension A [in (mm)] Dimension B 0 (0) (-0.4) Pipe outside diameter -0.015 Flare tool for R410A, clutch [in (mm)] [in (mm)] CAUTION type 1/4 (6.35) 3/8 (9.1) Be careful not to deform or scratch the panel while opening the knockout holes. 3/8 (9.52) 1/2 (13.2) To protect the piping insulation after opening a knockout hole, remove any burrs from... -
Page 10: Electrical Wiring
Blank cap 6. ELECTRICAL WIRING Flare nut Torque wrench 6. 1. The precautions of electrical wiring 90° WARNING Wiring connections must be performed by a qualifi ed person in accordance with Holding specifi cations. wrench The rated supply of this product is 60 Hz, 208/230 V of 1-phase. Use a voltage within the Torque wrench range of 187-264 V Flare nut [in (mm)]... -
Page 11: Knockout Hole
MAX. CKT. BKR GFEB When the total number of units* is over 64. Transmission line length between each unit* ≥ 1,312 ft (400 m) AOU36RLAVM 33 A 30 mA (2) Length of transmission cable between 1 network segment (NS) AOU48RLAVM 40 A 0.1 sec or less... -
Page 12: Wiring Method
Fig. 2 6. 5. Wiring method NOTE: NS 1 Outdoor unit Do not use loop wiring. 6. 5. 1. Connection diagrams This may lead to parts Indoor unit damage and erroneous Power supply Breaker 1: Ground Fault Equipment operation. 208/230V ~ 60Hz Breaker (GFEB) Terminal resistor Breaker 2: Maximum Circuit Breaker... -
Page 13: External Input And External Output
Installation method of conduit plate Power supply terminal Please fi x the conduit plate (accessory) as shown in the fi gure below. Transmission terminal (M3) Front connection Lateral connection Rear connection Ring terminal (M5) Earth (ground) cable Conduit plate lock nut Cable tie (accessory) Conduit... - Page 14 6. 6. 2. External input terminal 6. 6. 3. External output terminal Setting to low noise mode, cooling priority/heating priority selection, outdoor unit operation You can detect the operation condition of outdoor unit and the abnormal situation of both peak control setting, emergency/batch stop and electricity meter pulse are possible from indoor and outdoor unit.
-
Page 15: Field Setting
Figure: Terminal resistor setting 7. FIELD SETTING NS1 (Network segment 1) (Set terminal resistor at outdoor units) CAUTION Terminal resistor: on Discharge the static electricity from your body before setting up the DIP switches. Never touch the terminals or the patterns on the parts that are mounted on the PC board. Refrigerant system1 Master unit Terminal resistor: off... - Page 16 Switching between 42.8°F (6°C) Batch stop batch stop or 14.0°F (-10°C) Emergency stop emergency stop *1 17.6°F (-8°C) This mode selects the pattern of the stop function to be operated by the external input 21.2°F (-6°C) terminal (CN134). •...
- Page 17 (1) Turn on the power of the outdoor unit and enter standby mode. 1: Function setting • When system is normal POWER/MODE lamp lights up. (ERROR lamp is off.) First 2 digits Last 2 digits 7 segment LED display POWER/MODE lamp: ERROR lamp: OFF (LED 105, LED 104) POWER...
-
Page 18: Address Setting For Signal Amplifi Ers
Refrigerant system1 7. 5. Address setting for signal amplifi ers Signal amplifi er 7. 5. 1. Address setting for signal amplifi ers Master unit When using signal amplifi ers, the address for signal amplifi ers must be set. Refrigerant system2 The address for signal amplifi... -
Page 19: Resistance Measurement Of Transmission Cable (Measure With Breaker Off)
7. 7. Resistance measurement of transmission cable 8. 1. Sealing test - Pressure (leak) testing (Measure with breaker OFF) CAUTION CAUTION Use only nitrogen gas. Never use refrigerant gas, oxygen, fl ammable gas or poisonous gas to pressurize the Do not turn on the power if the resistance between the terminals of the transmission system. -
Page 20: Additional Charging
“B” “a” Model Factory charged Diameter of liquid Additional amount amount [lbs (kg)] pipe [in (mm)] for pipe length [lbs/ft (kg/m)] AOU36RLAVM 10.58 (4.80) AOU48RLAVM 11.68 (5.30) Ø 1/4 (6.35) 0.014 (0.021) AOU60RLAVM 11.68 (5.30) Ø 3/8 (9.52) 0.039 (0.058) (1) Calculation of additional amount for pipe length Total length of ø... -
Page 21: Test Run
9. TEST RUN (*1) Confi rm the number of connected indoor units 9. 1. Indoor unit connection check and the volume ratio of the indoor units con- nection. Normal operation will not be possible without performing the Indoor unit connection check. (*1) The number of connected 9. -
Page 22: Test Run
9. 2. Test run Function settings Before the test operation, check the following items. (1) Is there a gas leakage? (At pipe connections {fl ange connections and brazed areas}) First 2 digits Last 2 digits (2) Is the system charged with the specifi ed volume of refrigerant? (3) Is the refrigerant circuit address correct? (4) Is a breaker installed at the power supply cable of outdoor unit? MODE/EXIT... -
Page 23: Checklist
1 Outdoor unit inverter compressor start up error 9. 4. Checklist 1 Outdoor unit trip detection Outdoor unit compressor motor loss of synchroni- Check description Check method Criteria zation Cooling: low pressure approx. 1 Outdoor unit fan motor 1 lock error High and low pressure Check it with a 116 psi (0.8 MPa)
Need help?
Do you have a question about the AOU36RLAVM and is the answer not in the manual?
Questions and answers