Table of Contents
Advertisement
Advertisement
Table of Contents

Related Manuals for Haldex EB+ Soft Docking


Summary of Contents for Haldex EB+ Soft Docking
- Page 1 INSTALLATION GUIDE Soft Docking Innovative Vehicle Solutions...
- Page 2 › No legal rights can be derived from the contents of the manual a) A teaching aid following supervision of a Haldex › Duplication, translation and reprinting are prohibited engineer. without permission from Haldex Brake Products b) A reminder of the correct procedure of Haldex EB+ Soft Docking installation.
-
Page 3: Table Of Contents
Chassis components ..........5 Operating instructions ..........45 Sensor cables ............12 Conditions of no detection ........46 Installation of EB+ Soft Docking ECU ....... 14 Error repair .............. 48 Installation of LED outline marker light ..... 15 Liability exclusion ............. 49 Installation of audio beeper ........ -
Page 4: Introduction
Introduction EB+ Soft Docking is a system for detecting the presence of a dock (‘ramp’ or ‘loading bay’) within 2.5 m, warning the driver of the distance via flashing side marker lights and audio beeper at a rate dependent on distance and automatically applying the brakes to halt the vehicle (or reduce the impact speed) at 1 m from the dock. -
Page 5: Chassis Components
(364 622 xxx, see page 12) to reach the sensor location. Item Description Part number Notes EB+ Soft Docking ECU 364 608 001 Outline marker and brake cable (open wires) 364 606 xxx Green connector on ECU LED outline marker lamp (left) - Page 6 Item Description Part number Notes EB+ Soft Docking ECU 364 608 001 Outline marker and brake cable (open wires) 364 606 xxx Green connector on ECU LED outline marker lamp (left) 364 617 xxx LED outline marker lamp (right)
- Page 7 Item Description Part number Notes EB+ Soft Docking ECU 364 608 001 Outline marker and brake cable (open wires) 364 606 xxx Green connector on ECU LED outline marker lamp (left) 364 617 xxx LED outline marker lamp (right)
- Page 8 Item Description Part number Notes EB+ Soft Docking ECU 364 608 001 Outline marker and brake cable (open wires) 364 606 xxx Green connector on ECU LED outline marker lamp (left) 364 617 xxx LED outline marker lamp (right)
- Page 9 Item Description Part number Notes EB+ Soft Docking ECU 364 608 001 Outline marker and brake cable (open wires) 364 606 xxx Green connector on ECU LED outline marker lamp (left) 364 617 xxx LED outline marker lamp (right)
- Page 10 Item Description Part number Notes EB+ Soft Docking ECU 364 608 001 Outline marker and brake cable (open wires) 364 606 xxx Green connector on ECU LED outline marker lamp (left) 364 617 xxx LED outline marker lamp (right)
- Page 11 Item Description Part number Notes EB+ Soft Docking ECU 364 608 001 Outline marker and brake cable (open wires) 364 606 xxx Green connector on ECU LED outline marker lamp (left) 364 617 xxx LED outline marker lamp (right)
-
Page 12: Sensor Cables
EB+ Soft Docking Installation guide Sensor cables The EB+ Soft Docking ultrasonic sensor cables can be extended by using a combination of extension and splitter cables. Sensor extension cable Cable to increase the sensor distance from the ECU Sensor splitter cable 364 622 001 1.0 m... - Page 13 EB+ Soft Docking Extension cable location The sensor extension cable is used to increase the length of the cable from the EB+ Soft Docking ECU to the ultrasonic sensor. The sensor extension cable can be used anywhere and in any combination within the sensor loom to ensure the cable is long enough to reach the mounted sensor on the trailer.
-
Page 14: Installation Of Eb+ Soft Docking Ecu
Don’t expose the product below -40 °C and above 80 °C. For example, do not place the product in a paint oven (temperature > 80 °C). Fit the EB+ Soft Docking after painting. The position of the ECU box should be in a suitably protected position in the rear part of the trailer. -
Page 15: Installation Of Led Outline Marker Light
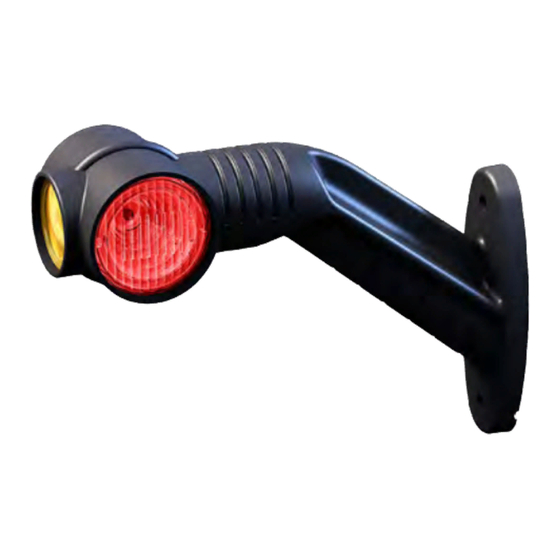
Fit on a flat surface If the EB+ Soft Docking is plugged into a 12 V supply, choose two 12 V end outline marker lamps. If the EB+ Soft Docking is plugged into a 24 V supply, choose two 24 V end outline marker lamps. -
Page 16: Installation Of Audio Beeper
(to let water flow). The audio beeper connector should be plugged into the EB+ Soft Docking cable part number 364 605 0xx. In case of accidental liquid projection inside the beeper, Bottom the beeper sound could be reduced momentarily. -
Page 17: Installation Of Power Supply Adapter Cable
Installation of power supply adapter cable Connection to Haldex EB+ Gen3 unit EB+ CAN cable connection The EB+ Soft Docking system only works with EB+ Gen3 systems. Plug the auxiliary CAN cable into one of the CAN auxiliary ports on the EB+ Gen3 unit, ensure correct polarity is maintained. -
Page 18: Installation Of Ultrasonic Sensor
EB+ Soft Docking Installation guide Installation of ultrasonic sensor The sensors must be correctly fitted for the device to work properly. If the sensors point to the ground, irregularities and Ultrasonic bumps on the surface may be interpreted as obstacles. - Page 19 Installation guide EB+ Soft Docking Mounting of sensor Mounting dimensions Maximum torque : 7.0 N.m Fixing: M6 stainless steel screw Obstacle: No obstacle shall be found in a 45° cone. 44 mm Mounting Rules : › Minimum 1 sensor per line (yellow channel and green channel) ›...
- Page 20 EB+ Soft Docking Installation guide Sensor adjustment If you cannot position the sensor assembly on the outermost area of the rear panel, you can adjust the angular detection of the sensors by using the sensor notches. 1 x 6° To adjust sensor, press firmly on the centre of the 1 x 6°...
- Page 21 Fix the sensor with two fixing screws onto the trailer. Plug the cable into the connector from the EB+ Soft Docking cable loom. See below, the yellow shaded zone shall be free of any object when installing the sensor.
- Page 22 Fix the sensor with two fixing screws onto the trailer. Plug the cable into the connector from the EB+ Soft Docking cable loom. See below, the yellow shaded zone shall be free of any object when installing the sensor.
- Page 23 0-60 cm (i.e. Physical Offset) to be used on the yellow and / or green channel. These offsets are programmed using latest version of DIAG+ software (downloadable on www.haldex.com) Note: The sensor offset does not change the sensor detection zone area, so any parts of the trailer that falls within this area will affect the Soft Docking system and give false errors.
- Page 24 EB+ Soft Docking Installation guide Installation error Care must be taken when choosing the location and orientation of the sensor on the trailer to ensure that the sensor detection zone does not clash with any part of the trailer and / or floor, especially when using the sensor offset.
-
Page 25: Configuring Eb+ Soft Docking Using Diag
Installation guide EB+ Soft Docking Configuring EB+ Soft Docking using DIAG+ The EB+ Soft Docking is configured using DIAG+ V6 software. The software and operators guide can be downloaded from the Findex section of the Haldex website. To download the software ›... - Page 26 EB+ Soft Docking Installation guide How to check if EB+ Soft Docking is installed Step 1: Step 4: Turn 'on' the power to the EB+ Gen3. Select CAN BUS tab. Open DIAG+, select configuration. Step 2: Step 5: Select ECU parameters / configuration.
- Page 27 Installation guide EB+ Soft Docking How to remove EB+ Soft Docking from EB+ Gen3 Step 1: Step 4: Turn 'on' the power to the EB+ Gen3. Select CAN BUS tab. Open DIAG+, select configuration. Step 2: Step 5: Select ECU parameters / configuration.
- Page 28 Select 'green' tick to complete the operation. Step 9: Step 13: Remove EB+ Soft Docking CAN BUS cable from EB+ Check using DIAG+ that the EB+ Soft Docking has now Gen3 ECU. been removed. EB+ CAN BUS cable Innovative Vehicle Solutions...
- Page 29 Installation guide EB+ Soft Docking How to install a 3 sensor (1 x yellow & 2 x green) EB+ Soft Docking system using DIAG+ Step 1: Step 7: Turn 'off' the power to EB+ Gen3. Read data from ECU. Step 2: Connect EB+ Soft Docking to the EB+ CAN BUS connector.
- Page 30 EB+ Soft Docking Installation guide Step 11: Step 14: Observe the EB+ Soft Docking tick box. Ensure that the 'CAN Bus Termination' box is selected. Note: the 'CAN Bus termination' shall always be selected unless otherwise advised by Haldex. Step 12: Select 'Modify' button.
- Page 31 Installation guide EB+ Soft Docking Step 16: Offset example: If no sensor channel offsets are required, go to step 17. Both channels the same value. If sensor channel offsets are required, go to step 18. Step 17: Proceed to EOLT.
- Page 32 EB+ Soft Docking Installation guide Step 19: Click on 'green' ticks until you reach 'Online Configuration and ECU Programming' window. Step 20: Select 'Send data to ECU'. Step 21: Select 'Yes' to send data to ECU. Step 22: Click green tick to return to DIAG+ home page.
- Page 33 Installation guide EB+ Soft Docking How to configure a sensor channel offset Step 1: Step 4: Turn 'on' the power to the EB+ Gen3. Select CAN BUS tab. Open DIAG+, select configuration. Step 2: Step 5: Select ECU parameters / configuration.
- Page 34 EB+ Soft Docking Installation guide Step 6: Offset example: Adjust channel values to sensor installation offset. Both channels are different values. Offset example: Step 7: Both channels the same value. Click on 'green' ticks until you reach 'Online Configuration and ECU Programming' window.
- Page 35 Installation guide EB+ Soft Docking Step 9: Select 'Yes' to send data to ECU. Step 10: Click green tick to return to DIAG+ home page. 2020 Innovative Vehicle Solutions...
- Page 36 Step 2: Open DIAG+, select service. DTC error: EE data mismatch - sensor mismatch between EB+ Gen3 stored data and EB+ Soft Docking stored data. Reset EB+ Gen3 to remove this error. Step 3: Select DTC's. Step 4: Check 'Diagnostic Trouble Code' window for any active DTC's.
- Page 37 Installation guide EB+ Soft Docking Step 5: Step 9: Click on 'green' ticks until you reach the DIAG+ home Select CAN BUS tab. window. Step 6: Select configuration. Step 10: Select "Modify" button. Step 7: Select ECU parameters / configuration.
- Page 38 Based on the information obtained, replace a sensor with a new sensor. Turn 'on' the power to the EB+ Gen3. Use DIAG+ to check for any active DTC's. Repeat steps (a) to (d) until no active EB+ Soft Docking sensor DTC's are shown. Innovative Vehicle Solutions 2020...
- Page 39 Installation guide EB+ Soft Docking How to complete EB+ Soft Docking EOLT using DIAG+ for a 3 sensor (1 x yellow & 2 x green) system Step 1: Step 5: Turn 'on' the power to the EB+ Gen3. No active DTC's present, start EOLT.
- Page 40 EB+ Soft Docking Installation guide Step 8: Step 9: Tick the EB+ Soft Docking box. Select 'arrow' to start the EOLT. EOLT option: Step 10: If required, tick the 'Pause Between Tests' box. Check 'Actual Sensors' displayed value is correct.
- Page 41 Installation guide EB+ Soft Docking Step 11: Step 14: Select 'OK' button. Activate the sensor on the yellow channel. Step 12: Select vehicle reverse gear. Sensor activation sequence: The sensor is activated / detected using a solid object (see example) placed at 150 mm in front of the sensor.
- Page 42 EB+ Soft Docking Installation guide Test sequence: Step 15: Sensor on the yellow channel has been detected (S1 › Marker lights flashing. box green). Activate any sensor on the green channel. › Place a solid object 150 mm away from the sensor face.
- Page 43 Installation guide EB+ Soft Docking Step 17: Step 20: Sensor on green channel has been detected (S2 box Disable vehicle reverse gear. green). Step 21: Step 18: EOLT completed. Select / click the correct button. Step 19: Step 22: Select / click correct button.
-
Page 44: Functional Test
EB+ Soft Docking Installation guide Functional test After the successful completion of the DIAG+ EOLT, you should test the system thoroughly. For this test you require a test sample (preferred material is a cardboard box approx. 500 x 500 mm, if there is no box available, you can use a similar object material with a smooth surface). -
Page 45: Operating Instructions
Operating instructions The complete system is installed into the last third of the trailer. Thus the EB+ Soft Docking is independent of the truck and also very well suited for changes of the truck and trailer combination. Engage the reverse gear to activate the system. -
Page 46: Conditions Of No Detection
The system cannot replace the driver’s responsibility to ensure a clear passage when manoeuvring. The operation needs to be tested on a vehicle after installation. The vehicle requires Haldex EB+ Gen3 2M or 3M systems to function. Innovative Vehicle Solutions... - Page 47 Installation guide EB+ Soft Docking Except for a complete failure of the system the following situations can lead to an erroneous signal. The reason for this is that in these cases, the physical limits of the ultrasonic sound are exceeded.
-
Page 48: Error Repair
EB+ Soft Docking is protected against an AC voltage supply, but will not function. It will function again correctly when reconnected with a DC supply. If the EBS is not powered (or EB+ Soft Docking is unplugged), the lights will be switched off when position function is activated. The system will not operate. -
Page 49: Liability Exclusion
EB+ Soft Docking Liability exclusion The system is not 100% accurate under all circumstances. When using the EB+ Soft Docking system the driver must manoeuvre with care and attention up to the dock / ramp. Haldex cannot be held responsible for any damage that may occur when using the system. -
Page 50: Excess Cable
EB+ Soft Docking Installation guide Excess cable Excess cable must not be allowed to hang free, but must be attached to the chassis to prevent damage due to vibration and abrasion. Ø150 max 100 min Cable lengths less than 1 m to be coiled into loops of 100 mm minimum and 150 mm maximum diameter. -
Page 51: Painting
Bleeper Painting recommendations: water based, baking for 1 hour @ 100oC Electro static painting: Haldex recommends that the EB+ Soft Docking assembly is fitted to the trailer after electro static painting. Sensor 2020 Innovative Vehicle Solutions... -
Page 52: Part Reference
EB+ Soft Docking Installation guide Part reference These available service parts can be obtained from Haldex service centres or distributors. EB+ Soft Docking ECU The ECU receives sensor information, determines the system status, and sends it to the EBS via the trailer CAN. - Page 53 Installation guide EB+ Soft Docking Outline marker lamps and brake cables Used to connect the EB+ Soft Docking ECU (green connector) to the EB+ Gen3 and trailer wiring loom. Outline marker lamps and brake loom Part number Outline markers with molded marker connectors...
- Page 54 EB+ Soft Docking Installation guide Sensors and audio beeper cables Beeper connection Used to connect the EB+ Soft Docking ECU (brown connector) to the sensors and audio beeper. Green sensor Yellow sensor channel channel Sensors and audio beeper loom Part number...
- Page 55 Installation guide EB+ Soft Docking Audio beeper (audible warning system) The audio beeper is used to warn the driver of the distance to the obstacle. EB+ Soft Docking audio beeper Part number Audio beeper 364 616 001 Ultrasonic sensor Used to calculate the distance to the obstacle.
- Page 56 EB+ Soft Docking Installation guide Sensor extension cable Cable to increase the sensor distance from the ECU Sensor splitter cable 364 622 001 1.0 m 364 622 011 3.0 m 364 622 021 6.0 m Refer to customer drawings for cable dimensions...
- Page 57 Installation guide EB+ Soft Docking 2020 Innovative Vehicle Solutions...
- Page 58 EB+ Soft Docking Installation guide Innovative Vehicle Solutions 2020...
- Page 59 Installation guide EB+ Soft Docking 2020 Innovative Vehicle Solutions...
- Page 60 EB+ Soft Docking Installation guide Innovative Vehicle Solutions 2020...
- Page 61 Installation guide EB+ Soft Docking 2020 Innovative Vehicle Solutions...
- Page 62 EB+ Soft Docking Installation guide Innovative Vehicle Solutions 2020...
- Page 63 Installation guide EB+ Soft Docking 2020 Innovative Vehicle Solutions...
- Page 64 EB+ Soft Docking Installation guide Innovative Vehicle Solutions 2020...
- Page 65 Installation guide EB+ Soft Docking 2020 Innovative Vehicle Solutions...
- Page 66 EB+ Soft Docking Installation guide Innovative Vehicle Solutions 2020...
- Page 67 Installation guide EB+ Soft Docking 2020 Innovative Vehicle Solutions...
- Page 68 EB+ Soft Docking Installation guide Innovative Vehicle Solutions 2020...
- Page 69 Installation guide EB+ Soft Docking 2020 Innovative Vehicle Solutions...
- Page 70 EB+ Soft Docking Installation guide Innovative Vehicle Solutions 2020...
- Page 71 Installation guide EB+ Soft Docking 2020 Innovative Vehicle Solutions...
- Page 72 Tel.: +1 816 891 2470 Fax: +1 816 891 9447 E-Mail: info.us@haldex.com ©2020, Haldex AB. This material may contain Haldex trademarks and third party trademarks, trade names, corporate logos, graphics and emblems which are the property of their respective companies. The...
Need help?
Do you have a question about the EB+ Soft Docking and is the answer not in the manual?
Questions and answers