Table of Contents
Advertisement
Quick Links
Advertisement
Table of Contents

Related Manuals for Prism Sound MDIO-Dante


Summary of Contents for Prism Sound MDIO-Dante
- Page 1 MDIO-Dante Module Operation Manual...
-
Page 3: Table Of Contents
Switched Mode ............................24 Multi-cast ..............................25 AES67 ................................25 Switching to MDIO-Dante Mode .......................... 25 The Prism Sound Control Panel ..........................25 Appendix 1 - Front Panel LEDs ..........................29 Appendix 2 - Installing the MDIO-PTHDX module ....................31... -
Page 4: General Information
TO PREVENT FIRE OR SHOCK HAZARD DO NOT EXPOSE THIS EQUIPMENT TO RAIN OR MOISTURE. REFER SERVICING TO QUALIFIED SERVICE PERSONNEL. Fitting the MDIO-Dante module to a suitable Prism Sound Interface requires the lid to be removed. There are dangerous voltages inside and installation must be referred to qualified personnel. - Page 5 THIS DIGITAL APPARATUS MEETS ALL CLASS B LIMITS FOR RADIO NOISE EMISSIONS AS LAID DOWN IN THE RADIO INTERFERENCE REGULATIONS OF THE CANADIAN DEPARTMENT OF COMMUNICATIONS. CET APPAREIL NUMÉRIQUE RESPECTE TOUTES LES EXIGIENCES APPLICABLES AUX APPAREILS NUMÉRIQUES DE CLASSE B SUR LE BROUILLAGE RADIOELECTRIQUE EDICTE PAR LE MINISTERE DES COMMUNICATIONS DU CANADA.
- Page 6 ©2019 - 2020 Audio Squadron Limited...
-
Page 7: Introduction
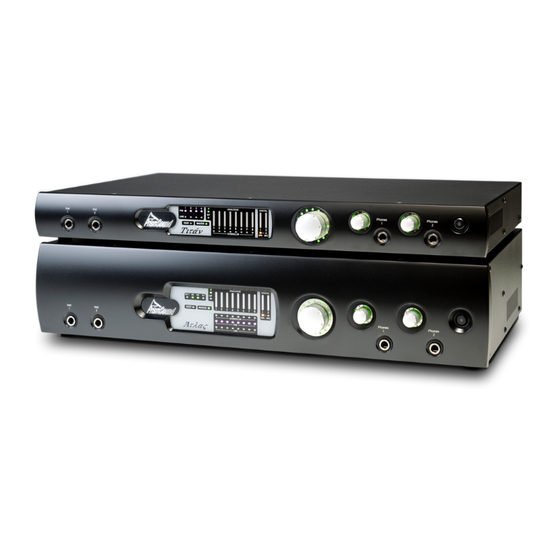
Terminology At the time of writing, the MDIO-Dante module can be used with either a Prism Sound Atlas or Prism Sound Titan interface unit. For the sake of simplicity, this document will refer to ‘Prism Sound Atlas’ or just ‘Atlas’ as... -
Page 8: Mdio Modules
There is a single MDIO module slot. If your Atlas already has the MDIO-PTHDX fitted, it will have to be removed before fitting the MDIO-Dante. There are details of how to fit the MDIO cards in Appendix 2. ©2019 - 2020 Audio Squadron Limited... -
Page 9: Quick Start Guide
2. Alternatively you may be fitting the MDIO-Dante to an existing unit. If this is an existing unit, it’s VERY important that BEFORE you fit the MDIO-Dante module you should update the unit in preparation. - Page 10 5. You may wish to make the connections to your audio inputs and outputs now. 6. Connect power to the Atlas unit(s). 7. Set each of them to MDIO-Dante mode by pressing and holding their Volume knob for four seconds. The Host LED on the front panel changes to red.
- Page 11 Prism Sound MDIO-Dante Module Operation Manual Revision 1.01 10. In Dante Controller’s Routing grid, make connections between the Atlas and your Dante Sound card. 11. When starting your DAW software, select the driver for the Dante soundcard. (i.e. DVS or the Dante PCIe card).
- Page 12 Prism Sound MDIO-Dante Module Operation Manual Revision 1.01 ©2019 - 2020 Audio Squadron Limited...
-
Page 13: Reference
Dante network. This document offers some simple information to help you to get started with Dante on the Prism Sound Atlas and Titan units but it will help to have some other knowledge of how to work with Dante. -
Page 14: Dante Controller
Prism Sound MDIO-Dante Module Operation Manual Revision 1.01 In order to control devices and to set up routings on the Dante network, you will need a computer attached to the network via its network port, and for it to be running the Dante Controller software…. - Page 15 Prism Sound MDIO-Dante Module Operation Manual Revision 1.01 Transmitters and Receivers ‘Transmitters’ (TX) are listed along the top; ‘Receivers’ (RX) down the left-hand side, and these names describe the devices’ relationship to the Dante Network. So, for instance one of Atlas’s Audio Inputs is a Transmitter – the audio received from a Line input or mic pre is being transmitted to the Dante network.
-
Page 16: Synchronisation
Prism Sound MDIO-Dante Module Operation Manual Revision 1.01 allow you to hear the audio. Likewise to record into your DAW, you will need to route an Atlas Transmitter to the DVS Receiver, and then assign that particular channel for recording in your DAW software. -
Page 17: Sample Rates
Prism Sound MDIO-Dante Module Operation Manual Revision 1.01 The Clock Status tab of the Dante Controller software is useful for giving you a picture of the synchronisation setup. Below is an example of a fairly simple setup, with an Atlas, a Titan and DVS – a Dante Virtual Soundcard. -
Page 18: Dante Pcie Card
Prism Sound MDIO-Dante Module Operation Manual Revision 1.01 Dante PCIe card The Dante PCIe cards offer much better performance than the Dante Virtual Soundcard in terms of number of tracks, latency and reliability of audio data. Several manufacturers make a Dante PCIe card – there is a list of currently available models on the Audinate site.. - Page 19 Prism Sound MDIO-Dante Module Operation Manual Revision 1.01 In the Device Config tab it’s possible to change the Device’s name – click in the box under ‘Rename Device’ and type. You will see some warnings that renaming a Device can break routings, so it would be a good idea to settle on some names now, before you spend too much time on complex routings.
- Page 20 Prism Sound MDIO-Dante Module Operation Manual Revision 1.01 And similarly in the Transmit tab, you can rename Atlas’s Inputs by clicking and typing into the Channel Label column. And in the Receive tab, you can rename a label in the Channel column.
- Page 21 Prism Sound MDIO-Dante Module Operation Manual Revision 1.01 If some of your I/O is permanently connected to other equipment, or for instance is used for microphones for artists or instruments, it could be a big advantage to name the Input or Output channel by the name of what’s connected.
-
Page 22: Some Dante Routing Examples
Prism Sound MDIO-Dante Module Operation Manual Revision 1.01 Some Dante Routing Examples Example 1 - Two Atlases Here we have a small expansion on the most basic setup. We have an Atlas and a Titan, routed to Dante Virtual Soundcard so that DVS’ inputs and outputs 1-16 are routed from/to The Atlas and Titan analogue Inputs and Outputs. -
Page 23: Redundant Mode
Dante offers the possibility of ‘redundant mode’ when devices support it. Redundancy allows two network paths so that if one route fails, the other can take over seamlessly. The Prism Sound MDIO-Dante module has two RJ45 network connections for this purpose. -
Page 24: Switched Mode
For instance multiple Atlas units could be connected to a single computer without using an Ethernet switch by using this method of connection… 1. Connect the Computer’s network port to the first Atlas MDIO-Dante module’s Primary port (labelled PRI - closest to the mains inlet). -
Page 25: Multi-Cast
The Prism Sound Control Panel In the standard USB mode, it’s possible to run the Prism Sound Control Panel app in order to control some of the settings and functions of the Atlas or Titan – metering of I/O, routings, mic pre settings, internal mixer levels, the setting of headphones, volume control etc. - Page 26 Prism Sound MDIO-Dante Module Operation Manual Revision 1.01 In MDIO-Dante mode there are some extra controls and displays which refer only to Dante mode… Device State Shows the status of the Dante module’s network connection – whether it’s Active or Disabled (or in an Error state) Port State Shows the synchronisation state of the Dante module –...
- Page 27 Prism Sound MDIO-Dante Module Operation Manual Revision 1.01 features that are available in USB mode – mixers, headphone Bus, volume control etc.etc. However, please note that ADAT inputs and outputs are not available in Dante mode. When switching between Dante mode and USB mode, it can take a few seconds before the Control Panel switches –...
- Page 28 Prism Sound MDIO-Dante Module Operation Manual Revision 1.01 ©2019 - 2020 Audio Squadron Limited...
-
Page 29: Appendix 1 - Front Panel Leds
Appendix 1 - Front Panel LEDs The front panel of both Prism Sound Atlas and Titan units have LED displays to show some key information. Because Atlas has a bigger case, there’s space for a bigger screen and more LEDs. - Page 30 Prism Sound MDIO-Dante Module Operation Manual Revision 1.01 LINE These light in GREEN when a TRS jack is connected to an analogue input to show that Line mode is selected on that channel. (The associated PRE LED will be unlit).
-
Page 31: Appendix 2 - Installing The Mdio-Pthdx Module
BEFORE FITTING the MDIO-Dante module, you MUST install the up to date software AND firmware. This must be done in the correct order – software first, firmware second. If the software is not updated first, it will not be possible to update the firmware. - Page 32 Hardware Installation 1. Remove the lid of the unit. Prism Sound Atlas has six hex-head screws on each side; Titan has five on each side; both units have another three screws along the top front edge and three along the lip of the lid at the rear.
- Page 33 Prism Sound MDIO-Dante Module Operation Manual Revision 1.01 2. Also remove the MDIO blanking cover plate which uses another four hex-head screws. 3. Approximately half way back from the MDIO slot there is a white multi-pin connector labelled ‘CN19’, and either side are two cross-head screws. Unscrew the two cross head screws.
- Page 34 5. Taking anti-static precautions, remove the MDIO-Dante module from its anti-static bag. 6. Offer up the MDIO-Dante module to its connector. If this is an Atlas rather than Titan, be careful of the wires connecting the MIDI ports on the rear – you’ll need to avoid pulling these as you place the Dante module.
- Page 35 8. Some new hex head M3 screws are provided to fix the rear plate of the MDIO-PTHDX module to the rear panel of Prism Sound Atlas/Titan. The short pair should be used for the lower pair of holes closest to the bottom of the box.
Need help?
Do you have a question about the MDIO-Dante and is the answer not in the manual?
Questions and answers