Advertisement
Quick Links
Advertisement

Related Manuals for Voodoo Lab Control Switcher


Summary of Contents for Voodoo Lab Control Switcher
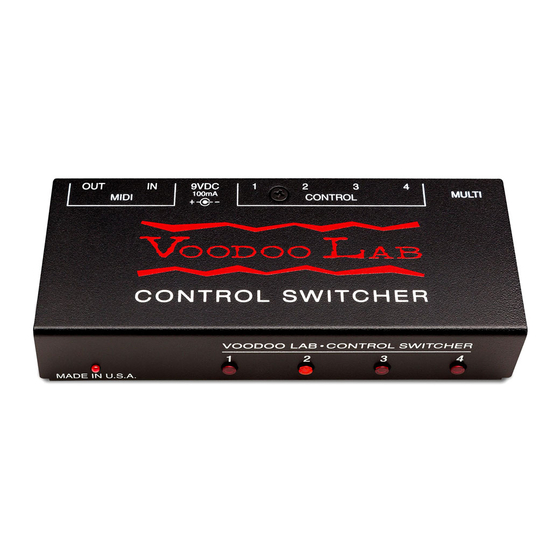
- Page 1 CONTROL SWITCHER User’s Manual www.voodoolab.com...
- Page 2 Copyright ©2014-2020 by Digital Music Corporation. This publication is protected by copyright and all rights are reserved. Voodoo Lab, Control Switcher, Pedal Power, Ground Control, and Dingbat are trademarks of Digital Music Corp. rev 2.1...
- Page 3 It works with any standard MIDI capable foot controller, loop switcher, and multi- effect pedal like Line 6 Helix or HX effects, TC Electronic’s G-System & Nova System, and many more. Control Switcher is also a great way to expand the capabilities of a...
- Page 4 Tip: If you want to make your own amp control cable using the MULTI connector, start with a 5-pin active MIDI cable, cut off and replace the connector from one end. Please contact Voodoo Lab or refer to our web site to purchase a ready made interface cable for many common amps.
-
Page 5: Operation
9-12VDC at 100mA to a 5.5x2.1mm barrel connector. Control Switcher can also operate from 9VAC. Control Switcher can be powered from any output of the Pedal Power 2+ with its DIP switch in the normal position. Other Voodoo Lab Pedal Power models can use any 9V or 12V output. - Page 6 Ground Control Pro’s MIDI OUT will be GCX#1 loops 1-4. A 2nd Control Switcher would then be GCX#2 loops 1-4. Alternately, if MIDI is routed to a GCX first and then Control Switcher, the GCX is #1 and Control Switcher becomes GCX#2.
- Page 7 (CC) messages. Follow the instructions below in the SETUP section of this manual to set Control Switcher to respond to either PC, CC or both message types, as well as which MIDI channel. If you are using CC, you also need to specify which group of CC numbers.
- Page 8 3.) Remove power when finished. Set MIDI Channel MIDI program change and control change messages include a channel number, 1 through 16. Control Switcher will only respond to messages received on its specified channel. The default MIDI channel is 1.
- Page 9 Select Control Change Numbers Each MIDI control change (CC) message includes a controller number which specifies the Control Switcher switch to turn on or off. You can select from eight different groups of CC numbers. The default group is CC numbers 80-83, which means that 80 controls switch #1, 81 controls switch #2, 82 controls switch #3, and 83 controls switch #4.
- Page 10 2.) Press buttons 1, 2 and 3 according to this table. CC # LED #1 LED #2 LED #3 80-83 84-87 88-91 92-95 64-67 68-71 56-59 60-63 3.) Remove power when finished. Set Switch Function Each of the four switches can be set to function as normal, reverse or momentary.
- Page 11 Here’s how you set Control Switcher’s switch functions: 1.) Apply power while holding down button #4. The LEDs will flash until you release the button. 2.) Press each button to set the corresponding switch’s function. The LED indicates the setting.
-
Page 12: Warranty
WARRANTY North America Only Voodoo Lab warrants this product against any defects that are due to faulty material or workmanship for a period of five years from the date of original retail purchase. This warranty does not include damage to the product resulting from accident or misuse.
Need help?
Do you have a question about the Control Switcher and is the answer not in the manual?
Questions and answers