Table of Contents
Advertisement
Quick Links
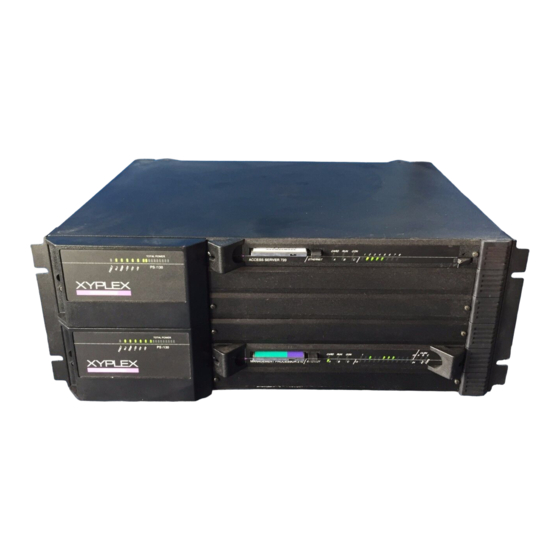
Installing the Network 9000
Routing Hub
Installation and servicing of the chassis and all
modules should be performed only by qualified,
!
trained service personnel.
Xyplex, Incorporated
295 Foster Street
Littleton, MA 01460
1-800-435-7997 (U.S.A)
+508-264-9903 (International)
support@xyplex.com (Internet)
451-0068A
Advertisement
Table of Contents

Subscribe to Our Youtube Channel
Related Manuals for Xyplex Network 9000

Summary of Contents for Xyplex Network 9000
- Page 1 Installing the Network 9000 Routing Hub Installation and servicing of the chassis and all modules should be performed only by qualified, trained service personnel. Xyplex, Incorporated 295 Foster Street Littleton, MA 01460 1-800-435-7997 (U.S.A) +508-264-9903 (International) support@xyplex.com (Internet) 451-0068A...
- Page 2 Xyplex, Inc. The information in this document is subject to change without notice and should not be construed as a commitment by Xyplex, Inc. Xyplex, Inc. reserves the right to revise this publication, and to make changes in content from time to time, without obligation to provide notification of such revision or changes.
-
Page 3: Table Of Contents
Network 9000 Multimedia Midplane ........ - Page 4 Section Page Number Chapter 4 Installing and Removing Processor and I/O Modules G e n e r a l ..................3 6 Installing and Removing Modules .
- Page 5 Preface How To Use This Guide This guide, Installing the Network 9000 Chassis, is intended to be used in series with other Xyplex product documentation. This set of documentation is organized to make the installation of Network 9000 products easy, and to help you get started using the Network 9000 Chassis in the shortest possible time.
-
Page 6: Chapter 1 - Introducing The Network 9000 Multimedia Intelligent Hub
Glossary Chapter 1: Introducing the Network 9000 Intra-Networking Hub, summarizes the features of the Network 9000 Hub, and briefly describes how you can use the Hub and functional options to build a network. Chapter 2: Installing the Network 9000 Chassis, describes the hardware installation procedures. -
Page 7: Overview
Slot 1 offers a subset of the Network 9000 management capabilities that are described in section 1.2.5. Slot 1 can be used for Xyplex MAXserver family cards, as well as a class of Network 9000 cards that can be used to meet your networking needs at a lower cost. -
Page 8: Network 9000 Multimedia Midplane
(off line, active, reset, loading software, etc) of the module. Figure 1-2 depicts the location of the midplane in a Network 9000 chassis. As shown in Figure 1-2, there are circuit boards that plug into one side of the midplane which are called called processor modules. - Page 9 Introducing the Network 9000 Routing Hub I/O Module Eject Handle Multimedia Midplane I/O Module Processor Fan Tray Module Optional Module Mounting Ears Power Supply Module Processor Module Ejector Handle Figure 1-2. Cut-Away Top View of the Network 9000 Chassis 0023...
-
Page 10: Power Supply Modules
It is possible that you can configure options in a Network 9000 Hub so that the hub does not operate redundantly. Use the Power Supply Configuration Worksheets contained in Appendix B to calculate power supply requirements for your Hub. -
Page 11: Ac Power Input Module
Network 9000 chassis management capabilities. Also, Type 1 products can only be connected to Ethernet segment A. Network 9000 products such as the 3605 LAN Interface Card (LIC) and the 6800 WAN Loader Card are Type 1 products. All MAXserver family cards are Type 1 products. -
Page 12: Network 9000 System Features
1.3.1 Hot Swap All processor, I/O, and fan tray modules in six and fifteen slot Network 9000 Hubs are hot swappable without disturbing any other function in the Hub. Depending on your configuration, power supply modules may be hot swapped without disturbing any other function in the Hub. - Page 13 These parameters are stored in the Control Storage of the ac input module of the Network 9000 chassis. You can change most of these parameters via the product module's initialization configuration menu or by the commands listed in the Guide to Managing Network 9000 Devices and Power Supplies.
-
Page 14: Remote Device Management
Introducing the Network 9000 Routing Hub The server may be configured to store parameters locally on a flash memory card, if one is available, on the memory card of another product module in the hub acting as a parameter server, or remotely in a file at any properly configured parameter servers. You use commands to change the parameter storing method. -
Page 15: Network 9000 Communication Options
Figure 1-3. Possible Local Router Ethernet Connections Network 9000 Communication Options The communication options for the Network 9000 include 10 Base T and FOIRL concentrators, Ethernet-to-FDDI bridge-routers, Token Ring Concentrators, Tri-Port Ethernet Repeaters, multiport LAN and WAN bridge-routers and terminal servers. Native Network 9000 product modules can be soft switched to any compatible midplane Ethernet LAN segment. -
Page 16: Enhanced Management Card
System Features section. If a memory card is installed it can load the software image and operational parameters from the memory card. It can also load and store parameters for other products in the Network 9000 Hub. 0023... -
Page 17: Internetworking
MAXserver LAN and WAN bridge-routers are also available for the Network 9000 using the MAXserver adaptor module. 1.4.4 Terminal Server The model 720 is the terminal server processor module for the Network 9000. Xyplex terminal server features include: - Licensed LAT... -
Page 18: Maxserver Adaptor I/O Module
MAXserver family options (excluding the MAXman card) can use midplane Ethernet LAN segment A in the Network 9000 hub. The adaptor module provides a location in which to plug in the MAXserver I/O connector card. Network 9000 Type 1 products also use the Adaptor I/O module, unless they are installed in slot 1. -
Page 19: Chapter 2 - Installing The Network 9000 Chassis
Chapter 2 Installing the Network 9000 Chassis General Installation and servicing of the chassis and all modules should be performed only by qualified, trained service personnel. The hardware installation consists of a few simple procedures to: • Select an appropriate site. -
Page 20: Unpacking And Inspecting The Hardware Kit
Installing the Network 9000 Chassis d . Make sure that the installation is at an optimum height from the floor to allow easy inspection of the LED indicators and decrease the possibility of dust from the floor from entering the unit. - Page 21 . If the unit has been damaged, or if parts are missing notify your Xyplex Sales representative immediately. US and Canada only. For international shipments, Xyplex may supply a different line cord which will be appropriate for the power requirements of your country.
-
Page 22: M O U N T I N
Each ear has three holes, which match the mounting bracket screw locations shown in Figure 2-1. Mounting Mounting Bracket Bracket Screw Holes Screw Holes Figure 2-1. Side View of Network 9000 Hub, Showing Location of Bracket Holes. 0023... - Page 23 Installing the Network 9000 Chassis c . Locate the 4 mounting screws and Tinnerman nuts in the accessories bag. Each ear has a hole in the top and bottom (see Figure 2-1). Partially screw two of the mounting screws into the rack at the bottom of where the chassis is to be mounted.
-
Page 24: Stand-Alone Installation
Installing the Network 9000 Chassis 2.5.3 Stand-Alone Installation The hub can be mounted in any location as long as the site requirements (paragraph 2.3) are met. A location should be selected that does not require each cable's maximum bend radius to be exceeded. -
Page 25: G E N E R A
The AC power input module, power supply modules, and fan tray modules are removable. Depending on your Network 9000 hub configuration, the power supplies may be "hot swapped" without bringing the unit down. This chapter describes the procedures used to install and remove these options, and provides a quick reference to the controls and indicators found on the ac input and power supply modules. - Page 26 Power Supplies, Fans, and AC Input Modules Total Power P / S 1 3 0 X Y P L E X N E T W O R K 9 0 0 0 Captive Screw Access to Wrist Strap Jack Figure 3-1. P/S 130 Managed Power Supply Front Panel. 0023...
- Page 27 Power Supplies, Fans, and AC Input Modules Table 3-1. P/S 130 LED Indicators. Purpose Item ON - indicates that an internal power supply fault has occurred. You should examine the other Fault LED LEDs for specific details of the fault condition. OFF - indicates that the power supply is functioning properly.
-
Page 28: Installing And Removing Power Supply Modules
Power Supplies, Fans, and AC Input Modules 3.2.1 Installing and Removing Power Supply Modules The Network 9000 architecture permits you to add, change, and remove power supply modules while the unit is powered on. Depending upon the configuration of your hub power supplies, this can sometimes be done without disrupting other devices in the hub. - Page 29 1 P/S 1 Figure 3-3. Installing Power Supplies in a Redundant Network 9000 Chassis. b. Examine the area inside the hub that was uncovered by removing the blank panel. Along both sides of this area you will see card guides. There are two card guides for each power supply slot.
- Page 30 Power Supplies, Fans, and AC Input Modules Removing Power Supplies Reverse the power supply installation procedure to remove any power supply. Perform the following steps to remove any power supply: a . Loosen the captive screw securing the power supply to the chassis. b.
- Page 31 Power Supplies, Fans, and AC Input Modules Card Guides Power Supply 2 Wrist Strap Jack Power Supply 1 Threaded Midplane Captive Connectors Screw Hole Power Supply 1 Figure 3-4. Interior of Hub Power Supply Area. 0023...
-
Page 32: Ac Power Input Module
Slot Chassis contains one of these modules. A Redundant Network 9000 Fifteen Slot Chassis contains two of these modules. These modules are pre-installed in the Network 9000 chassis. The power input module must be installed in the bottom slot of the Network 9000 chassis. 110-240V~... -
Page 33: Installing And Removing The Ac Power Input Module
Network 9000 Fifteen Slot Chassis contains two of these modules. One module is always located in the bottom I/O card slot of the hub. In a Redundant Network 9000 Fifteen Slot Chassis, the second module is installed in slot 10. You will only need to remove an AC Power Input Module if it fails or you wish to swap or repair the chassis itself. -
Page 34: F A N T R A Y
Power Supplies, Fans, and AC Input Modules Fan Trays Figure 3-6 depicts a Network 9000 fan tray. Six-slot Network 9000 hubs must contain two fan trays. Fifteen-slot hubs must contain five fan trays. Each Network 9000 hub is shipped with the maximium number of fan trays it can support. - Page 35 To insert a fan tray: Locate the fan tray guides in your Network 9000 Hub. Figure 3-7 depicts the fan tray guides. The sheet metal of the fan tray is designed to slide into these guides. Insert the sheet metal into the guide and push the fan tray all the way in.
- Page 36 Depending on the model of Network 9000 hub you have, slots are numbered designated as 1-15 or from 1-6 beginning from the bottom. A Network 9000 module can be placed in any available slot, except slot 1. (Slot 1 contains the ac power input module, but can be used with a single-slot module from the MAXserver family of communication options.) Do not remove the module...
- Page 37 Installing and Removing Processor and I/O Modules c . Examine the area inside the hub slot that was uncovered by removing the blank panels. Along each side of the slot you will see a card guide, which consists of two protrusions formed in the metal separated by about one-eighth inch.
- Page 38 CAUTION ALWAYS WEAR AN ANTI-STATIC BRACELET BEFORE HANDLING ANY Network 9000 MODULES. Each Network 9000 hub comes with an anti-static bracelet that attaches to the jack on the power supply front panel (see Figure 4-1). c . Using a bent paper-clip "tool" press the reset switch on the processor module once to place the module into reset mode.
- Page 39 Appendix A Technical Specifications Item Three-Slot Six-Slot Chassis Fifteen Slot Chassis Chassis Height: 3.45 in (8.8 cm) 6.9 in (17.6 cm) 17.4 in (44.6 cm) Depth: 14.1 in (35.9 cm) 14.1 in (35.9 cm) 14.1 in (35.9 cm) Standalone 17.6 in (44.6 cm) 17.6 in (44.6 cm) 17.6 in (44.6 cm) Width:...
- Page 40 Modules (Type 2 Options) LAN/WAN Bridge/Router 401 Management Processor 210 Secure Processor 211 Hub/Router 220 Secure Hub/Router 221 Network 9000 Type 1 Options 6800 WAN loaders MAXserver Cards: MX-TSERV-J8 8-port terminal server card MX-TSERV-J16 16-port terminal server card MX-NPC-P1 Network Printer server card...
- Page 41 Slot Ethernet Addresses Each slot of a Network 9000 Chassis has a unique Ethernet address. When a device is installed in a given slot, it acquires the Ethernet address of that slot. There is a label on the AC Power Input Module which specifies the Ethernet address for the slot 1.
- Page 42 Modules pre-installed in the chassis. One Redundant AC Power Input Module is installed in slot 1 (the bottom slot of the Network 9000 chassis), the other in slot 10. Xyplex recommends that you order 2 or 4 power supplies for the chassis to ensure power supply redundancy.
- Page 43 Controls and Indicators Figure 2 shows the location and purpose of all controls and LED indicators on the Network 9000 Redundant AC Power Input Module. Ethernet Address Label Safety Label (refer to Safety Considerations section) I/O Connector Redundant 08-00-87-xx-xx-xx 110-240~...
- Page 44 300 W of power (two 150 W power supplies when using P/S 130 power supply modules). When using the power supply worksheets, you must ensure that the communication options that you install in the Network 9000 chassis can be adequately powered by a total of 300W.
- Page 45 1 to the ON position. Then do the same for the module in slot 10. Installing and Removing the AC Power Input Module If a Redundant AC Power Input Module fails, use the procedures described in the Network 9000 Chassis Hardware Installation and Maintenance Guide to remove the failed module and replace...
- Page 46 AC power input module also go out of service, but the remaining power supply modules continue to provide power to a l l Network 9000 processor modules and I/O modules in the chassis. If AC power is lost due to circuit failure, full power redundancy is restored when power is restored.
- Page 47 Type 1 Products. Type 1 processor modules only know about the primary AC power input module. (A Type 1 option is a Network 9000 product or a MAXserver family product which does not support chassis management commands, and has a link to midplane Ethernet segment A only.) Therefore, when the primary AC power input module fails, Type 1 products no longer...
- Page 48 240V - 5.0A Power +5V - 3.0A +12V - 0.3A -12V - 0.3A Enclosure Requirements One I/O slot in a Redundant Network 9000 intra-networking hub. Emissions Compliance FCC Class A, EN55022 Class A Order Codes Product Name and Description Order Code...
- Page 49 I/O modules, and compartments for power supplies and the AC input module. Two types of Network 9000 chassis are available: a six-slot chassis with compartments for two power supplies and a fifteen-slot chassis with compartments for five power supplies.
- Page 50 If it is enabled, the processor module can use it to obtain initialization parameters. I/O module An I/O module is a Network 9000 component that provides links to the network and cabling. Terminal servers, LAN bridge/routers, WAN bridge/routers, and managed concentrators consist of a processor module and an I/O module. Unmanaged 10BASE-T concentrators consist of an I/O module only.
- Page 51 The midplane is a hardware component in the middle of the Network 9000 chassis. It connects the processor module and the I/O module of a Network 9000 product. Independent I/O modules also plug into the midplane. The midplane supports three internal Ethernet segments, four Token Ring Segments, and two FDDI segments.
- Page 52 A power supply is a component of the Network 9000 chassis which supplies power to the modules in the chassis. The Network 9000 chassis supports two types of power supplies: model PS/130 managed power supplies and model PS/120 unmanaged power supplies.
- Page 53 Ethernet segment A only. type 2 option A type 2 option consists of a Network 9000 module or module set. Type 2 options support chassis management commands and have l i n k s that can connect to midplane Ethernet segment A, B, or C.
Need help?
Do you have a question about the Network 9000 and is the answer not in the manual?
Questions and answers