Table of Contents
Advertisement
Quick Links
Advertisement
Table of Contents

Related Manuals for ORKEL Dens-X Compactor

Summary of Contents for ORKEL Dens-X Compactor
-
Page 1: Io Block
User Manual Dens-X Compactor Rev.Dens-X.UM.2A.EN Original version. Published 2020. According to Directive 2006/42/EC, Annex | 1.7.4.1 Orkel AS Valid from serial number: 20427005 Johan Gjønnes' veg 25 Orkel part number: 16774 7320 Fannrem, Norway orkel.no/qr/dens-x... -
Page 2: Table Of Contents
Table of contents 1 General 1.1 Introduction 1.1.1 Foreword 1.1.2 Disclaimer 1.1.3 Range of use 1.2 Control before delivery 1.2.1 Preparation at customer location 1.3 Identification of the machine 1.4 The operators manual 1.4.1 How to use this manual 1.5 Warranty 1.6 Declaration of conformity 2 Safety 2.1 Introduction... -
Page 3: Io Block
2.6 Break-in period 3 Settings and hydraulic adjustments 3.1 Main parts 3.1.1 Principle of operation 3.2 Hydraulics 3.2.1 Guidelines for hydraulic adjustments 3.2.2 Tank valves Dens-X 3.3 Feed hopper 3.3.1 Control panels 3.3.2 Settings 3.3.3 Correction of the sideways movement of the feed hop- per-F25 3.4 Elevator and sub conveyor 3.4.1 Settings... - Page 4 4 Operation 4.1 Safety 4.1.1 Safe work routine 4.1.2 Operator safety 4.1.3 Other people's safety 4.1.4 Assembly on site 4.1.5 Elements of hazard during operation 4.1.6 Danger zones during operation 4.1.7 Risk of overturning 4.1.8 Leaving the machine 4.2 Connection and setting up the machine 4.2.1 Rig up 4.2.2 Flexible drawbar and feed hopper F25 4.2.3 Lever/Controls overview...
-
Page 5: Io Block
4.7.1 Wrapping arm emergency stop 4.7.2 Installing a new film roller in the wrapper 4.8 Parking brake 4.9 Operators platform 4.10 Compressed air cleaner system 4.10.1 Mode of operation 4.10.2 Recommendations 5 Transport 5.1 Transport safety 5.1.1 Speed limit 5.1.2 On road preparation 5.1.3 Lifting points 5.1.4 Strapping and tie down 5.1.5 Dismantling the machine... -
Page 6: Io Block
6.1.13 User data 6.1.14 Weighing system 6.1.15 Reset 6.1.16 Software 6.1.17 Settings and explanations 7 Maintenance and mechanical adjustments 7.1 Safety 7.1.1 Before maintenance 7.1.2 Safety precautions during maintenance and mechanical adjustments 7.1.3 Elements of hazard during maintenance 7.1.4 Control after repair or maintenance 7.2 Electrics 7.2.1 Fuses 7.3 Wheels... -
Page 7: Io Block
7.8.1 Inspection 7.8.2 Adjusting the front chamber belt 7.8.3 Adjusting the rear chamber belt 7.8.4 Adjusting the chamber belt tensioner 7.8.5 Replacing chamber belt 7.9 Plastic tying unit 7.9.1 Control and maintenance 7.10 Wrapping table 7.10.1 Inspection 7.10.2 Adjusting the wrapping table belt 7.11 Frame, drawbar, attachments 7.11.1 Frame 7.11.2 Main components, fastening points... - Page 8 8.1.3 Beka max grease lubrication system 8.2 Refilling lubricants 8.2.1 Refilling the oil reservoir 8.2.2 Adjusting the amount of grease 8.2.3 Bleeding the grease system 8.3 Electric pump and main distributor 8.4 Troubleshooting for Beka max 8.5 Oil temperature 8.6 Approved lubricants 8.6.1 Hydraulics 8.6.2 Chain lubrication 8.6.3 Greasing...
- Page 9 10.5 Inputs and outputs 10.5.1 IO block 1 10.5.2 IO block 2 10.5.3 IO block 3 10.5.4 IO block 5 10.5.5 IO block 6 10.5.6 IO block 7 10.6 Power supply 10.6.1 Supply block 1 10.6.2 Supply block 2 10.7 Inputs and outputs sorted by number 10.7.1 IO list 1 10.7.2 IO list 2 10.7.3 IO list 3...
- Page 10 11.1.4 Additional feed hopper control for F25 and chamber drive 11.1.5 Hydraulic diagram list 11.2 Valve overview 11.2.1 Valve chart for Dens-X 11.2.2 Valve list for Dens-X 12 Specifications 12.1 Electrical system 12.2 Power take off 12.3 Lubrication system beka-max 12.4 Hydraulic system 12.5 Wheels and tyres 12.6 Dimensions and weight...
-
Page 11: General
1.1 INTRODUCTION 1.1.1 Foreword The products from Orkel AS are well known for their high quality, reliability and strength. We will therefore congratulate you, choosing one of our products. To fulfill our own goals, regarding quality and strength, Orkel AS has implemented a continuing product- developing process. -
Page 12: Range Of Use
The Dens-X compactor is designed for compressing soft organic materials to bales wrapped in plastic film for storage or transport. The compactor must only be used for this purpose. NOTE: Other materials can also be compressed, but have to be confirmed by Orkel AS in each case. This due to warranty legislations. -
Page 13: The Operators Manual
12. SPECIFICATIONS An overview over the general machine capacities and performances. 1.5 WARRANTY Orkel AS recommends that you study the document «Warranty conditions» for detailed information regarding warranty terms and conditions. This document can be found enclosed in the binder delivered with the compactor. -
Page 14: Declaration Of Conformity
1.6 DECLARATION OF CONFORMITY 1 GENERAL... -
Page 15: Safety
2 Safety 2.1 Introduction 2.2 Symbols 2.2.1 Warning, danger and caution 2.3 Emergency stop 2.4 To the operator 2.4.1 Exercise of security 2.4.2 Personal protection 2.4.3 Personal safety 2.4.4 Safe operation 2.4.5 Important issues 2.4.6 Danger zones 2.5 Precautions 2.5.1 Know your machine 2.5.2 Equipment control 2.5.3 Cleaning 2.5.4 Environmental protection... - Page 16 The symbol and the word DANGER, The symbol and the word WARNING, indic- state a direct or immediate dan- ates a potentially hazardous situation. If gerous situation that will cause you fail to comply with instructions given it DEATH OR SERIOUS INJURY if not could result in personal injury or loss of life.
-
Page 17: Emergency Stop
Warning signs, indicating danger or warning attached to the machine, must not be removed or painted over. Unreadable signs shall be replaced by new ones. These can be ordered from Orkel 2.3 EMERGENCY STOP The machine is equipped with 5 manual emergency stop buttons. Four are accessible from ground level... -
Page 18: To The Operator
Figure 2.1 : Red circles indicates emergency stop locations. Two more buttons are located on the opposite side, ground level. When an emergency stop button has been triggered, the emergency stop button has to be reset so that the machine can be started from the control panel. Figure 2.2 : Mushroom head type emergency stop button. -
Page 19: Personal Safety
2.4.3 Personal safety Use all available protective and safety equipment. Provide good lighting in the area where the machine is positioned. All covers must remain intact and attached during operation. If pressing of flammable mater- ials, a fire extinguisher must be in close proximity. 2.4.4 Safe operation Persons under 16 years of age should under no circumstances operate this machine. -
Page 20: Precautions
2.5 PRECAUTIONS 2.5.1 Know your machine Know your machine. Learn all the functions and actuating mechanisms, and familiarize where the emer- gency stop switches are located. Learn the machines capacity and limitations, to avoid unnecessary down- time and mechanical brake-down. IMPORTANT: If any dangerous situations occur, shut down the power take off (PTO) right away. - Page 21 Check Check points All bearings have a visible grease collar. Figure 2.3 No visible grease on the relief valve on the grease pump. Precautions: A new compactor must go through a break-in in period. It shouldn’t be run at maximum capa- city at the first 25 hours of operation.
-
Page 22: Settings And Hydraulic Adjustments
3 Settings and hydraulic adjustments 3.1 Main parts 3.1.1 Principle of operation 3.2 Hydraulics 3.2.1 Guidelines for hydraulic adjustments 3.2.2 Tank valves Dens-X 3.3 Feed hopper 3.3.1 Control panels 3.3.2 Settings 3.3.3 Correction of the sideways movement of the feed hopper-F25 3.4 Elevator and sub conveyor 3.4.1 Settings 3.5 Chamber... -
Page 23: Main Parts
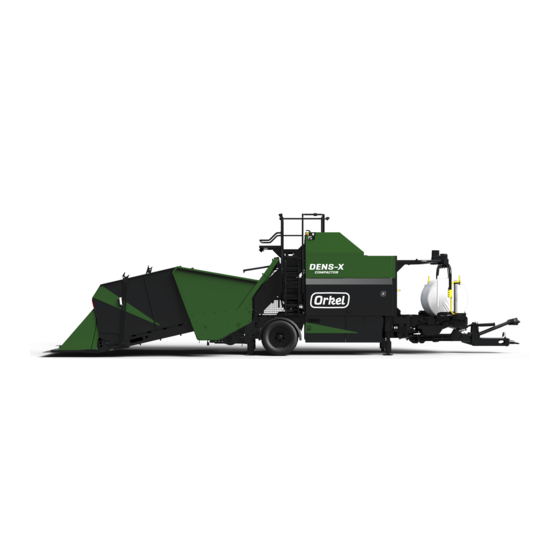
3.1 MAIN PARTS Figure 3.1 : The compactor main parts 3.1.1 Principle of operation The material is loaded into the feed hopper using a wheel loader, or directly by a conveyor belt. The mater- ial is then transported by the elevator into the chamber. The amount and speed is controlled by an ultra- sonic sensor as well as settings in the display unit. -
Page 24: Guidelines For Hydraulic Adjustments
3.2.2 Tank valves Dens-X The Dens-X compactor got five tank valves: T1, T2, T3, T4 and T5. 3.3 FEED HOPPER NOTE: All references to valves found in this sub chapter can be found in the hydraulic schematic and valve over- view in chapter 11 "Hydraulics"... -
Page 25: Settings
Rear controller Description Action/Movement Red button: Emergency stop. Green button: Overrides the feed hopper sensor, and manu- ally activates the feed hopper belts. Useful when loading the hopper. Red button: Stops the belts. Arrow up: Lifts both flips. Arrow down: Lowers both flips. -
Page 26: Elevator And Sub Conveyor
rect relative positioning when fully extended/retracted. In such cases, the sideways movement must be corrected, using the dual refill check valves (F1, F2, F3 and F4). There are two valves for each side. Both valves on each side must always be operated pairwise, into one of the two following positions: Operating position: Upper check valve open, lower check valve closed. -
Page 27: Chamber Pressure Settings
3.5.2 Chamber pressure settings The chamber pressure settings is set on the display unit. When the baling starts, the elevator will run at its higher set speed. When the chamber pressure surpasses the elevator slow threshold, the speed is reduced in order to allow a higher bale density. -
Page 28: Brake And Feed Speed
Figure 3.3 : Plastic tying unit 3.6.2 Brake and feed speed The speed should be set so that the net/film is fed at a slightly higher speed than the bale’s peripheral speed. Depending on whether net or film is used, and what material is being baled, the brake force must be set accordingly. -
Page 29: Settings
Figure 3.4 : Brake and feed speed controls B1 Valve for feed speed B2 Valve for brake force C Gauge D Emergency stop switch E Electrical valve for brake release/engagement 3.6.3 Settings Feed speed: Adjusting the feed speed is done by turning the B1 valve. Clockwise decreases the speed. Coun- terclockwise increases the speed. -
Page 30: Wrapping Table
Press and hold red and yellow buttons until the sequence is finished (feed rollers Close film system: and knife close). Press and hold green button for at least 2 seconds until the net/film Start net/film system system starts Release brake: Press and hold red button and shortly tap blue button. -
Page 31: Film Cutter Settings
3.7.2 Film cutter settings The opening and closing speed of the film cutters must be set correctly. If their speed is too high, the wrap- ping film might be damaged instead of neatly cut when the wrapping arms stop. The film cutters speed, left (valve P4) and right (valve P5), may be reduced by turning the valve clockwise. -
Page 32: Wrapping Table Tilt Speed
3.7.3 Wrapping table tilt speed Adjusting the wrapping table tilt speed may affect the speed of the bale when rolling off the wrapping table during bale drop. Adjusting the wrapping table tilt speed is done by turning valve P3. Clockwise decreases the speed. -
Page 33: Drawbar
3.8 DRAWBAR 3.8.1 Flexible drawbar To be able to swing the flexible drawbar, the locking devices on both sides must be disengaged. This is done by pulling the nylon ropes as shown on Figure 3.8. Figure 3.8 : Transport safety lock nylon ropes. The flexible drawbar is controlled with two hydraulic hoses. - Page 34 Figure 3.9 : Hydraulic hoses to control the drawbar. Green arrow indicates the hoses that control the tilting of the drawbar. Yellow arrow shows the hydraulic hoses that control swing of the draw- bar. 3 SETTINGS AND HYDRAULIC ADJUSTMENTS...
-
Page 35: Operation
4 Operation 4.1 Safety 4.1.1 Safe work routine 4.1.2 Operator safety 4.1.3 Other people's safety 4.1.4 Assembly on site 4.1.5 Elements of hazard during operation 4.1.6 Danger zones during operation 4.1.7 Risk of overturning 4.1.8 Leaving the machine 4.2 Connection and setting up the machine 4.2.1 Rig up 4.2.2 Flexible drawbar and feed hopper F25 4.2.3 Lever/Controls overview... -
Page 36: Safety
4.9 Operators platform 4.10 Compressed air cleaner system 4.10.1 Mode of operation 4.10.2 Recommendations 4.1 SAFETY IMPORTANT: If any dangerous situations occur, shut down the PTO right away. 4.1.1 Safe work routine This machine must under no circumstances be used for any other purpose than the intended one. Operate in daylight conditions only. -
Page 37: Elements Of Hazard During Operation
Max. height in operation position: 3900 mm 4.1.5 Elements of hazard during operation If you fail to comply with instructions given it could result in personal injury or loss of life. Pay attention to the risk of: squeezing/crushing/cutting of fingers or hands near the knife for plastic tying unit. squeezing/crushing of fingers or hands between conveyor belts and sprockets. - Page 38 11. Sufficient clearance must be achieved between the hopper halves before lowering to down position (limit switch active when sufficient). User resources are available at www.orkel.com 12. Lower the left part of the feed hopper to DOWN position (lever 5).
- Page 39 Perform a function test of all the emergency stop switches before starting baling. IMPORTANT: Check the compactor covers and panels for any damage. Repair any damaged safety gear before baling. IMPORTANT: Be aware of the danger of tipping when rigging up. 4 OPERATION...
-
Page 40: Lever/Controls Overview
4.2.3 Lever/Controls overview Figure 4.2 : Lever/Controls overview Dens-X section 3.3.1 "Control panels" for descriptions of the levers/controls regarding the feed hopper. 4.2.4 Lever list Flexible drawbar and feed hopper F25 Lever no: Description Valve function Left support leg, rear Up / down Right support leg, rear Up / down... -
Page 41: Leveling The Machine
4.2.5 Leveling the machine 1. Ensure that the feed hopper is raised clear of the ground when leveling the machine. The feed hop- per may be lowered onto the ground only when the machine is properly leveled. 2. Operate the valves for the hydraulic jack stands until the machine is properly leveled (See section 4.2.3 "Lever/Controls overview") -
Page 42: Oil Temperature
4.2.10 Oil temperature The oil temperature is shown in the top left corner on the display unit main page. If the oil is too cold, run the PTO at maximum 300 rpm until the minimum start temperature is reached. See temperature values below. -
Page 43: Checkpoints While Baling
The first 50 hours of operation are considered to be the break-in period. NOTE: Before the compactor is shipped from the factory, Orkel has performed a thorough quality control and made a test run. The test run is done without any material. The need of some adjustments during first start up is to be expected, depending on the material being baled. -
Page 44: Automatic Operation
Filters IMPORTANT: Orkel recommends that the operator regularly performs visual controls of the compactor as well as act- ive listening for abnormal noises. Perform adjustments as soon as there is a need. A problem that is not immediately rectified may cause further problems, and in worst case lead to mechanical breakdown. -
Page 45: Film Roller Storage
overview" When pressing the start icon on the display unit, the following will happen: The chamber starts, the elevator starts, the sub conveyor and hopper start. Material is fed into the bale chamber. The feed amount is controlled by the ultrasonic sensor S29. When set chamber pressure is reached (elevator slow threshold) the elevator slows down in order to reduce the material flow into the chamber until the bale is finished. -
Page 46: Wrapping Arms
age. In order to operate the storages the machine must be connected to the tractor’s hydraulic system, with the oil flow activated. The total capacity is 15 film rollers. NOTE: 14 turns/laps of the wrapping arm equals approximately 6 layers of film on the bale. 4.7 WRAPPING ARMS 4.7.1 Wrapping arm emergency stop The compactors wrapping arms are equipped with safety guards that stop the wrappers movement if... - Page 47 Figure 4.4 : Film stretcher with tensioner Figure 4.5 : Empty film strecher Threading of the film shall be done as illustrated in the principle drawing Figure 4.6 : Film in the film stretcher seen from above. 4 OPERATION...
-
Page 48: Parking Brake
User resources for installing new film rollers may be found at www.orkel.com/qr 4.8 PARKING BRAKE The parking brake is located near the right side wheel (Figure 4.7). Rotate clockwise to engage, and counter clockwise to disengage NOTE: Always make sure the parking brake is disengaged before moving the compactor. -
Page 49: Mode Of Operation
Figure 4.9 : Compressed air cleaner system on the plastic tying unit 4.10.1 Mode of operation The three different cleaning processes are triggered by specific signal sequences. 1. Chamber door Cleans the chamber door contact surfaces when the bale is transported towards the wrapping table. - Page 50 Figure 4.10 : Valve and filter, location It is recommended to use an external compressor, located outside the polluted area of operation. IMPORTANT: To use the tractors compressor is not recommended due to insufficient compressor capacity. 4 OPERATION...
-
Page 51: Transport
5 Transport 5.1 Transport safety 5.1.1 Speed limit 5.1.2 On road preparation 5.1.3 Lifting points 5.1.4 Strapping and tie down 5.1.5 Dismantling the machine 5.2 Highway use 5.2.1 Transport preparation, Flexible drawbar and feed hopper F25 5.1 TRANSPORT SAFETY Be aware of the danger of tipping when driving off road. 5.1.1 Speed limit 5.1.2 On road preparation This machine is designed for being towed by the drawbar only. -
Page 52: Strapping And Tie Down
Front: Use a nylon strap to make a loop around the front crossbeam (Beam Dim: 100 x 100mm). Rear: Use lifting points on the hydraulic jack stands NOTE: Use only certified lifting gear with sufficient lifting capacity. Lifting and strapping points Figure 5.1 : 5.1.4 Strapping and tie down Secure the machine from moving if transported by lorry, train or boat. -
Page 53: Highway Use
17. Ensure that parking brake is disengaged. 18. Check the road lights and brakes before driving. 19. Ensure that film roller storages, covers and hatches are all closed and secured. User resources for the F25 feed hopper may be found at www.orkel.com/qr 5 TRANSPORT... -
Page 54: Control System
6 Control system 6.1 User interface 6.1.1 Main page 6.1.2 Icons for starting program sequences 6.1.3 Menu 6.1.4 User settings [Language and screen] 6.1.5 System information 6.1.6 Manual controls 6.1.7 Machine settings 6.1.8 Quick settings 6.1.9 Presets 6.1.10 Sensors 6.1.11 Messages 6.1.12 Time and date 6.1.13 User data 6.1.14 Weighing system... -
Page 55: Icons For Starting Program Sequences
Figure 6.1 : Main page with icon names 6.1.2 Icons for starting program sequences Start auto mode / stop This icon starts the machine in automatic mode. The machine can be stopped by press- ing the icon again (red symbol). Start net/film system This icon starts a complete sequence in which the net/film system lays net or film on the bale in the chamber. -
Page 56: User Settings [Language And Screen]
Figure 6.2 : Menu screen 6.1.4 User settings [Language and screen] From main page; press menu and then the icon for Language and screen settings. Choose the desired language. The system will remember which language is chosen and use it as default. The screen’s brightness as well as key tone volume may also be set from this page. -
Page 57: System Information
Figure 6.3 : Language and screen settings page 6.1.5 System information From main page; press menu and then the icon for System information This page shows information about the installed software (SW), voltage and logged data. Figure 6.4 : System information screen 6.1.6 Manual controls From these pages the machine’s various functions may be operated manually by pressing and holding the respective icon. - Page 58 Manual control, page 1 Figure 6.5 : Page 2 Figure 6.6 : Manual control, page 2 Run elevator, low speed Run elevator, high speed Run elevator and chamber Run sub-conveyor, transport speed Run sub-conveyor, recycling speed Run hopper 6 CONTROL SYSTEM...
-
Page 59: Machine Settings
Raise wrapping table Lower wrapping table Open film cutters Close film cutters Run wrapper, low speed Run wrapper, high speed Run wrapper to home position Run wrapper, complete sequence Open chamber door Close chamber door Shortcut to machine settings Run chamber (applies to both page 1 and page 2) Open net/film knife Close net/film knife... -
Page 60: Quick Settings
Machine settings screen Figure 6.7 : 6.1.8 Quick settings Figure 6.8 : Quick settings Certain machine settings can also be accessed from the main page, also when the machine is running in auto mode. 6 CONTROL SYSTEM... -
Page 61: Presets
Presets Figure 6.9 : The top of the list contains presets (predefined factory setups) from Orkel for several different materials. These cannot be changed. If the machine settings are changed when such a preset is activated, a new setup will automatically be created and activated. -
Page 62: Messages
Figure 6.10 : Sensor overview with status 6.1.11 Messages From main page; press menu and then the icon for Messages. This page shows a list containing the previous 100 operational messages, including error messages. 6 CONTROL SYSTEM... -
Page 63: Time And Date
Figure 6.11 : Message screen 6.1.12 Time and date From main page; press menu and then the icon for Time and date settings. The values can be changed up and down by pressing the arrows on the right hand side and left hand side respectively. - Page 64 Figure 6.13 : User data page When pressing the upper left icon, the control unit generates a printable text file containing the customer log. NOTE: Insert the mini-USB-USB-adapter and flash drive into the control unit. The text file prints directly on the flash drive when pressing the «generate»-button.
-
Page 65: Weighing System
User list Figure 6.14 : 6.1.14 Weighing system Weighing system is not supported by the software version described in this doc- ument. 6.1.15 Reset From main page; press menu and then the icon for Reset. The reset icon resets the baling process, so that this starts from the beginning when the machine is put in auto mode. - Page 66 Use a mini-USB-USB-adapter. The USB port is behind the black cap to the far left. Reboot the display unit by turning off the main power breaker at least 3 seconds. When the Orkel logo shows, press and hold the lower right corner until ”Application Loader” is shown.
-
Page 67: Settings And Explanations
6.1.17 Settings and explanations Settings Explanation Chamber speed, baling Chamber speed during baling Chamber speed, net feed Chamber speed during net/film feed Chamber speed, net pull Chamber speed when net/film is put on the bale Chamber speed, drop Chamber speed when bale is ejected from the chamber. Import- ant in context of both stiction and loss Chamber max pressure Pressure limit at which the net/film sequence starts (maximum... - Page 68 Settings Explanation Film release, 2nd Defines at which of the wrapper rounds the cutters releases the film, second time Film release, 3rd Defines at which of the wrapper rounds the cutters releases the film, third time Film release duration Defines the duration of the cutter film release. Should be adjusted in context of the cutters speed (manual valve) Bale drop dwell time Defines the wrapping tables dwell in lower position during bale...
-
Page 69: Maintenance And Mechanical Adjustments
7 Maintenance and mechanical adjustments 7.1 Safety 7.1.1 Before maintenance 7.1.2 Safety precautions during maintenance and mechanical adjustments 7.1.3 Elements of hazard during maintenance 7.1.4 Control after repair or maintenance 7.2 Electrics 7.2.1 Fuses 7.3 Wheels 7.4 Chains 7.4.1 Chain tensioner A 7.4.2 Chain tensioner B and C 7.5 Feed hopper 7.5.1 Tightening the feed hopper belts F25... -
Page 70: Safety
Before any maintenance or adjustments are performed on the machine, we recommend you to make a con- ference call to your local dealer or Orkel AS. All repair work shall be carried out by a skilled mechanic. 7.1.2 Safety precautions during maintenance and mechanical adjustments NOTE: Due to your own safety, Orkel AS recommends that all repair- and maintenance work on the machine is done in daylight conditions or equivalent. -
Page 71: Elements Of Hazard During Maintenance
Be cautious when cleaning belts and rollers to avoid crushing or squeezing of body parts. Use proper shoes and work wear to avoid slipping and other injuries when working on the machine. 7.1.3 Elements of hazard during maintenance If you fail to comply with instructions given it could result in personal injury or loss of life Squeezing/crushing of fingers and hands near chains and sprockets Squeezing/crushing of finger and hands during cleaning of conveyor belts and rollers. -
Page 72: Fuses
Look for abnormal wear and tear on sprockets and chains. Replace worn out parts if needed. Contact your local supplier or Orkel AS directly if you have any doubts about parts that must be replaced. 7.4.1 Chain tensioner A Basic setting: Adjust the chamber drive chain tensioner bolt until the chain play is approximately 3 mm. -
Page 73: Chain Tensioner B And C
Implications during adjustment: When adjusting either the left side (drive chain tension) or the right side (belt tracking) of this roller, these adjustments influence each other. Hence, you have to adjust both sides multiple times, until you achieve the ultimate chain tension and belt tracking combination. Adjustment: 1. -
Page 74: Tightening The Feed Hopper Belts F25
7.5.1 Tightening the feed hopper belts F25 Loosen the lock-bolts (yellow arrows), Figure 7.3. There are two bolts on each side of each hopper halves (total: 8 bolts). Adjust the belt tension by adjusting the bolts located inside the hopper halves (red arrow). Remember to tighten the lock bolts after adjustment. -
Page 75: Drive Chains Overview
7.6.1 Drive chains overview Figure 7.4 : Drive chains, left side Figure 7.5 : Drive chains, right side 7.6.2 Drive chains tensioning The chain tensioning is done by turning the adjustment bolts as shown on the pics below. One bolt on each side of the compactor. -
Page 76: Elevator And Sub Conveyor
Figure 7.6 : Adjustment bolt location, both sides 7.7 ELEVATOR AND SUB CONVEYOR 7.7.1 Conveyor belts and feeder carrier Sub conveyor and elevator. The sub conveyor and elevator are of chain type with welded carriers. Check the chain tensioning and look for uneven wear. -
Page 77: Chain Tensioner, Sub Conveyor
Sub conveyor Figure 7.8 : Procedure Loosen the four bolts holding the bracket. Untighten the counter nut and tighten the bolt on the chain tensioner until correct chain-tension is achieved. Adjust both sides equally. Tighten the counter nut and the attaching bolts on bracket. 7.7.3 Chain tensioner, sub conveyor Figure 7.9 : Chain tensioner sub conveyor... -
Page 78: Chain Tensioner, Elevator F25
Replace damaged rollers and belts if excessively worn. If there is excessive wear on the chamber sidewalls, Hardox wear plates can be retrofitted on the chamber walls. Contact Orkel AS if relevant. NOTE: The play in the slide bearings is at the smallest when the compactor is brand new. This may result in increased temperature in the bearings. -
Page 79: Adjusting The Front Chamber Belt
NOTE: In extreme cases of heating, a special filler nipple may be used (force lubricate) after removing the hose from the bearing. Please contact Orkel if this is necessary. 7.8.2 Adjusting the front chamber belt All adjustment of the belt tracking is done on the right side of the chamber (upper front roller). See Figure 7.12. - Page 80 Figure 7.13 : Rear chamber adjustments Rear tension roller Adjusting the belt tracking is done by changing the distance C on the rollers bearing point D (Figure 7.15) Tension roller Figure 7.14 : By increasing the distance C, the belt tracking will go towards B (Figure 7.14).
- Page 81 If the belt still goes towards one of the sides, this operation must be carried out on the left side bearings, but in reverse order. If reducing the distance C, the belt tracking will enter towards B. Figure 7.15 : Bearing point (D), tension roller Figure 7.16 : Adjusting brackets, rear chamber belt...
-
Page 82: Adjusting The Chamber Belt Tensioner
Adjusting the belt tracking is performed by changing the distance D on the roller C (Figure 7.17). Prefer- ably on the right side bracket. Figure 7.18 : Tension roller Figure 7.17 : Bracket, upper adjust- ment roller By increasing the distance D, the belt will go towards A (Figure 7.18) in the chamber. -
Page 83: Replacing Chamber Belt
Figure 7.19 : Belt tensioner, right side Basic settings: Turn the nut B, until there’s a clearance A of 1 mm between the coils (Figure 7.19). NOTE: When pressing very light and dry materials, such as hay and wooden chips, the material might have some problems to start rotating. -
Page 84: Plastic Tying Unit
Figure 7.20 : Belt with locking rod and washer 7.9 PLASTIC TYING UNIT The tying unit, containing wide film or net is located on top of the chamber. Plastic tying unit, location Figure 7.21 : 7.9.1 Control and maintenance 1. Clean and lubricate the slides for feed rollers. 2. -
Page 85: Wrapping Table
Figure 7.23 : Feed rollers, seen from oper- ator's platform Figure 7.22 : Free wheel, seen from wrapping table 7.10 WRAPPING TABLE 7.10.1 Inspection Check the function of both emergency stop handles. Tighten the hinge bolts so that the handles barely returns to the start position. -
Page 86: Adjusting The Wrapping Table Belt
Knife bed Figure 7.25 : 7.10.2 Adjusting the wrapping table belt The tension of the wrapping table belt must be adjusted as shown in Figure 7.26. Correct belt tension, wrapping table Figure 7.26 : The belt tension can be changed by relocating the roller. There are six alternative holes to mount the roller support (Figure 7.27) - Page 87 Figure 7.27 : Holes for roller support Loosen the upper bolt to allow some movement on the bearing housing. Dismount the lower bolt and pull the roller to a suitable position. Insert the bolt in a suitable hole. Both sides must be equally mounted. If the belt tracking is incorrect, try to change location (side) of the belts.
-
Page 88: Frame, Drawbar, Attachments
7.11 FRAME, DRAWBAR, ATTACHMENTS 7.11.1 Frame Check the welding for cracks or deformations once a month. 7.11.2 Main components, fastening points Check all major bolt connections and re-tighten if necessary. Drawbar—frame Drawbar—eye Chamber—frame Feed hopper—frame Elevator—frame Pay extra attention to the bolts fixing the draw bar and eye. (574 Nm) Fixing bolts for drawbar eye Figure 7.29 : 7.12 CHAMBER ROLLER BUSHINGS... -
Page 89: Permissible Wear
Figure 7.30 : Check for play in the bushings. Red markings indicate areas on the bushings. There are two typical conditions of a worn out bushing, depending on where the bushing is located on the machine. Read the description and see Figure 7.30. -
Page 90: Remove Sprockets
New bearing: 40 mm inside diameter, 44mm outside diameter. Defect bearing: ≥ 42,2 mm inside diameter. Measure the diameter several places to get the correct impression of the bearing ovality. Large type, 50 mm New bearing: 50 mm inside diameter, 55 mm outside diameter Defect bearing: ≥... -
Page 91: Hydraulics
Sprocket removal Figure 7.33 : 7.13 HYDRAULICS 7.13.1 Hydraulics oil The oil level is monitored by the control unit. An alarm stating “oil level - low” is displayed in the control unit. Top up if necessary. The oil level can also be visually checked through an oil glass placed in/on the oil tank. -
Page 92: Heat Exchanger
Figure 7.34 : Dipstick with max and min level indicators Figure 7.35 : Location dipstick The oil level must be between max and min on the level indicator. Top up if necessary. The gear oil must be changed minimum once a year, or when needed. See approved lubricants in section 8.6.4 "Gearbox and gears for hydraulic motors"... -
Page 93: Changing Oil And Filter
Oils can be hot. Some pressure can remain in the hydraulic system/hoses/pipes, even though the machine is shut down. IMPORTANT: Always change filters when changing the hydraulic oil! 7.14.1 Changing oil and filter Hydraulic oil 1. Heat the oil up to about 30°C. 2. -
Page 94: Welding And Grinding
4. Drain until empty. 5. Clean the oil spill. 6. Mount the new filter. 7. Dispose with the old filter according to environmental regulations. IMPORTANT: Always use original parts when changing filter. Changing gear oil For main gear, feed hopper, elevator and wrapping table: 1. -
Page 95: Service History
Always use goggles, gloves, and suitable working clothes. Always keep a fire extinguisher available. 7.16 SERVICE HISTORY We recommend to fill in all service/maintenance work in this table Date/year Service/maintenance/major repair Performed by; Name/company 7 MAINTENANCE AND MECHANICAL ADJUSTMENTS... -
Page 96: Lubrication
8 Lubrication 8.1 Lubrication system, beka max EP 1 8.1.1 Oil lubrication, mode of operation 8.1.2 Grease lubrication, mode of operation 8.1.3 Beka max grease lubrication system 8.2 Refilling lubricants 8.2.1 Refilling the oil reservoir 8.2.2 Adjusting the amount of grease 8.2.3 Bleeding the grease system 8.3 Electric pump and main distributor 8.4 Troubleshooting for Beka max... - Page 97 Figure 8.1 : Pump element, suction phase Figure 8.2 : Pump element, pressure phase The grease lubrication system is a progressive system. It operates all types of grease of NLGI kl. 2 type. See recommended lubricants in section 8.6.3 "Greasing". A progressive lubrication system, means that all the bearings are lubricated one by one.
-
Page 98: Beka Max Grease Lubrication System
8.1.3 Beka max grease lubrication system Beka Max grease lubrication pump system, exploded view with description on major Figure 8.3 : parts. 1. Reservoir, transparent 7. Delivery piston 2. Stirrer scrape 8. Non return valve 3. Suction area, pump 9. Pressure relief valve 4. -
Page 99: Refilling The Oil Reservoir
1/2 turn on the adjusting screw reduces the grease added by 0,013cm³. Please contact Orkel Compaction if you have any questions. It is also possible to regulate the grease amount for the control unit. Adjustable from 100% down to 40%. -
Page 100: Electric Pump And Main Distributor
4. Activate the function greaser from the control box once more (the pump will run as long as the but- ton on the control box is activated). 5. Disconnect the tube from the first distributor block and activate the pump until you have a constant flow from this outlet. -
Page 101: Oil Temperature
Problems Cause Remedy NOTE: Correct motor mounting Air pocket in pump Bleed the pump Pump is working but does not supply Level in reservoir is too low Refill the reservoir grease Pump element not building up pressure (no Replace the pump element air pocket) Pump does not work Refer to pump not working above. -
Page 102: Gearbox And Gears For Hydraulic Motors
8.6.4 Gearbox and gears for hydraulic motors Gear oil: Renolin unisyn CLP 220N 8 LUBRICATION... -
Page 103: Manual Lubrication Charts
8.7 MANUAL LUBRICATION CHARTS 8.7.1 The compactor 8 LUBRICATION... -
Page 104: Feed Hopper F25
8.7.2 Feed hopper F25 8 LUBRICATION... -
Page 105: Flexible Drawbar
8.7.3 Flexible drawbar 8 LUBRICATION... -
Page 106: Lubrication List - Manual Greasing Points
8.8 LUBRICATION LIST - MANUAL GREASING POINTS Dens-X: Description: Qty on each side: Location: Total Intervall Elevator, lower Left and right Handbrake Right Sub conveyor, elevator side Left and right Brake shaft, support Left and right Under elevator, bearings on rollers Left and right Elevator, upper Left and right... -
Page 107: Preservation
9 Preservation 9.1 Cleaning 9.1.1 Using high pressure washer 9.2 Storage 9.2.1 Long time storage 9.2.2 Oil filling in the grease lubrication storage 9.1 CLEANING 9.1.1 Using high pressure washer The compactor can be cleaned with a high pressure washer. Avoid directing the beam towards any elec- trical connections and components. -
Page 108: Electrics
10 Electrics 10.1 Main power supply, e-stop switches and electrical cabinet 10.2 Electrical cabinet power supply rail 10.3 Sensors and manual controls 10.4 Valves, fan motors and pumps 10.5 Inputs and outputs 10.5.1 IO block 1 10.5.2 IO block 2 10.5.3 IO block 3 10.5.4 IO block 5 10.5.5 IO block 6... -
Page 109: Main Power Supply, E-Stop Switches And Electrical Cabinet
10.1 MAIN POWER SUPPLY, E-STOP SWITCHES AND ELECTRICAL CABINET 10 ELECTRICS... -
Page 110: Electrical Cabinet Power Supply Rail
10.2 ELECTRICAL CABINET POWER SUPPLY RAIL 10 ELECTRICS... -
Page 111: Sensors And Manual Controls
10.3 SENSORS AND MANUAL CONTROLS 10 ELECTRICS... -
Page 112: Valves, Fan Motors And Pumps
10.4 VALVES, FAN MOTORS AND PUMPS 10 ELECTRICS... -
Page 113: Inputs And Outputs
10.5 INPUTS AND OUTPUTS 10.5.1 IO block 1 Loc. ID Description Type Hi Mid Low X1.1 V02 Chamber open ·1 ·2 X1.2 V03 Chamber close ·1 ·2 X1.3 V04 Wrapper bypass off ·1 ·2 X1.4 ---------- NOT IN USE ---------- X1.5 ---------- NOT IN USE ---------- X1.6 V36 Elevator &... -
Page 114: Io Block
Loc. ID Description Type Hi Mid Low X2.14 ---------- NOT IN USE ---------- X2.15 ---------- NOT IN USE ---------- X2.16 S07 E-Stop redundancy input X13.3 X2.17 S37 Remote open feed rollers B.Bl B.Br X2.18 V33 Cooler fan run (suck) X2.19 S19 Feed rollers opened X2.20 S20 Feed rollers closed X2.21 V34 Cooler fan reverse (blow) X2.22 S38 Remote close feed rollers... - Page 115 Loc. ID Description Type Hi Mid Low X5.5 V13 Grease pump FB X5.6 ---------- NOT IN USE ---------- X5.7 V09 Wrapping arm slow ·1 ·2 X5.8 V10 Wrapping arm fast ·1 ·2 X5.9 ---------- NOT IN USE ---------- X5.10 ---------- NOT IN USE ---------- X5.11 ---------- NOT IN USE ---------- X5.12 S14 Oil temperature...
-
Page 116: Power Supply
Loc. ID Description Type Hi Mid Low X6.23 S10 Table upper position 10.5.6 IO block 7 Loc. ID Description Type Hi Mid Low X7.1 ---------- NOT IN USE ---------- X7.2 - V5 reference voltage X7.3 ---------- NOT IN USE ---------- X7.4 ---------- NOT IN USE ---------- X7.5 S42 Flip up... - Page 117 Loc. Terminal block function Comment X12.3 GND - I/O X12.4 GND - I/O X12.5 GND - I/O X12.6 X12.7 X12.8 X13.1 Supply - CU1 870-831 X13.2 Supply - CU2 870-831 X13.3 E-stop relay 870-831 X13.4 E-Stop circuit 870-826 X13.5 E-Stop circuit 870-826 X13.6 Various...
-
Page 118: Inputs And Outputs Sorted By Number
Middle- Left Middle-left Middle Right Left right E-stop 4 [Bl] To X2.16 (E-stop) E-stop relay, A1 E-stop 2 [Y] E-stop 3 [R] E-stop 3 [Y] E-stop 4 [Y] E-stop 2 [R] E-stop 1 [Y] E-stop 1 [R] To X10.3 S1 override switch [Y] To X5.19 Check valve [1] Hopper switch [Y]... - Page 119 All sensors ID Description Loc. Type Hi Mid Low S31 Chamber speed X3.20 PI Bl Br S32 Net control X3.21 PI Bl Br S33 RF remote ctrl. Stop (OPT) X7.16 DI S34 RF remote ctrl. Drop (OPT) X7.21 DI S35 Elevator speed X3.22 PI Bl Br S37 Remote open feed rollers...
-
Page 120: Io List
Valves, HIC1, HIC2 and HIC3 ID Description Loc. Type Hi Mid Low V33 Cooler fan run (suck) X2.18 DO V34 Cooler fan reverse (blow) X2.21 DO V35 Air cleaning, door (OPT) X1.18 DO ·1 ·2 V36 Elevator and ch. door speed X1.7 PWM ·1 V36 Elevator and ch. -
Page 121: Other Sensors And Switches
10.8.2 Other sensors and switches Other sensors and switches Description Loc. Hi Mid Low S01 Bale on wrapping table X5.19 A.Wh S29 Feed hopper US-sensor X3.6 Gy S14 Oil temperature X5.12 Bk S27 Oil level X6.16 Bk S28 Grease level X6.17 Bk S30 Chamber pressure X3.5 Wh... -
Page 122: Sensors, 7-Lead Cable
10.8.4 Sensors, 7-lead cable Sensors, 7-lead cable from wrapper Description Loc. S01 Bale on wrapping table X5.19 A.Wh S05 Wrapping arm home position X6.19 A.Bk S08 Wrapping arm stop X6.20 A.Br S11 Film sensor 1 X7.19 A.Bl S12 Film sensor 2 X7.20 A.Gn 10.8.5 Film system remote control... -
Page 123: Cable Detection
Valves, HIC4 (F25) ID Description Loc. V52 Run flip X2.10 ·1 ·2 V53 Flip change direction X6.5 ·1 ·2 V54 Flip check right X6.6 ·1 ·2 V55 Flip check left X6.7 ·1 ·2 V56 Auger bypass X5.16 ·1 ·2 10.8.9 Cable detection Cable detection (Automatic controller identification) Description Loc. -
Page 124: Sensor Overview
10.9 SENSOR OVERVIEW 10 ELECTRICS... -
Page 125: Sensor List And Function
10.10 SENSOR LIST AND FUNCTION Inputs on controllers for standard system Description Type Brand & type Range Comment Bale on table ultrasound Digital ultrasound Microsonic mic+130/D/TC 100...2000 mm Default 70 cm Table in middle position Inductive PNP Pepperl&Fuchs NBB8-18GM50-E2-V1 3...8 mm Wrapping arm in home pos- Inductive PNP Pepperl&Fuchs NBB8-18GM50-E2-V1 3...8 mm... - Page 126 Inputs on controllers for standard system Description Type Brand & type Range Comment pressure S42 Remote control - flip up Switch NO F25 only S43 Remote control - flip down Switch NO F25 only Remote control - hopper Switch NO F25 only start Remote control - hopper...
-
Page 127: Hydraulics
11 Hydraulics 11.1 Hydraulic diagram 11.1.1 Complete diagram 11.1.2 Wrapping table, chamber and elevator control 11.1.3 Plastic tying unit, sub conveyor and feed hopper 11.1.4 Additional feed hopper control for F25 and chamber drive 11.1.5 Hydraulic diagram list 11.2 Valve overview 11.2.1 Valve chart for Dens-X 11.2.2 Valve list for Dens-X 11.1 HYDRAULIC DIAGRAM... -
Page 128: Complete Diagram
11.1.1 Complete diagram 11 HYDRAULICS... -
Page 129: Wrapping Table, Chamber And Elevator Control
11.1.2 Wrapping table, chamber and elevator control 11 HYDRAULICS... -
Page 130: Plastic Tying Unit, Sub Conveyor And Feed Hopper
11.1.3 Plastic tying unit, sub conveyor and feed hopper 11 HYDRAULICS... -
Page 131: Additional Feed Hopper Control For F25 And Chamber Drive
11.1.4 Additional feed hopper control for F25 and chamber drive 11 HYDRAULICS... -
Page 132: Hydraulic Diagram List
11.1.5 Hydraulic diagram list Outputs on controllers for standard system Description Type Brand & type Current drawn @ 24Vdc Resistance in Ohms Comment Digital valve Comatrol SV-15-34-04 1,38 A Digital valve Comatrol SV-15-34-05 1,38 A Digital valve Comatrol SV-15-34-05 1,38 A Digital valve Comatrol SV-15-34-04 1,38 A... -
Page 133: Valve Overview
11.2 VALVE OVERVIEW 11.2.1 Valve chart for Dens-X 11 HYDRAULICS... -
Page 134: Valve List For Dens-X
11.2.2 Valve list for Dens-X Valve number Description Location Chamber, closing speed In cabinet, on valve block Safety valve, chamber door cylinder Chamber, cylinder, right hand side Safety valve, chamber door cylinder Chamber, cylinder, left hand side Plastic tying unit, feed speed Plastic tying unit Plastic tying unit, brake force Plastic tying unit... - Page 135 12 Specifications 12.1 Electrical system 12.2 Power take off 12.3 Lubrication system beka-max 12.4 Hydraulic system 12.5 Wheels and tyres 12.6 Dimensions and weight 12.6.1 Measurements 12.6.2 Power requirements 12.6.3 Dimensional sketch F25, operating mode 12.6.4 Dimensional sketch F25, transport mode 12.1 ELECTRICAL SYSTEM 24 Vdc with alternator located by the pump unit and dual 12 V 55 Ah Power supply:...
- Page 136 Oil type Motor oil SAE 10W - 30, 15W - 40 Oil consumption 6ml each bale on the table. 0.3 l/h (@ 50 bales/h) Volume container 4,2 l 12.4 HYDRAULIC SYSTEM Chamber drive: 280/340 bar (SW/relief valve) Sub-conveyer, feed hopper and film system: 180 bar Elevator and chamber door: 170 bar...
- Page 137 12.6.3 Dimensional sketch F25, operating mode 12 SPECIFICATIONS...
- Page 138 12.6.4 Dimensional sketch F25, transport mode 12 SPECIFICATIONS...
- Page 139 Glossary Bale chamber The material is transported into the chamber and shaped into a compact bale. After shaping the mater- ial, several layers of net/film is laid on the bale by the net/film system ensuring that the bale main- tains its shape during the transport to the wrapping table. Usually referred to as "the chamber". Elevator Transfers the material from the feed hopper to the chamber.
- Page 140 Sub conveyor Conveyor belt placed along the frame under the chamber, for transporting the bale from the chamber to the wrapping table, as well as transporting material spillage back to the elevator. Wrapping arms Wraps the bale with film while it lays on the wrapping table by rotating the arms around the bale. Safety features are mounted on the arms so that the emergency stop is triggered if something hits the safety features.
- Page 141 Index Break-in period 20, 43-44, 91 Control system Machine settings 59 Daily checklist 42 Film roller Installing a new film roller 46 How to use this manual 13 Hydraulics Recommended grease 101 Recommended oil types 23 Valve chart 133 Lubrication Approved lubricants 92, 101 Greasing 43, 79, 101, 106 Lubrication charts 13, 103...
- Page 142 Maintenance 13, 69, 71 INDEX...
Need help?
Do you have a question about the Dens-X Compactor and is the answer not in the manual?
Questions and answers