Advertisement
Quick Links
Safety Notes
This appliance can be used by children age from 8
years and above and persons with reduced physical,
sensory or mental capabilities or lack of experience
IMPORTANT:
and knowledge if they have been given supervision
or instruction concerning use of the appliance in a
Please read the following precautions
safe way and understand the hazards involved.
carefully before using this equipment.
Children shall not play with the appliance. Cleaning
and user maintanence shall not be made by children
This unit contains high voltage
without supervision.
circuits that may expose you to the
danger of electric shock.
If the supply cord is damaged, it must be replaced by
the manufacturer, its service agent or similarly
Means for disconnection must be
qualified persons in order to avoid hazard.
incorporated in accordance with the
wiring rules.
Before Installation
Do not open the enclosure without
isolating the signal and supply
Ensure you have checked all parts required are
sources. Ensure that these sources
present and inspect for any damage before
have been isolated for at least 5
installation. In the unlikely event your items are
minutes before entering the
faulty, DO NOT install faulty or damaged parts as this
enclosure.
unsafe and will void any warranty. Please return to
Do not power the unit outside of the
your distributor in the original delivery condition
values stated on the rating label.
including any packaging. This unit is ONLY to be
installed by a suitably qualified person complying
Do not use damaged or frayed
with local regulations.
cables.
Do not dismantle or modify this
equipment.
Never insert fingers into mechanisms
without turning the power supply off
first.
Do not mount the unit to unstable,
irregular or non-vertical surfaces.
Do not place heavy objects on top of
the unit.
Do not attempt to place items (such as
screwdrivers) into the moving parts of
the pump head.
Always ensure that care is taken
when handling chemicals.
Do not discard of the manual, this
must be retained.
This unit must be installed by suitably qualified
personnel in accordance with local regulations,
or in the absence of local regulations, installed
in accordance with the applicable
requirements in the National Electrical Code,
NFPA 70, Canadian Electrical Code (CEC),
Part 1, CSA C22.1, and Standard for
Ventilation Control and Fire Protection of
Commercial Cooking Operations, NFPA 96.
Quantura Q10+ Laundry Dosing System
Quantura
Q10+
Peristaltic
tubing
× 1
(Silicone 5mm )
Ceramic weight
and foot filter
× 1
Remote dose
controller x1
PVC Tubing
1 x 3m (10ft)
Fixings Pack:
Screws × 2
Wall plugs ×2
Installation
Mounting and connection
Step 1:
Using the wall plugs and screws
specified for this unit, fix the mounting
bracket to the wall. There is an embedded
spirit level to aid with this part of the
installation.
Step 2:
Mount the unit to the wall by
hooking it onto the wall bracket. As you push
the unit down you should hear a click sound.
Step 3:
Ensure there is no power to the
unit Remove front cover by turning thumb
screw anti-clockwise and pulling the front
cover towards you as shown.
Step 4:
Insert one end of the tube ensuring
that it is slotted into the body of the
enclosure as shown.
INFORMATION:
Silicone grease provided
must be applied to the tube and the pump &
rotor assembly before the tube is inserted.
Failure to apply the grease will affect the
pump performance during operation.
Step 5:
Now by manually rotating the
pump head, feed the tube into the unit as
shown.
IMPORTANT
to aid prolonging tube life and
efficent running, please use the Silicone
Grease (supplied) on the outer of the tube.
Spread liberally to the outside of the tube to
help ease installation, this will also aid
continuous smooth operation and help
prevent any potential snagging.
Step 6:
Now insert the other end of the
tube ensuring that it is slotted into the body
of the enclosure as shown.
IMPORTANT INFORMATION:
Dispensers Ltd (manufacturer) accepts no
responsibility and/or damages caused to
either the product or premises if the
installation process is not complied with in
full.
.
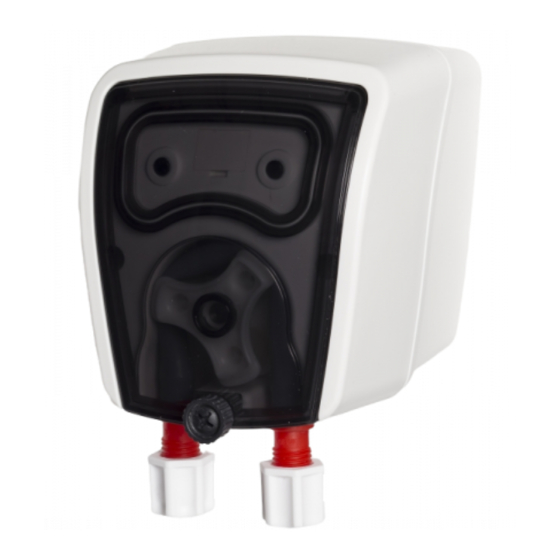
Connecting Chemicals
A
B
Power Supply
Should the supply cord be damaged, it should be replaced by the
manufacturer or its service agent or a similarly qualified person in
order to avoid a hazard.
Wire Colours
ROW
US
Blue
Black
Brown White
Connecting or Replacing Handset
Brightwell
.
Step 1:
Ensure there is no
power to the unit, push the tube
adaptors into the clamps nuts.
Then tighten the clamp nuts.
Step 2:
Connect the suction
tube from the chemical
container to (A). Now connect
the delivery tube from (B) to the
injection point.
Step 1: Offer up the connector
handset to the connector of the
unit (positioned underneath the
pump). Make sure the connector
is lined up correctly as it will only
fit in a certain position.
Step 2: Tighten the connector by
turning it clockwise until finger
tight.
Note:
Do not overtighten
Advertisement

Subscribe to Our Youtube Channel
Related Manuals for Brightwell Quantura Q10+

Summary of Contents for Brightwell Quantura Q10+
- Page 1 Step 2: Tighten the connector by or in the absence of local regulations, installed turning it clockwise until finger in accordance with the applicable IMPORTANT INFORMATION: Brightwell Fixings Pack: tight. requirements in the National Electrical Code, Dispensers Ltd (manufacturer) accepts no Screws ×...
- Page 2 Initial Set up - Programming Operating Instructions Service Intervals Selecting between Learn 1. Pump Tube Servicing: It is recommended the pump tubes are inspected for Mode and Run mode performance once every 3 months and lubricated with silicone grease to pro long tube life.
Need help?
Do you have a question about the Quantura Q10+ and is the answer not in the manual?
Questions and answers