Table of Contents
Advertisement
Quick Links
Advertisement
Table of Contents

Related Manuals for König Gaming GAME-WHEEL11


Summary of Contents for König Gaming GAME-WHEEL11
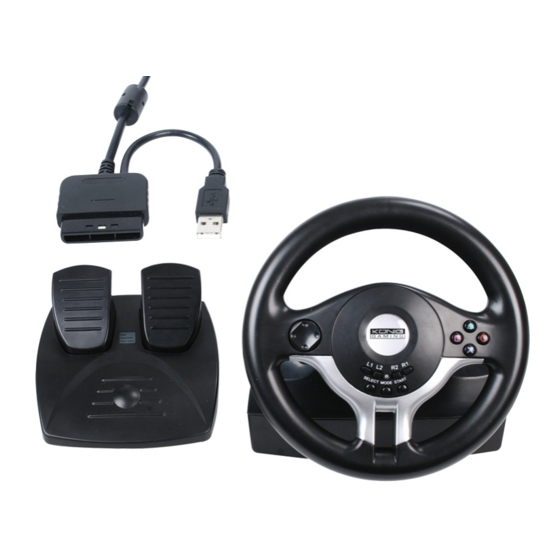
- Page 1 GAME-WHEEL11 PS2™ & PC wheel MANUAL...
- Page 2 1. Connection & Installation 1)Select the switch (PC/PS) according to the console. 2) Connect foot pedal to steering wheel. 3) Connect wheel to PS2™ or PC console. When single player plays PS2 game, make sure the wheel’s plug is connected to the first jack from the left. 2.
- Page 3 Brake 3. Buttons function form (PS—PC) PS2/Digital PS2/Analog PS2/Neg RY(0-255) LX(0-255) LY(0-255) LY(0-255) START START START SELECT SELECT D-PAD X/Y axis D-PAD D-PAD Brake LX(0-255) Accelerator RY(0-255) LX(127-0) LX(127-0) RX(127-0) LX(127-0) LX(127-255) LX(127-255) RX(127-255) LX(127-255) MODE MODE MODE MODE MODE MODE 4.
- Page 4 mode present. 2) KeyMap function without memory A. Under the NEGCON mode, there is no KeyMap function. B. PROGRAM sourcing buttons includes: , X, , O, L1, L2, R1, R2 C. The programmable key includes: left/right foot pedals, left/right hand gear stick. D.
- Page 5 B. Test the buttons from “1” to “10”: Press any button from 1 to 10 of the wheel, the corresponding button in the test page will turn red. C. Testing the Directional buttons: Digital mode:Press the direction button’s 8 directions ( up, down, left, right plus 4 x 45 degree angle) , the interface’s “X/Y axes “block has corresponding direction indications.
- Page 6 Tel.: 0031 73 599 1055 Email: info@nedis.com Declare that product: Name: KÖNIG Model: GAME-WHEEL11 Description: Steering Wheel for PS2™ and PC Is in conformity with the following standards EN50081-1/1992: EN55014, EN61000-3-2/-3 EN50082-1/1997: EN55104-2 Following the provisions of the 89/336/EEC (EMC) directive.
- Page 7 To reduce risk of electric shock, this product should ONLY be opened by an authorized technician when service is required. Disconnect the product from mains and other equipment if a problem should occur. Do not expose the product to water or moisture. Maintenance: Clean only with a dry cloth.
Need help?
Do you have a question about the GAME-WHEEL11 and is the answer not in the manual?
Questions and answers