
Subscribe to Our Youtube Channel
Related Manuals for Vytronix DSM13


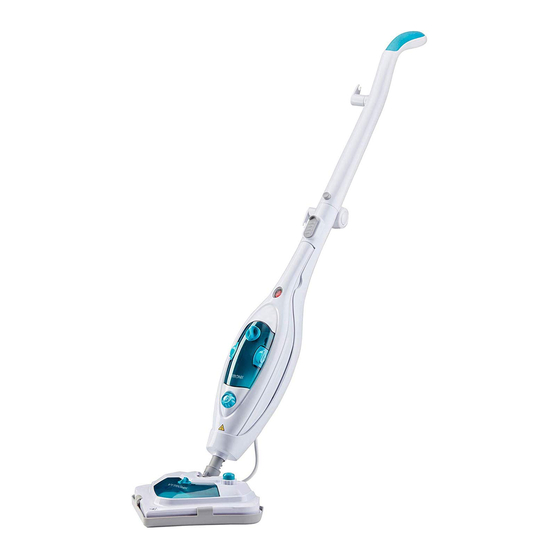
Summary of Contents for Vytronix DSM13
- Page 1 D S M1 3 MU L T I F U N C T I O N S T E A M MO P I N S T R U C T I O N MA N U A L w w w . v y t r o n i x . c o m...
- Page 2 BLANK PAGE Page 1 of 12...
- Page 3 Safety instructions WARNING:Read all safety warnings and all instructions. Failure to follow the warnings and instructions listed below may result in electric shock, fire and/or serious injury. • Warning: When using electrical appliances, basics safety precautions, including the following, should always be followed to reduce the risk of fire, electric shock, personal injury and material damage.
- Page 4 • Never put detergent or chemical products into the steam mop unless they have been approved by Vytronix Ltd, as this may damage it or make it unsafe for use. • The appliance emits very hot steam to sanitize the area of use. This means that the steam head and cleaning pads get very hot during use.
- Page 5 Box contents A. Handheld Unit B. Main Body/Folding Handle C. Window Squeegee D. Small Scrub Brush E. Medium Scrub Brush F. Accessory Adaptor G. Angle Nozzle H. Grout Cleaning Tool Scraping Tool Measuring cup K. Microfiber Pad L. Garment Steamer Cloth M.
- Page 6 Technical specification • Rated voltage: 220-240V • Rated frequency: 50Hz • Output power: 1300W (+5%,-10%) • Water tank capacity: 300 ML • Steam output time: 20 minutes • With a ready indicator. when the appliance is connected to power supply, turn on the power switch, the indicate light will change to blue, meaning the mop is ready to emit the steam.
- Page 7 Attaching the base to the main body Slide the bottom end of main body onto the steam head until it clicks into place. The steam head can be removed from the main body by pressing the release button on the main body. Attaching a cleaning pad Simply press the pad onto the underside of the base and it will stick in place.
- Page 8 Operation 1) Fill the water tank Method one: Open the water tank cap by tuning it counterclockwise, fill tank with 300ML of water use measuring cup, then replace cap and turn clockwise to close. Method two: Remove the water tank from main body, open the water tank cap by tuning it counterclockwise, fill the water tank directly from a tap, then replace cap and turn clockwise to close.
- Page 9 To use as a handheld steamer 1) Press the release button on the main body to remove handheld unit. 2) Install the accessory adaptor to the handheld unit, this can later be removed by pressing the release button. 3) Select the accessory you wish to use, place it onto the accessory adaptor and turn clockwise until it locks into place.
- Page 10 Accessory list WHAT IT’S CALLED WHAT IT LOOKS LIKE WHAT IT’S FOR Removing soap scum and grime Window Squeegee/Garment from shower glass, mirrors and Steaming Tool windows. Taking creases out of hanging garments, curtains tablecloths and more. Oven, microwaves, stove tops, Small and Medium Scrub showers, bathtubs, tap fixtures, brushes...
- Page 11 Cleaning, maintenance and storage BE SURE THAT THE UNIT IS DISCONNECTED FROM THE POWER OUTLET AND COMPLETLEY COOLED DOWN BEFORE PERFORMING MAINTENANCE Drain the remaining water in the tank and rinse after use. Cleaning attachments can be washed in warm water with a small amount of dish soap if they become dirty.
- Page 12 This product contains no serviceable internal parts. Do not try to repair it yourself. Any maintenance or repair that requires disassembly or any steps other than those stated in this manual must be carried out or approved by Vytronix Ltd. Cleaning the microfiber pad Machine washable on at 30 –...
- Page 13 It is always advised to check the troubleshooting guide in the event of any issues before making contact with Vytronix Ltd as many issues can be resolved quickly and easily at home. BE SURE THAT THE UNIT IS DISCONNECTED FROM THE POWER OUTLET AND COMPLETELY...
- Page 14 R e g i s t e r y o u r w a r r a n t y a t w w w . v y t r o n i x . c o m...
Need help?
Do you have a question about the DSM13 and is the answer not in the manual?
Questions and answers