Table of Contents
Advertisement
Advertisement
Table of Contents

Related Manuals for LT Piccolo Series

Summary of Contents for LT Piccolo Series
- Page 1 USER MANUAL VERSION 2.06...
- Page 2 Piccolo 2 from 82 www.lt-light.com...
-
Page 3: Table Of Contents
USB HOST (A), USB DEVICE (B), & ETHERNET ............11 3.3.1. USB´s ........................11 3.3.2. Ethernet ........................11 3.4. LT-LINK ........................11 3.5. VGA (optional) ....................... 11 3.6. DC-IN (& switcher) ......................11 3.7. LIGHT (1 or 2, depending of models) ................12 EXTRA CONECTIONS FOR PICCOLO SCAN MODELS .......... - Page 4 37.4. SETUP ........................64 37.4.1. Editor & Times (30) ..................... 64 37.4.2. Playbacks (31) ...................... 65 37.4.3. System (32) ......................66 37.4.4. Dmx Setup (33) ....................66 37.4.5. Power-Up Macro (34)................... 66 37.4.6. Remote & PocketPC (35) ..................66 www.lt-light.com...
- Page 5 37.6.3. Tools, Software Updates… (79) ................68 37.6.4. 37.7. TEST ........................... 68 37.7.1. All Inputs (80), functions and LT-Link (88)............68 OLE ........................... 68 ETHERNET ........................70 39.1.1. PICCOLO & CAPTURE, using CITP ..............71 39.1.2. PICCOLO & COOLUX, using ArtNet ..............73 39.1.3.
-
Page 6: Introduction
And just one more, LT-Light has 4 Piccolo models and 2 Piccolo Scan models covering a wide range of needs. Piccolo 12... - Page 7 240 x 64 240 x 64 240 x 64 Dimmer Curves 5 pre 5 pre 5 pre 5 pre Ethernet 10/100 RS485 (LT-Link) USB (1 host & 1 device) PC-Software (OLE) Option Option Option Option VGA-Output 3pin XLR – Worklight...
- Page 8 Display 2 displays of 240 x 64 2 displays of 240 x 64 Dimmer Curves 5 pre-programmed 5 pre-programmed Ethernet 10/100 RS485 (LT-Link) USB (1 host & 1 device) PC-Software (WOLE) VGA-Output 3pin XLR – Worklight Yes (1) Yes (1) Midi In/Out, SMPTE, Audio &...
-
Page 9: Functionality
Storage of Show to external USB memory stick Printout of show data in a file *.txt. O.L.E. (Off Line Editor for PC). Complete Simulator, which allows the user to practice, to edit and to modify the Shows on your PC www.lt-light.com... -
Page 10: Basic Conections, All Models
MIDI-IN – Pin 2: n.c. MIDI-OUT – Pin 2: Ground MIDI-IN – Pin 3: n.c. MIDI-OUT – Pin 3: n.c. MIDI-IN – Pin 4: Signal MIDI-OUT – Pin 4: Return MIDI-IN – Pin 5: Return MIDI-OUT – Pin 5: Signal www.lt-light.com... -
Page 11: Usb Host (A), Usb Device (B), & Ethernet
Pin 6 – RX- Pin 7 – N.C. Pin 8 – N.C. 3.4. LT-LINK SUBD-9 connector, standard RS485. Connector for expansion devices such as remote control, etc. 3.5. VGA (optional) SUBD-15 connector, video standard. If Piccolo has the optional video card, then it is possible to connect a conventional monitor or a TFT. -
Page 12: Light (1 Or 2, Depending Of Models)
3 – SMPTE + {jack live point} 4.3. AUDIO Stereo jack for 1Vpp audio signals. The signal is computed like mono signal. Code: 1 – 0 V ref. {jack body} 2 – N.C. 3 – Signal (1Vpp) {jack live point} www.lt-light.com... -
Page 13: Start Up
The first time that the console is started, and whenever it is necessary, a reset should be done: Switch off the console (Off) Press and hold down [] Switch on the console (On). After a few seconds, release [] www.lt-light.com... -
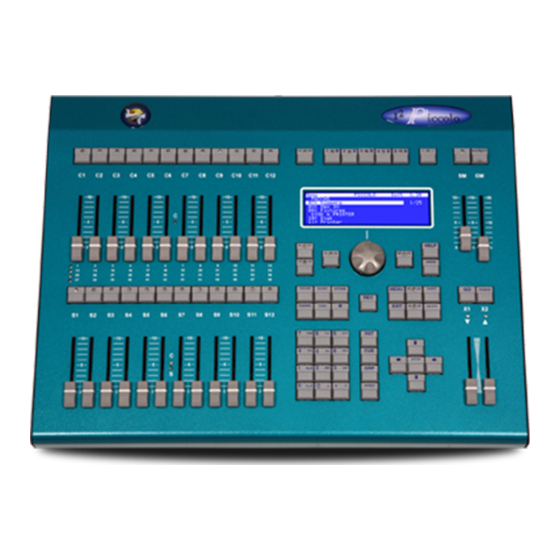
Page 14: Piccolo Parts
Delete any stored data (cue, group, etc) in all data memory. Recover the preset default data (if this option is active, see menu 77). If no option is set the console recovers the manufacturer defaults. PICCOLO PARTS PICCOLO SCAN PARTS www.lt-light.com... -
Page 15: Selecting The Working Mode
[1-72] & [73-144] [1-36], [37-72], [73-108] & [109-144] PICCOLO 48/192 [1-96] & [97-192] [1-48], [49-96], [97-144] & [145-192] Press [CH.MD] to change the channel banks. The active bank is marked with a LED (example: the first bank is selected): www.lt-light.com... - Page 16 C LED’s (in the middle of the fader group) are lit in green. Channel control in THEATRE & MANUAL mode: C LED’s (in the middle of the upper faders) are lit in green. S LEDs are lit in red. www.lt-light.com...
-
Page 17: Base Display / Base Screen
In the monitor, and depending of the model, the information is in one screen that, if necessary, is paged pressing [↓] and [↑]. In the fixtures zone it’s possible to have more information about the same fixtures, pressing [] & []. www.lt-light.com... -
Page 18: Editing Channels
To obtain full channel levels in scenes it will be necessary to: Move GM to the upper end Deactivate [BLK.OUT] (LED is off). If necessary, edit the channels patch now, do this always before the beginning of any scenes edition. (See DIMMER, pg-56) www.lt-light.com... -
Page 19: Channel Faders
[CHANNEL] [#] [THRU] [#], a channels range [CHANNEL] [#] [THRU] [#] [EXCEPT] [#], a range, excluding a channel [CHANNEL] [#] [THRU] [#] [EXCEPT] [#] [EXCEPT] [#], a range, excluding several channels [CHANNEL] [#] [THRU] [#] [EXCEPT] [#] [THRU] [#], a range, excluding channels in range www.lt-light.com... -
Page 20: Level 00 & No-Selection
Piccolo has a command to edit a level value in scale 0-255, with whole precision. To edit a cannel with a value in scale 0-255, press: [CHANNEL] [#] [@][OPTIONS] [#][#][#], with the last 3 numbers as desired value in scale 0- 255. www.lt-light.com... -
Page 21: Example
Edit a new scene, starting from the previous scene or starting from zero (cleared scene). 13.4. CHANNEL EDITING IN SINGLE MODE Edit a scene from the keyboard and/or from C# & S# If desired, store the scene to a group (pg-23) or cue (pg-24). www.lt-light.com... -
Page 22: Channel Editing In Double Mode
Note: When DOUBLE is activated, BLIND is forced for the S# and also the T are deactivated for the crossfader 13.6. CHANNELS & [CH.MD] For following working modes THEATRE, DOUBLE and MANUAL, pressing [CH.MD] toggles the 4 banks to access the channels. Bank 1 Bank 2 Bank 3 Bank 4 www.lt-light.com... -
Page 23: Storing Groups
If desired, jsut now, you can press [OPTIONS] and edit times and text of the just stored group. Exit of options function pressing [EXIT], [OPTIONS], or [LOAD] [S#] Also you can access to options for a particular group, pressing: [GRP] [#] [OPTIONS] (Editing times and text) [OPTIONS] www.lt-light.com... -
Page 24: Storing Cues
Toggles between the general options & cues options. [EXIT] Closes the table/list. General options: Listed are: the default values for the fade-times, auto-time, time parameters for the crossfader and the go-back function (are the same values that are in menu 30). www.lt-light.com... -
Page 25: Timing
Submasters allow the playback with groups & cues loaded: To load the group # into a Submaster [GRP][#][LOAD][S#] To store a new group with the current scene and [LOAD][S#] load this new group into a Submaster To load the cue # into a Submaster [CUE][#][LOAD][S#] www.lt-light.com... - Page 26 SM (this can be changed in the configuration menu 31), and its blackout key. In monitor & display: Submasters from 01 to 03 are loaded with groups and submasters from 04 to 10 are loaded with cues, in different modes (normal, absolute – - & inhibit – www.lt-light.com...
- Page 27 **It is possible to influence this using the Crossfader output. From the MENU 31, select option Solo Off X To empty a Submaster, press [DELETE] [S#]. The Submaster will be free (its LED turned Off) To empty all the Submasters at the same time, press [DELETE] [FL.MT] www.lt-light.com...
-
Page 28: Pages (Theatre/Manual)
Loading a page never causes a jump in the light on scene. If, at the moment of the loading, there are some activated Submaster, the new content will only be activated when submasters arrives its 00, and will be in this moment when the new content is loaded. www.lt-light.com... -
Page 29: Cues In Crossfader (Theatre/Manual & Single)
When a cross-fade is in progress, pressing [PS.BACK] the cross-fade is paused. If the cross-fade is inactive, [PS.BACK] starts to previous cue in invert direction If cross-fade is paused, [GO] restarts it to the next cue and [PS.BACK] restarts it to the previous cue, in invert direction www.lt-light.com... -
Page 30: Cue List In Submasters
(of the loaded list) is executed, the list is then automatically reloaded again by loading the first cue in X2 and the cue list is then ready to be executed again. These options are inside menu 31: Playbacks www.lt-light.com... -
Page 31: Modifing Cues & Groups
Using a scene, cue or group to modify which is loaded to a Submaster. Edit the desired scene, Submaster at FF, with the channel faders or the keyboard, and using (if desired) the output of any playback (Submaster or Crossfader). www.lt-light.com... -
Page 32: Submasters With Effects (Theatre)
Load it with speed control (7: EFFECT Rate) [EFFECT] [#] [LOAD] [S#] Load it with level control (8: EFFECT Level) [EFFECT] [#] [LOAD] [LOAD] [S#] To execute a loaded effect: [S#] Start/Stop, in automatic mode, the loaded effect in S# www.lt-light.com... -
Page 33: Control Submasters For Level And Rate
It’s possible to create a general control for rate (9: RATE) and/or for level (19: LEVEL) using any Submaster of the console. For this, open the screen: [MD.FY][FL.MT] Select the desired option and configure the playbacks that will be controlled for this control, the crossfader (X) and the Submaster range (01-12) www.lt-light.com... -
Page 34: Fixtures (Piccolo)
Hm column. This key can be used as a normal change, for all the fixtures parameters or only for the selected parameter, respectively: [FIXTURE] [#] ([THRU] [#]) [3_B]HOME [FIXTURE] [#][5_B]PARAM [#] [3_B]HOME [4_B]EDIT+ (See below) www.lt-light.com... -
Page 35: Fixtures (Piccolo Scan)
Orto (LED blinking): Only one axis can be edited at the same time (X or Y). The axis with biggest movement will be the axis edited. In this way is very easy to esdit only X or only Y. This key also is used to activate TB mode always that trackball is in MOUSE mode (see below). www.lt-light.com... -
Page 36: Commands For Fixtures
(Lamp ON, Lamp Off and Reset). Press [FIXTURE] [#] ([THRU] [#]) [PARAM] [#] [@] [#] to edit a value. [FIXTURE] [#] ([THRU] [#]) [PARAM] [#][#] to execute a special command. [FIXTURE] [#] ([THRU] [#]) [PARAM] [#] [@][OPTIONS] [#] to edit a value in scale 0-255. www.lt-light.com... - Page 37 Note that the LED of the bank key corresponding to the new stored library is lit to indicate that the library is accessible. To store a position, edit the position parameters of all the desired fixtures that you want include in the library. www.lt-light.com...
- Page 38 Libraries are real references, in other words, each cue or group that is edited using libraries, it maintains this library value as reference, in this way you can modify the library to modify each cue and group that includes this library. www.lt-light.com...
- Page 39 Empty the editor. Activate [LIBs], its LED is lit. [POS] [#] [MDFY] (Note the modifing flag that appears in the status line) Edit and change the desired values (it’s possible to include new fixtures, etc) [REC] to store the modifications. www.lt-light.com...
- Page 40 Deleting libraries. A diferencia de las paletas, las librerías se pueden borrar. Podemos borrar una librería, un rango de ellas, o todas las librerías de un tipo: Activate [LIBs], its LED is lit. [POS] [#] ([THRU] [#])[DELETE], to delete the position # (or the selected range). Confirm pressing [DELETE] again. www.lt-light.com...
- Page 41 These references (of dimmer libraries) are marked in light magenta in the editor (on monitor): Example using DIM libraries, “scenes”: Editing a basic scene with 6 fixtures, including positions, beams, gobo, etc Now, record a DIM library with all this information: [DIM] [1] [REC] Apply DIM 1 pressing: [DIM] [1] [ENTER] www.lt-light.com...
- Page 42 Automatically, cues 1, 2 & 3, after the DIM 1 modifications, they will have this lock in scene: & Library categories table Category Library [DIM] Library by item (fixtures & channels), stores the complete scene. Admits all the parameters and channels patched. [POS] Library by fixture. www.lt-light.com...
- Page 43 Library n is applied fading in # [EDT+][#] [n] [ENTER] seconds (# from 0,1 to 999.9 sec; 3 [EDT+][3][B.1] sec in example), over the editor [EDT+][3][POS][1][ENTER] selection. *Note 1: Only parameters set as “fade” are affected for these times. www.lt-light.com...
- Page 44 1: [FIXTURE][1][WHEEL] Encoder [WHEEL] , release the pressed key to set the encoder value in the scene. Copy the parameter value of the first fixture of the selection over the rest of the fixtures of the same www.lt-light.com...
-
Page 45: Menu 30 - Editor & Times, Option: "Virtual Dm
Press [SHAPE], and then, select option 0 by pressing [0] From here, follow the instructions on screen (or display)… o Selecting the shape type (Type), if necessary (depending of the selection). o Selecting the primitive function (Palette) to apply. www.lt-light.com... -
Page 46: Others Options For Shapes
In the new screen opening, it is possible to change the order of the items. Add option ([SHAPE][1]) This option is to add a new shape to the last selection with shapes, this option is applied following the same steps that the option new ([SHAPE][0]) www.lt-light.com... - Page 47 Channels at 50% + flash and Channels at 50%, without flash, Fixtures in new position + circle. and Fixtures in new static position Scene is mixture of both groups. (without shape). The scene is only from the last group. www.lt-light.com...
-
Page 48: Exam & Mdfy Functions
Exams the contents of macro # or exams the general macro [3_B]MACRO [#] [EXAM] () options in the macro list. [3_B]MACRO [EXAM] () Exams the contents of the Submaster # or exams the item Submaster [EXAM] [S#] () loaded in all the Submasters. [EXAM] [FL.MT]] () www.lt-light.com... -
Page 49: Test & Next Functions
The same command, but used to test groups [CUE][#][TEST], [TEST], [TEST] … The same command, but used to test cues The function [1_B]NEXT helps to find the next channel, fixture, group, cue, effect, etc. The commands are very similar: www.lt-light.com... -
Page 50: Copy Function
29.1. DELETING CUES & GROUPS To delete cues & groups from the data memory: Delete a cue or a group: [CUE][#][DELETE] [GRP][#][DELETE] Delete a range of cues or groups: [CUE][#] [THRU][#][DELETE] [GRP][#] [THRU][#][DELETE] www.lt-light.com... -
Page 51: Deleting Effects, Pages & Macros
Open the cues table pressing [CUE][CUE] Activate [4_B]LN-TM (Led on). Edit the desired time ( ). Note that the absolute value for is changed to compensate to the “moment” of the next cross-fade. End the process deactivating [4_B]LN-TM (Led off). www.lt-light.com... -
Page 52: Macros
To repeat process when selecting in editing: In this case, the macros are directly executed from the keyboard, pressing: [3_B]MACRO [#][ENTER] Note: Piccolo can also execute a macro when turned on. This macro is programmed in the menu 35, option: Power Up Macro. (pg- 66). www.lt-light.com... -
Page 53: Midi & Time Code (Multimedia)
SMPTE input is in Piccolo Scan and can be add to Piccolo consoles using an external multimedia box) TC is a time value with following hh:mm:ss:ff, where as: Is the hour, from 0 to 23 Is the minute, from 0 to 59 www.lt-light.com... - Page 54 To capture or edit the TC, the events list can be activate (ON) or off. If activate (ON), at the same time that the TC is captured, the events list is executed. This way you can simulate the real execution of the events in the list www.lt-light.com...
-
Page 55: Executing The Events List
(these events will then be executed on these days of the week). Note*: Current day can be seen and changed in menu 32: System Playing back time code TC, only the events programmed for the day will shown in base screen. Following the previous example (for Monday) you will see: www.lt-light.com... -
Page 56: Dimmer Patch
At the 50% of control level, the output is 30% of the total power. This curve is useful with fluorescent fixtures, and in Theatre, to compensate the fast start of some lamps with low power. On-Off Curve, (4: O-F) Is the Non-Dim curve. This curve does not dim. At 0% of its control www.lt-light.com... -
Page 57: Dimmers To Control The Auditorium Lights
Piccolo has no fixtures by default. It is necessary to configure the desired fixtures from the fixtures patch (for a maximum of 32 parameters for Piccolo consoles and a maximum of 256 parameters for Piccolo Scan consoles). Open the fixtures patch table by pressing: [FIXTURE][FIXTURE] [MENU][0][4] www.lt-light.com... -
Page 58: Scroller Definition
Type Fixture personality (these types are obtained from the fixtures library and can be downloaded from web www.lt-light.com) To edit the type, enter the index number of the Cache list (1 to 4 for Piccolo or 1 to 8 for Piccolo Scan). This list can be edited. To open the Cache list, press [OPTIONS]. -
Page 59: Dark Gel
ID folder, and this folder insede the FIXTURES folder. \\FIXTURES \ 10 \ MAC600M4.___ You can ask for new fixtures in support@lt-light.com 34.3. FIXTURE DEFINITION Name: A short text that identifies each Type Ch: DMX channels number used by the fixture... -
Page 60: Patch Tools
This option can be found in the channels patch menu. It has tools to copy, delete, exchange, or activate DMX addresses or DMX lines. Inside channels patch, press [OPTIONS] to access, now you can: Default Set dimmers to their default values: www.lt-light.com... -
Page 61: Shows
Only for OLE software (pg-68), if necessary, select the data format pressing [OPTIONS]: o LT Shows (standard Piccolo format. Use this format always when possible) o ASCII Shows (shows exchange format using ASCII, only available in the OLE. It is used to import/export the show basic data from/to other lighting consoles) ... -
Page 62: Menus
For channels: 3 groups more, one with all channels, other with the odd, and other with the even. Inside this menu (07) we can select that groups you will want and set their number of the first group to record for fixtures & channels: www.lt-light.com... -
Page 63: Shows & Printer
Sound input, AUDIO, admits 1Vpp signals. Audio signal is filtered in Bass, Medium & Treble; you have these 3 filtered signals as controls. When a control is activated, its associated key is “pressed” or its associated fader is “moved” www.lt-light.com... -
Page 64: Setup
& the default timing. Piccolo has 3 different timing: T1 (basic, all parameters fade at time) T2 (LTP parameters jump to value without time; only channels and fixture dimmers fade at time, and also size and rate for shapes) www.lt-light.com... -
Page 65: Playbacks (31)
Store in S1 a group with a Scroller in red and in S2, the same Scroller in green. And, we observe the differences, activating and deactivating the Submasters in different sequences: Submasters Color in Scene DISABLED ENABLED We begin with Home White (initial tracking) White (initial tracking) www.lt-light.com... -
Page 66: System (32)
Control can be radio or cable. To activate the Remote Control, access to REMOTE & POCKETpc menu and configure its options as next: Then, connect the Remote unit (Remote or Receiver) to the LT-LINK port of Piccolo and check that www.lt-light.com... -
Page 67: Wireless Dmx (36)
ENABLED it will not be possible to change the patches to factory default. To store the Patches data: first edit the patches, and then with the Saved cell execute the command 0:SAVE (with password as ENABLE). After this the data is stored, set Load www.lt-light.com... -
Page 68: Tools, Software Updates
Dmx Out: shows the DMX-OUT signal Memory: tests the consistency of the system data memory Midi & LT-Link: Test the MIDI port and the LT-LINK port. In both cases, follow the instructions on the screen right to end of the test procedure To exit from test press [EXIT] 38. - Page 69 Piccolo 69 from 82 IMPORTANT! Always use this software to print show data, to convert a Piccolo Show into a ASCII show, and to read a ASCII show and convert into a Piccolo Show www.lt-light.com...
-
Page 70: Ethernet
Note: If it wants to communicate with Capture by IPX (as until now) the Net number must be selected in the range between 0 and 9. Some ArtNet devices use net numbers between 1 and 16 (1 = 0) www.lt-light.com... -
Page 71: Piccolo & Capture, Using Citp
In the computer: Set the IPs of both, console & computer, in the same range of directions. For PC: 1. - In Properties of Connection Status 2. - Accede to Properties of the TCP/IP protocol www.lt-light.com... - Page 72 5. Connect Piccolo, using CITP, with Capture, editing the cell with the index number of one of the available. At the end, in Capture: Check, if needed, or set manually, the assignation done amongst Project Universe and External Universe: www.lt-light.com...
-
Page 73: Piccolo & Coolux, Using Artnet
Layer 5402: Camer 17 Graphic Layer Camera Note: Piccolo cannot control some types of layer and cameras because they are controlled for more than 32 DMX channels or 16 parameters (maximum for Piccolo fixtures). Piccolo Scan can control both. www.lt-light.com... - Page 74 To transmit Dmx data by Ethernet in ArtNet protocol, you also need configure the Piccolo Ethernet Configuration menu. Enable the Ethernet communication, y: o The same Subnet number in Piccolo & in Pandoras Box product (0) o The same ArtNet universe number (0). www.lt-light.com...
- Page 75 Piccolo 75 from 82 To select files and folders for Media and Mesh contents in layers, and for Mesh in cameras, you need configure the media contents inside the project: www.lt-light.com...
-
Page 76: Piccolo & Ebox
39.1.3. PICCOLO & eBOX The LT-Light eBOX, can have 2/4 physical DMX universes from Ethernet. Each eBOX can assign up to 512 DMX outputs on any of the Ethernet universes. Piccolo transmits only one universe by Ethernet, but you can set the same universe for the 2 physical output of the Ebox. If the universe is in IPX: To configure the Ebox (Ethernet <->... - Page 77 Piccolo Simulator (WOLE) as a PC-Console. In others words, when a WOLE detects a connected LT eBOX to the PC, it can work as PC-Console. When Piccolo (or WolePiccolo) is transmitting DMX signal by Ethernet, in the command line you can see the next symbol: , in both monitor y/or display,...
-
Page 78: Console Updating
40. CONSOLE UPDATING Software for updating the console is published on Internet, www.lt-light.com, but it can also be obtained from your LT-Light distributor. Console is updated using its USB connection to a PC. For this it will be necessary: PC with WIN-XP or WIN7. - Page 79 Seect “Install from a list or specific location (Advanced)” . Select UsbDriver folder location . Driver is installed, and computer is ready to update LT devices by USB Observe that new Driver is installed in a new location: “Libusb-win32 devices”, not in “Universal Serial Bus Controllers”...
-
Page 80: Apendix
If correct, and always when the table is active, this key toggles between the general options and the table Closes the table… Do not forget to press [ENTER] to accept the last [EXIT] cell which was edited before closing the table www.lt-light.com... -
Page 81: Option Windows
In display E▪ & E■ for the active Editing (faders or keypad) Red & light red for the active Channels in MANUAL mode Magent Submasters Yellow Inhibited Black level over inverted background X1 (Crossfader) Cyan X2 (Crossfader) Light cyan www.lt-light.com... - Page 82 Piccolo 82 from 82 www.lt-light.com...
- Page 83 Firma y Sello Distribuidor: Firma CERTIFICADO DE GARANTIA: Para cualquier consulta sobre las condiciones de garantía están disponibles en nuestra página web: www.lt-light.com Para cualquier requerimiento de nuestro Servicio Técnico es necesaria la presentación de este Certificado de Garantía. Cortar por aquí...
- Page 86 Because your successes are ours www.lt-light.com Specifications can be changed without previous notice.
Need help?
Do you have a question about the Piccolo Series and is the answer not in the manual?
Questions and answers