Table of Contents
Advertisement
Quick Links
ISI-163SB
● This product is for indoors, so do not use it outdoors.
● Before using the product, be fully familiar
with the contents in the manual.
Please store this manual in a place where you can
reach it easily for future reference.
● This user manual contains a product warranty.
● This appliance can be used by children aged
from 8 years and above and persons with reduced
physical, sensory or mental capabilities or lack
of experience and knowledge if the have been given
supervision or instruction concerning use of the
appliance a safe way and understand the hazards
involved.
Children should be supervised to ensure
that they do not play with the appliance.
Advertisement
Table of Contents

Subscribe to Our Youtube Channel
Related Manuals for icetro ISI-163SB


Summary of Contents for icetro ISI-163SB
- Page 1 ISI-163SB ● This product is for indoors, so do not use it outdoors. ● Before using the product, be fully familiar with the contents in the manual. Please store this manual in a place where you can reach it easily for future reference.
-
Page 2: Table Of Contents
Dear customers; Thank you very much for purchasing a soft ice cream maker made by ICETRO. For correct use of the product and its maintenance, please read this manual carefully. If a problem occurs while using the product, you can refer to this manual for troubleshooting. This manual contains a product warranty, so keep it safely for future reference. -
Page 3: Cautions For Your Safety
Cautions for your safety... -
Page 6: Part Names And Controllers 6~7
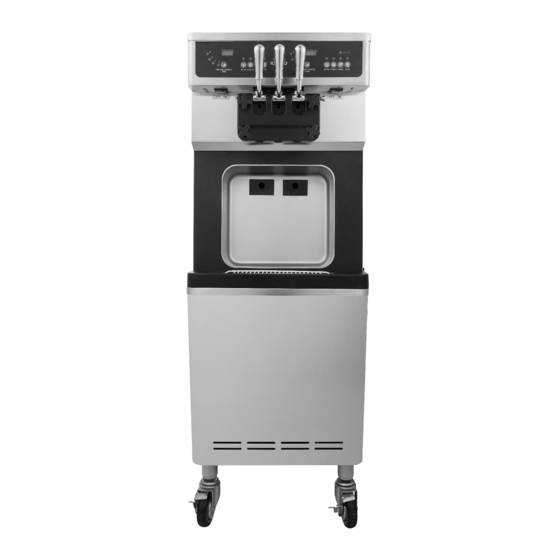
Part names and controllers FRONT MIXING TANK COVER LEVER BUTTON DISPLAY POWER SWITCH DASHER COVER STAR DASHER COVER BOLT DRAIN BOX BACK SIDE SIDE PANEL FILTER CONDENSER... - Page 7 Included accessories CARBURETOR TUBE CARBURETOR TUBE BRUSH BODY MANUAL BRUSH 3 BEARING DASHER DASHER COVER PACKING BRUSH 143 PATITION FOOD PACKING CARBURETOR DASHER LUG FOAM PACKING DOWN 143 HINES PACKING PISTON PACKING REMOVE HANDLE 1 EA...
-
Page 8: Check Prior To Use
Check prior to use ■ Make sure to check them prior to use ! ■ This product is exclusively for 1Ø, 230 V~, 50 Hz / 220 V~, 60 Hz Install it independently with an earth leakage circuit breaker with more than 30 A and provide anexternal grounding. -
Page 9: Button Display Names And Functions
Button display names and functions ① “MIX TANK TEMPERATURE” ② “MIX LOW” Display the ingredient Lamp blinks when there temperature inside the are insufficient ingredients hopper. and It blinks when there is no ingredient. ③ “FREEZING CONTROL LEVEL” BUTTON Icecream Level Adjustment button ④... -
Page 10: How To Make Soft Ice Cream
How to make soft ice cream 1. Open the top cover and pour ingredient into the hopper tank. Please be aware of using soft serve mix stored under -10℃. Please check MIX LOW lamp turns OFF. 2. After pouring the mix, please insert the carburetor body and carburetor tube into the hole in the hopper. -
Page 11: Conversion Function Between Ice-Cream Mode And Yogurt Mode
Conversion function between ice-cream mode and yogurt mode 1) The default mode is the ice-cream mode. 2) The modes can be distinguished by checking LED's; lighting for the ice-cream mode, and blinking for the yogurt mode. ① Pressing 'FREEZING CONTROL LEVEL' button for two seconds converts to other mode (The buzzer sounds when conversion is complete). -
Page 12: Carburetor Control
Carburetor control The carburetor has two components. The one inserted into the hopper is "BODY," with a “TUBE" going into the body. Carburetor tube body The tube is open on both sides and cannot be inserted in the wrong direction. Carburetor tube The carburetor is set to a medium-size hole. -
Page 13: Cleaning Method
Cleaning method ■ Wash mode ■ 1. Press the wash button on the control panel. (Wait until the soft cream in the cylinder is melted, About 10 minutes.) 2. Remove the cover food pan and Take out the carburetor (tube+body) carburetor Please do not let water or ice cream mix get into the agitator shaft. - Page 14 7. Separate the dasher cover from the main body. Disassemble parts of dasher assay. 8. Brush off the inner area of the cylinder and wipe it off with a soft cloth. 9. Disassemble the dasher assembly, wash all the parts using neutral detergent and wipe them with soft cloth.
-
Page 15: Washing Of Each Parts
■ Washing of each parts ■ 13. Disassemble the mixing shaft and wipe it off with a brush. Mixing shaft 14. Take out the piston of the dasher cover and clean the edge of the piston with a soft towel. 15. - Page 16 Dasher and dasher cover assembly method ■ Dasher assembly ■ 1. Please assemble the blades (LUG POM) on the dasher ass'y. Dasher lug pom 2. Please insert the assembled dasher into cylinder.
-
Page 17: Dasher Cover Assembly
■ Dasher cover assembly ■ 1. Apply edible vegetable oil to the ring inserted into the piston. 2. Insert the piston in the dasher cover. ※Please make sure not to switch the middle piston with left and the right piston. ※... -
Page 18: Installation Method
Installation method ■ Electrical connection ■ 1. Supply AC 1Ø 220/230V electricity to an additional power distribution box with an earth leakage circuit breaker of a capacity of more than 30 A is individually installed. 2. Remove the front panel at the bottom front and remove the control box cover. -
Page 19: Before Requesting Service 1
Before requesting service The soft ice cream machine can operate abnormally because you are not familiar with the method for use or due to another insignificant reason. It does not necessarily mean a malfunction. In this case, check the following items to resolve a simple problem on your own without the help from the service center. If you still can’t resolve it after checking the following items, please contact our service center. -
Page 20: Error Code Types 2
Error code types Error Release Error code Error details Display condition occurrence Cooling temperature Auto Stop Stand by LED will blink sensor is bad.(Open) release Cool temperature Auto Stop Stand by LED will blink sensor is bad.(Short) release Cool cyl i n der Auto entrance' s temperature Stop... -
Page 21: Circuit Diagram 2
Circuit diagram... -
Page 22: Product Specification 2
Product specification CLASSIFICATION UNIT SPECIFICATION Indefinite (a 100 cc serving every 30 seconds) May vary depending based on ambient Selling capacity on the ice cream temperature of 38℃, humidity of 60%, and mix maker and mixes. temperature of 5℃ or lower. Making capacity kg/hr 9 x 2... - Page 23 Product specification ■ Charging Refrigerant ■ ① Leak Test When the refrigeration system is opened to repair or service the refrigerant system, conduct leak test before vacuum work, at the expanded and welded tube joints. 1) Connect the manifold gauge to the low-pressure service port, and connect nitrogen gas tank to the manifold gauge 2) When the manifold gauge indicates 300 PSIG, close the valve.
-
Page 24: Part List 24 ~2
Part list ■ MOVE PART ■... - Page 25 Part list 【 DASHER ASSY 】...
- Page 26 Part list 【 COMPRESSOR AND CONDENSER 】...
- Page 27 Part list 【 FRONT COVER ASS'Y 】 【 SIDE & BACK PANEL ASS'Y 】...
-
Page 28: What To Watch Out For
What to watch out for Overcooling may give rise to issues such as unintended stopping of operation, damage to the product itself or any part, or malfunction of the power delivery axis. There may be excessive noise or smell due to abrasion. Any issue inside the product may result in the formation of foreign object in the ice cream. -
Page 29: Warranty
Warranty If no receipt or warranty certificate is received, the receipt/warranty certificate is lost, or the date of purchase cannot be confirmed for reasons other than the foregoing, the warranty expires within 6 months of the manufacturing date. [ Free repair ] 1. - Page 30 MEMO...
- Page 31 MEMO...
- Page 32 Online Internet Service http://www.icetro.com 3 2 4 0 3 5 0 - 0 0...
Need help?
Do you have a question about the ISI-163SB and is the answer not in the manual?
Questions and answers