Advertisement
Quick Links
Advertisement

Subscribe to Our Youtube Channel
Related Manuals for ICS Auto Sentry-eXP

Summary of Contents for ICS Auto Sentry-eXP
- Page 1 Auto Sentry-eXP Maintenance Revised 12/21/07...
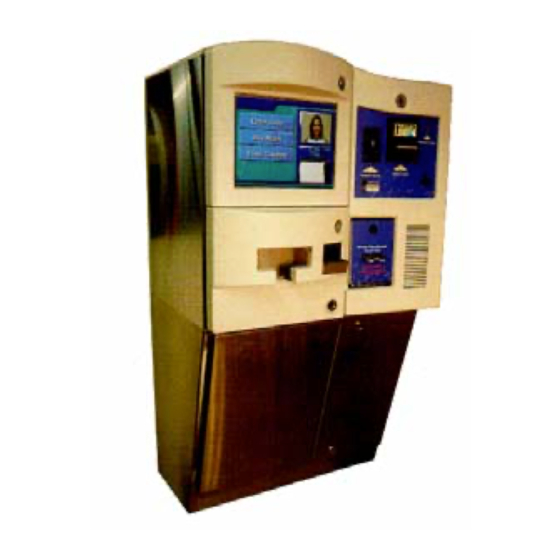
- Page 2 Maintenance Procedures Maintenance Procedures for Auto Sentry eXP for Auto Sentry eXP ® ® Bill Dispenser Bill Dispenser Credit Card Reader Credit Card Reader Bill Acceptor Bill Acceptor...
-
Page 3: Maintenance
Bill Dispenser Bill Dispenser Maintenance Maintenance •Bill Dispenser Problem / Cause •Bill Dispenser Error Codes •Cleaning Pick Assembly Feed Rollers •Cleaning the Bill Dispenser Belts •Cleaning and Testing Sensors •Bill Dispenser Removal Procedure •MDS Sensor Adjustment Procedure •Bill Cassette and Cavity Checks... - Page 4 Fujitsu Bill Dispenser Problem / Cause • High Bill rejection rate – Place only dollar bills in good condition in Bill Dispenser cartridge – Stack dollars neatly in cassette – Clean MDS sensor area including metal rollers and clear Mylar scrapers –...
- Page 5 Auto Sentry eXP Error Code Reporting for the Bill Dispenser • 1800 – PS1 Sensor – No bills in cassette- Pick Assembly Open? • 7001 – PS1 Sensor – Bill jammed in PS1 sensor • 7006 – BPS Sensor – Check for Bill in BPS sensor •...
- Page 6 Auto Sentry eXP Error Code Reporting for the Bill Dispenser • 7A2B - Check the CPS sensor and put it back in its position • 7A3A - Check for remaining Bill in dispense path (around BPS) • 7B00 - Open the Bill Dispenser and remove the jammed Bill between BPS - RJS sensor •...
- Page 7 Checking Bill Dispenser Health • Pressing either End of Day Switch will bring up the Service Unit (Jack Pot) Screen.
- Page 8 Bill Dispenser Heath •Check the Bill Dispenser Sensor Health periodically. •The individual Sensor Health can be checked from the Service Unit (Jack Pot) Screen. •Touch the Diagnostics Button...
- Page 9 Bill Dispenser Heath The individual Sensor Health is indicated via a traffic light display. All sensors should have a green light. Yellow light indicates that the sensor requires maintenance soon. Red light indicates immediate maintenance is required.
- Page 10 Cleaning Pick Assembly Rollers • Remove Remove Bill Cassette Bill Cassette from Bill Dispenser to access the Pick Rollers...
- Page 11 Cleaning Pick Assembly Rollers • Clean the rollers by placing a soft alcohol (isopropyl) dampened cotton cloth against each individual roller while rotating one of the black rollers in an upward direction...
- Page 12 Cleaning Pick Assembly Rollers • Clean the remaining two rollers by placing a soft alcohol dampened cotton cloth against each individual roller • Turn the large green wheel located on the left side of Bill Dispenser in a clockwise direction while applying pressure to rollers...
- Page 13 Belt Roller Cleaning • Move the three belts off the center of their respective black rollers. • Remove any dirt accumulation on the rollers with isopropyl alcohol • Move all belts back to their proper position • Turn large green wheel to ensure belts are tracking properly...
- Page 14 Cleaning the Lower Set of Bill Dispenser Belts • Mark each of the three belts to determine full belt rotation • With the Bill Cassette removed, reach in through the cassette cavity with cleaning cloth • Clean the lower set of belts by pinching each of the three belts with a soft alcohol-dampened cotton...
- Page 15 Cleaning the Lower Bill Dispenser Belts Clean the lower set of belts by pinching each of the three belts with a soft alcohol dampened cotton cloth while rotating the large green wheel...
- Page 16 Cleaning the Upper Set of Bill Dispenser Belts • Mark each of the three belts to determine full belt rotation • Clean the upper Bill Dispenser belts by pinching each of the three belts with a soft alcohol-dampened cotton cloth while rotating the large green wheel...
- Page 17 Cleaning the Output Belts Viewed from the top • The three belts can be (1 of 3 belts shown) cleaned by placing a soft Viewed looking in from alcohol-dampened cotton Bill Cassette cavity cloth against each of the belts while rotating the large green wheel...
- Page 18 Feed out Idler Rollers • Ensure both feed out idler rollers turn when turning the large green wheel. • If one or both do not turn, reform metal spring tentioners to obtain better contact.
- Page 19 Cleaning Clock Wheel • With canned air, blow off any dust that may have accumulated on the clock wheel and both sides of sensor • The clock wheel can be rotated by turning the large green wheel Sensor...
- Page 20 Testing Bill Dispenser Sensors • The Bill Dispenser sensors can be tested by placing the Bill Dispenser in a diagnostic test mode. This diagnostic test mode is called RAS mode. Follow the instructions in the blue area to test the individual sensors For Example …...
- Page 21 Entering RAS Mode (Diagnostic Sensor Test) • Press SW1, SW2, and ST at the same time • Display will go from 00 to 8.8. to 0.0. • Release all switches • Enter diagnostic code using SW1(Ten’s) and SW2 (Units)
- Page 22 Testing Bill Dispenser Sensors For Example … To Test the CPS Sensor •Enter RAS Mode •Press SW1 5 times until 5 is displayed •Press SW2 twice until 2 is displayed •Press ST twice to enter test mode •Look for upper right segment on the units display to change state when sensor is blocked (illuminated to Not illuminated) Sensor Tested RAS Mode Diagnostic Number...
- Page 23 Testing Bill Dispenser Sensors For Example … To Test the CPS Sensor •Enter RAS Mode •Press SW1 5 times until 5 is displayed •Press SW2 twice until 2 is displayed •Press ST twice to enter test mode •Look for upper right segment on the units display to change state when sensor is blocked (illuminated to Not illuminated) CPS Sensor Unblocked Sensor Tested...
- Page 24 Testing Bill Dispenser Sensors For Example … To Test the CPS Sensor •Enter RAS Mode •Press SW1 5 times until 5 is displayed •Press SW2 twice until 2 is displayed •Press ST twice to enter test mode •Look for upper right segment on the units display to change state when sensor is blocked (illuminated to Not illuminated) CPS Sensor Blocked Sensor Tested...
- Page 25 Testing Bill Dispenser Sensors For Example … To Test the CPS Sensor •Enter RAS Mode •Press SW1 5 times until 5 is displayed •Press SW2 twice until 2 is displayed •Press ST twice to enter test mode •Look for upper right segment on the units display to change state when sensor is blocked (illuminated to Not illuminated) CPS Sensor Unblocked Sensor Tested...
- Page 26 Testing Bill Dispenser Sensors For Example … To Test the CPS Sensor •Enter RAS Mode •Press SW1 5 times until 5 is displayed •Press SW2 twice until 2 is displayed •Press ST twice to enter test mode •Look for upper right segment on the units display to change state when sensor is blocked (illuminated to Not illuminated) CPS Sensor Blocked Sensor Tested...
- Page 27 Testing Bill Dispenser Sensors For Example … To Test the CPS Sensor •Enter RAS Mode •Press SW1 5 times until 5 is displayed •Press SW2 twice until 2 is displayed •Press ST twice to enter test mode •Look for upper right segment on the units display to change state when sensor is blocked (illuminated to Not illuminated) CPS Sensor Unblocked Sensor Tested...
- Page 28 Testing Bill Dispenser Sensors For Example … To Test the CPS Sensor •Enter RAS Mode •Press SW1 5 times until 5 is displayed •Press SW2 twice until 2 is displayed •Press ST twice to enter test mode •Look for upper right segment on the units display to change state when sensor is blocked (illuminated to Not illuminated) CPS Sensor Blocked Sensor Tested...
- Page 29 Testing Bill Dispenser Sensors For Example … To Test the CPS Sensor •Enter RAS Mode •Press SW1 5 times until 5 is displayed •Press SW2 twice until 2 is displayed •Press ST twice to enter test mode •Look for upper right segment on the units display to change state when sensor is blocked (illuminated to Not illuminated) CPS Sensor Blocked Sensor Tested...
- Page 30 Testing Bill Dispenser Sensors For Example … To Test the CPS Sensor •Enter RAS Mode •Press SW1 5 times until 5 is displayed •Press SW2 twice until 2 is displayed •Press ST twice to enter test mode •Look for upper right segment on the units display to change state when sensor is blocked (illuminated to Not illuminated) Sensor Tested RAS Mode Diagnostic Number...
- Page 31 Exiting RAS Mode • Press SW1, SW2, and ST at the same time • Display will go from 0.0. to 8.8. to 00 • Release all switches...
-
Page 32: Sensor Location
Sensor Location FRONT... - Page 33 CPS Sensor Secondary Counting Sensor • Clean upper sensor with soft cloth • Clean lower sensor with Q-Tip Viewed from top...
- Page 34 CPS Sensor Cleaning Improved Access and Visibility • Remove the two (2) Phillips head screws securing the CPS sensor Bracket • Carefully flip bracket over as shown • Clean both sensor faces with a Q-Tip • Reinstall CPS bracket with the tabs falling into the frame detents and secure with two (2)
- Page 35 MDS Sensor (Bill Thickness Sensor) • Measures bill thickness • Blow compressed air to clean sensor area Viewed from...
- Page 36 Sensor Location MDS Sensor Bill thickness It is imperative that both sensing is sets of rollers are clean accomplished by to prevent high spots a bill traveling which would cause good between two bills to be rejected sets of rollers FRONT...
- Page 37 MDS Exit Roller cleaning • Make sure metal rollers located in the top near MDS Sensor are clean • The rollers can be cleaned by rotating the green turn knob while holding a Q-Tip saturated with alcohol held Sensor against the rollers as they turn.
- Page 38 MDS Exit Roller cleaning • Make sure the upper and Top right rear of BD Top left rear of BD lower metal rollers located in the top rear of the Bill Dispenser near the MDS sensor are clean • Access to the area can be improved by removing two Phillips head screws from a cross member in the top...
- Page 39 MDS Sensor Roller cleaning Viewed from top of Bill • Make sure metal Dispenser rollers located in the top near MDS Upper Mylar sensor are clean scraper Lower Mylar • Both clear plastic scraper Mylar roller scrapers for the upper and lower rollers must be free of dirt Sensor...
- Page 40 BPS Sensor (Skew and Length Sensor) • Clean both sensor faces with a soft cloth (Bill Dispenser may need to removed. Removal procedure is outlined later in this slide presentation) Viewed from back Front facing down...
- Page 41 BPS Sensor • The light return path via the clear prism must be cleaned • Cleaning can be performed by first blowing out the area with canned air • Using a Q-tip, clean both top areas of the prism. Alcohol can be used to remove dirt followed by a mild detergent.
- Page 42 RJS Sensors (Reject Full Counting Sensor) Remove the Bill Dispenser cartridge. The RJS sensors are located directly in line with the cut • Clean both out on the bill dispenser. The sensors can be found sensor faces 3” and 6” inward from the front of the dispenser.
- Page 43 PS1 Sensor (Primary Counting Sensor) • Blow compressed air in and around sensor area with feed in “Closed” position • Insert Q-Tip through “U” shaped access holes to clean surface of clear prism. • Clean sensor faces with Q-tip. The Q-tip will clean the prism surface after being inserted 1½”...
- Page 44 PS1 Sensor Cleaning • Clean both sensor Viewed windows that are located with Bill on the “Close” tab facing Dispenser the green feed wheels in right side the feeder assembly with up – a Q-tip Cassette removed Clean both rectangular window areas Viewed with by moving Q-Tip up and down in Bill Dispenser...
- Page 45 PS1 Sensor Cleaning Viewed with Bill Dispenser cassette removed • Blow compressed air in from direction of yellow arrows into area highlighted in the red rectangle...
- Page 46 PS1 Sensor PSI Sensor Prism location Viewed from back of Bill Dispenser...
- Page 47 PS1 Sensor Cleaning If sensing problems still exist with the PS1 sensor after the cleaning procedures have been performed then follow the addition cleaning procedures described in the next several slides Tools required • Magnetic Phillips head screwdriver • Nut driver set •...
- Page 48 Removing the Bill dispenser • Power OFF Auto Sentry- • Remove the nut and bolt on each side of the Bill Dispenser...
- Page 49 Removing The Bill Dispenser • Unplug top wiring harness (1) - Mark top of connector • Remove bottom wiring harness (2) - Mark top of connector • Unclip the wire harness clamp if lower harness is routed through it (3) •...
- Page 50 Removing the Bill Dispenser • Spread the wiring track tabs on the retaining clip (1) outward to release the wiring track casing (2)
- Page 51 PS1 Sensor Cleaning 1. Turn power off to AutoSentry-eXP 2. Remove Bill Dispenser cartridge 3. Remove Bill Dispenser assembly from AutoSentry-eXP slide out tray 4. Turn Bill Dispenser assembly upside down as shown...
- Page 52 PS1 Sensor Cleaning • Remove two screws from “Close” tab bracket • Push up on “Open” tab to release...
- Page 53 PS1 Sensor Cleaning • Both PS1 sensors can now be easily seen • With a damp cloth clean both black square sensors with round sensor faces...
- Page 54 PS1 Sensor Cleaning •Clean translucent viewing window with compressed air followed by a slightly water dampened Q-Tip...
- Page 55 PS1 Sensor Cleaning • Close spring loaded mechanism with your hand by reaching in and pushing up as shown...
- Page 56 PS1 Sensor Cleaning • Reinstall the two screws from “Close” tab bracket • Reinstall Bill Dispenser assembly...
- Page 57 Reinstalling Bill Dispenser • Reinstall wiring harness track into retaining tabs • Route the two wire harnesses and ground strap along left side of Bill Dispenser • Plug in both wire harnesses into their respective plug jacks. Be careful to plug them in correctly.
- Page 58 Reinstalling Bill Dispenser • Fasten ground strap • Reinstall the hardware securing the Bill Dispenser • Turn AutoSentry-eXP power on...
- Page 59 Bill Cassette Check •There are three (3) gray colored magnets located in the lid of the Bill Cassette. They can be viewed from the top through access holes. •Holes “a, b, c” should appear gray and the “d” hole should be open...
- Page 60 Bill Cassette Check The magnet retainer should be checked periodically to ensure the that the thumb screws are tight •Turn the access cover thumb screw counter-clockwise to remove cover Removing access •Check both thumb screws on the magnet cover retainer to ensure that they are tight. (turn in clockwise direction) When reinstalling •Reinstall access cover plate...
- Page 61 Level 2 Bill Dispenser Maintenance Additional adjustment and cleaning procedures are outlined in the following slides if problems still exist in the Bill Dispenser. Proceed only with Level 2 adjustments if directed Support • Removing the Pick Assembly • PS1 sensor - Pick Assembly Cleaning •...
- Page 62 Level 2 Removing the Pick Assembly Perform this procedure only when directed by ICS Support •Click the image to start video...
- Page 63 Level 2 Pick Assembly Cleaning...
- Page 64 Level 2 Removing the Open Tab Cross Member • Remove one screw from each side of the Pick Assembly...
- Page 65 Level 2 Removing the Open Tab Cross Member • Carefully remove the cross member and set it down as shown.
- Page 66 Level 2 Opening the Close Tab Area • Remove the two screws on the Close Tab and fold down...
- Page 67 Level 2 • Clean the entire area – Blow off the Dust – Clean all rollers • Metal • Rubber...
- Page 68 Level 2 Cleaning the Bill Restrictor Area • The ball bearing rollers can be easily moved and cleaned by pivoting away from the bill restrictor rollers Bill Restrictors Ball Bearings...
- Page 69 Level 2 Cleaning the PS1 Sensors • Wipe Clean both PS1 sensors Warning: not use alcohol to clean the plastic sensors.
- Page 70 Level 2 Clean the Pick Assembly Rollers • Clean each of the Black Pick Rollers individually by holding a alcohol dampen rag against one roller while the other is Black Pick Roller rotated in direction shown...
- Page 71 Level 2 Clean the Pick Assembly Rollers • Clean the Outer Green rollers on each side by holding a alcohol dampen rag against each green roller as the black pick Black Pick roller is rotated in Roller direction shown...
- Page 72 Level 2 Clean the Pick Assembly Rollers • Clean the remaining two center green rollers by rotating the sprocket while holding a alcohol dampen rag against each green roller...
- Page 73 Level 2 Cleaning the Ball Bearing Rollers • Clean the Ball Bearing Rollers (1) with alcohol • Large deposits can be scraped off by rotating the bearing while holding the bearing against the metal scraper (2)
- Page 74 Level 2 Cleaning the Prism • The Prism faces can be easily viewed and cleaned with a Q-Tip • Clean the Black Translucent window on both sides...
- Page 75 Level 2 Bill Restrictor Area Reassembly • The ball bearing rollers need to be closed against the bill restrictors before proceeding with the closure of the Close Tab Area • Shown with rollers closed...
- Page 76 Level 2 Reassembly • Fold back the sensor assembly • Squeeze the sensor assembly and Close Tab together • Replace both small screws...
- Page 77 Level 2 Reinstalling the Open Tab Cross Member • Reinstall the Open Tab Cross member by keeping the treaded tabs within the Pick Assembly bracket • Ensure that the tabs fit in the cutouts on the frame • Reinstall both larger screws;...
- Page 78 Level 2 Reinstall the Pick Assembly...
- Page 79 Level 2 MDS Sensor Adjustment Before performing adjustment… perform upper and lower roller as well as Mylar scraper cleaning procedures outlined on previous slides Failure to perform the proper cleaning procedures will result in an inaccurate adjustment of the MDS sensor...
- Page 80 Level 2 MDS Diagnostic Code Entry Adjustments to the MDS sensor should only be made by an ICS Technician unless authorized by ICS Support • Enter RAS mode • MDS Sensor – diagnostic code 60 • Enter code by pressing the SW1 switch until a “6”...
- Page 81 Adjusting MDS Sensor Level 2 Adjustments to the MDS sensor should only be made by an ICS Technician unless authorized by ICS Support (2)Turn Loosen both upper Phillips Slotted screw head screws through the on right side access in the Bill Dispenser...
- Page 82 Level 2 MDS Sensor Adjustment Check •After making the MDS sensor adjustment a final check must be performed to ensure that the adjustment has been performed correctly •Slide the Bill Dispenser out so that the metal extensions can be accessed. •Press down lightly on one of the metal extensions •The value on the display...
- Page 83 Level 2 MDS Sensor Adjustment Check •An additional check can be performed by inserting a Dollar Bill at the Bill Dispenser exit •Rotating the large green wheel from front to back will feed the dollar bill back into the Bill Dispenser toward the MDS sensor •The display should change from E7 to a lower value.
- Page 84 Level 2 Exiting RAS Mode Important! Make sure Important! Make sure • Press SW1, SW2, display is in run mode display is in run mode and ST at the [0][0] when complete [0][0] when complete same time • Display will go from 0.0.
- Page 85 Level 2 Checking the Bill Cassette Cavity Left Side view • Inspect that the tab is at a 90 angle with the frame Reform if necessary • Inspect white rails on each side of Bill Dispenser cavity and tighten screws if found to be loose...
- Page 86 Level 2 Proper Drive Belt Configuration (shown with cover removed)
- Page 87 Credit Card Reader Maintenance •Removing Foreign Objects •Credit Card Reader Cleaning Procedure...
- Page 88 Credit Card Reader Maintenance (1) (2) • Check for foreign objects in card reader cavity • Paper or credit card label material is often found in the area of the sensor(1) and within the clear cavity of the credit card reader(2)
- Page 89 Credit Card Reader Removing Debris • A paper clip or a piece of wire can be reformed and utilized to remove small pieces of paper from inside of Credit Card Reader Form a paper clip or wire to extract piece of paper...
- Page 90 Credit Card Reader Foreign Object Removal...
- Page 91 Credit Card Reader cleaning procedure • Insert the alcohol moistened Credit Card Cleaner Card into the credit Card Credit Card Reader Cleaner • Pull out and reinsert the card 7 to 8 times...
- Page 92 Credit Card Reader cleaning procedure • Insert the alcohol moistened Credit Card Cleaner Card into the credit Card Credit Card Reader Cleaner • Pull out and reinsert the card 7 to 8 times...
- Page 93 Credit Card Reader cleaning procedure • Insert the alcohol moistened Credit Card Cleaner Card into the credit Card Credit Card Reader Cleaner • Pull out and reinsert the card 7 to 8 times...
- Page 94 Credit Card Reader cleaning procedure • Insert the alcohol moistened Credit Card Cleaner Card into the credit Card Credit Card Reader Cleaner • Pull out and reinsert the card 7 to 8 times...
- Page 95 Credit Card Reader cleaning procedure • Insert the alcohol moistened Credit Card Cleaner Card into the credit Card Credit Card Reader Cleaner • Pull out and reinsert the card 7 to 8 times...
- Page 96 Credit Card Reader cleaning procedure • Insert the alcohol moistened Credit Card Cleaner Card into the credit Card Credit Card Reader Cleaner • Pull out and reinsert the card 7 to 8 times...
- Page 97 Credit Card Reader cleaning procedure • Insert the alcohol moistened Credit Card Cleaner Card into the credit Card Credit Card Reader Cleaner • Pull out and reinsert the card 7 to 8 times...
- Page 98 Credit Card Reader cleaning procedure Important !!! Close the right Auto Sentry-EXP door prior to checking the operation of the Credit Card Reader. Stray sunlight will negatively impact its proper operation...
- Page 99 Bill Acceptor Maintenance Bill Acceptor Maintenance •Bill Acceptor Cleaning Procedure...
- Page 100 Bill Acceptor Status LED...
- Page 101 Bill Acceptor Status LED...
- Page 102 Bill Acceptor Status LED...
- Page 103 Bill Acceptor Status LED...
- Page 104 Bill Acceptor Status LED...
- Page 105 Bill Acceptor Connector Pin outs Cartridge Side...
- Page 106 Bill Acceptor Maintenance • Remove Bill Acceptor Cartridge by depressing Blue release button (1) • Slide Bill Acceptor Cartridge (2) to right and lift up to remove...
- Page 107 Bill Acceptor Maintenance • Clean clear surfaces with a soft cloth moistened with a mild detergent solution • Clean white rollers with a damp cloth– gently scrape white rollers if necessary. Ensure that rollers move freely...
- Page 108 Bill Acceptor Maintenance • Reinstall Bill Acceptor Cartridge (1) with white tab facing blue release tab on reader • Slide Bill Acceptor Cartridge (2) to left until it snaps in place...
-
Page 109: Maintenance Procedures
Maintenance Procedures Maintenance Procedures for Auto Sentry eXP for Auto Sentry eXP ® ® Training complete! Thank you for your participation 1349 Jacobsburg Road - Wind Gap, PA 18091 www.washnet.com 1-800-246-3469...
Need help?
Do you have a question about the Auto Sentry-eXP and is the answer not in the manual?
Questions and answers