Table of Contents
Advertisement
Advertisement
Table of Contents

Related Manuals for Millipore NovAseptic GMP Series

Summary of Contents for Millipore NovAseptic GMP Series
- Page 1 ® NovAseptic GMP Mixer Installation and User Guide...
- Page 2 Notice The information in this document is subject to change without notice and should not be construed as a commitment by Millipore Corporation. Millipore Corporation assumes no responsibility for any errors that may appear in this document. This manual is believed to be complete and accurate at the time of publication. In no event shall Millipore Corporation be liable for incidental or consequential damages in connection with or arising from the use of this manual.
-
Page 3: Table Of Contents
NovAseptic GMP Mixer Installation and User Guide Contents Operator and Equipment Safety............. 7 NovAseptic GMP Mixer Components ..........8 Required Tools ................9 Additional Equipment ..............9 Optional Equipment ..............10 Installation and Operating Parameters......... 11 Installation ..................12 Male Bearing Installation ............12 Mixing Head Installation............ - Page 4 www.millipore.com...
- Page 5 NovAseptic GMP Mixer Installation and User Guide...
- Page 6 www.millipore.com...
-
Page 7: Operator And Equipment Safety
• Any attempt to use the NovAseptic GMP Mixer equipment in a manner not specified by Millipore Corporation may result in damage to the equipment, voiding of product warranty, and possible operator injury. • Any of the following can damage the mixer: external load;... -
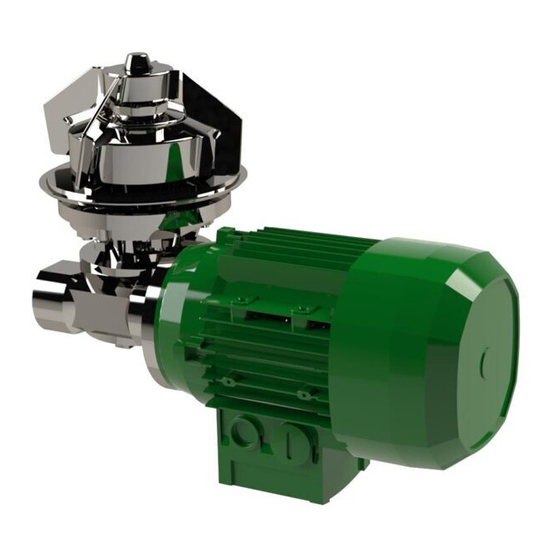
Page 8: Novaseptic Gmp Mixer Components
NovAseptic GMP Mixer Components Catalogue numbers and specifications for the components listed here can be found on the appropriate specification sheet. Mixing Head (GM#/12#) Handle the mixing head with care. The bearing material is hard and brittle. Keep the magnetic body away from any particles that may adhere to it. -
Page 9: Required Tools
Required Tools The following tools are required for installation of the NovAseptic GMP Mixer. These tools are NOT included with the mixer, but are available from Millipore. Catalogue numbers and specifications for the components can be found at www. millipore.com. -
Page 10: Additional Equipment
Additional Equipment The following additional equipment is available from Millipore. Catalogue numbers and specifications for the component shown here can be found at www.millipore. com. Description Purpose Control cabinet Speed control device for mixer. Regulates rotation (G50-#, G51-#) speed and ramp time for the motor. -
Page 11: Installation And Operating Parameters
NovAseptic GMP Mixer Installation and User Guide Installation and Operating Parameters Please refer to the appropriate product specification sheet for more information. Tank Plate and Welding Flange Parameter Minimum Maximum Temperature -80 °C 200 °C (-112 °F) (392 °F) Pressure -1 barg 10 barg (-14.5 psig) -
Page 12: Installation
Installation Use the Installation Checklist and the Installation Qualification Checklist (in this manual) as guides for installing the mixer and and initiating use. Use the Maintenance Checklist as a guide for followup care of the mixer. Install the GMP Mixer components in the... - Page 13 NovAseptic GMP Mixer Installation and User Guide Remove the protective cap. Ensure that the thread connection in the tank plate and male bearing are clean, dry, and free from foreign material. Tighten the male bearing clockwise by hand into the thread of the tank plate, making sure that it is aligned with the center line of the tank plate.
-
Page 14: Mixing Head Installation
Mixing Head Installation See NovAseptic GMP Mixing Head Installation Guide 00101787PU for additional information. • Handle the mixing head with care. • Use extreme care when mounting the mixing head on to the male bearing; mixer bearings are brittle. -
Page 15: Drive Unit Installation
NovAseptic GMP Mixer Installation and User Guide Drive Unit Installation • The drive unit may be heavy. Use appropriate equipment to avoid injury. • Never use the drive unit without a frequency converter. See Control Cabinet in this guide. • See the Electrical Installation section of this manual for electrical information. - Page 16 GMP 1000 and GMP 2000 10° Tighten the screws (1) in a clockwise direction (view from below). Install the drive unit into the tank plate. Insert the locking screws into the two oval holes in the tank plate (2).
-
Page 17: Electrical Installation
NovAseptic GMP Mixer Installation and User Guide GMP 5000, GMP 10 000, GMP 20 000 and GMP 30 000 Install the drive unit into the tank plate. Align the four holes in the drive unit to the threaded holes in the tank plate. Screw the f our bolts into the tank plate and tighten them with a wrench. - Page 18 Drive Unit Thermistor All standard NovAseptic GMP drive units are equipped with a positive temperature coefficient (PTC) thermistor probe. Millipore recommends installation of the probe. Thermistor protection units continuously monitor the temperature of the motor through a probe embedded in the motor windings. If the nominal operating temperature of the probe is reached, a rapid increase in resistance is converted into a switching function.
- Page 19 NovAseptic GMP Mixer Installation and User Guide Turn on the motor and check that the rotor rotates clockwise. A label on the motor indicates the correct rotational direction. Speed Counter Installation The speed counter may be ordered separately. Use the instructions below to install the speed counter.
- Page 20 Mount the speed counter on the drive unit according to the following illustration (different procedures for different GMP sizes). Note in which order to assemble the components, and how the cable should run. GMP 100 GMP 1000 GMP 50...
- Page 21 Verify that the correct EPM-prom is installed according to product specification sheet. If the control cabinet is not supplied by Millipore, ensure that a variable frequency drive is installed. Millipore supplies general information and standard parameters. Perform validation for each individual process.
- Page 22 Variable-Frequency Drive A variable frequency, adjustable-speed drive (VFD) controls the rotational speed of an alternating current (AC) electric motor by controlling the frequency of the electrical power supplied to the motor. VFDs are also known as adjustable-frequency drives (AFD), variable speed drives (VSD), AC drives, and inverter drives.
-
Page 23: Operation
NovAseptic GMP Mixer Installation and User Guide Operation • Ensure that the insta llation has been performed correctly and that the parameters are correctly programmed. • Ensure that no one is working inside the vessel. • Ensure that a sufficient level of liquid covers the mixing head and the male bearing to ensure sufficient lubrication of the bearing. -
Page 24: Disassembly
Disassembly Before dismounting the drive unit: • Ensure that the power supply is turned off. • Ensure that the vessel is empty and ventilated. • Ensure that the vessel is at atmospheric pressure. • Ensure that the vessel is cooled to below 25 °C (77 °F). -
Page 25: Cleaning And Sterilizing Procedures
NovAseptic GMP Mixer Installation and User Guide Cleaning and Sterilizing Procedures Cleaning in Place (CIP) GMP mixers are designed for CIP using any of the following processes: sprayball, rotary jethead, or submerged. Sprayball and Rotary Jethead Cleaning Start the liquid circulation through the sprayball or jethead before starting the mixer to ensure lubrication of the bearing. -
Page 26: Sterilizing In Place (Sip)
They can also cause a higher torque, which may cause the mixing head to decouple and severely damage the vessel. Other sterilization methods For information on using other sterilization methods, please contact your Millipore representative for NovAseptic GMP Mixer product information.Commisioning... -
Page 27: Installation Checklist
NovAseptic GMP Mixer Installation and User Guide Installation Checklist To ensure correct installation, before using the mixer make sure to complete each step in this checklist, and check the applicable box. Note: Follow all cautions and warnings in the installation section of this manual. Install the Male Bearing Complete Ensure the proper position of the O-ring on the male bearing. - Page 28 Install the Drive Unit – GMP 5000, GMP 10000, GMP 20000, GMP 30000 Complete Install the drive unit into the tank plate. Align the four holes in the drive unit to the threaded holes in the tank plate. Screw the four bolts into the tank plate and tighten.
- Page 29 NovAseptic GMP Mixer Installation and User Guide Install the Control Cabinet Complete Select the appropriate control cabinet. Set torque according to AC motor and DC motor. Verify that the correct EPM-prom is installed. If the control cabinet is not supplied by Millipore, install a frequency converter.
-
Page 30: Commissioning
Commissioning Valid Regulations Application of the AFS 1999:4 (Council Directive 97/23/EC of 29 May 1997 on Pressure Equipment), as amended. Complete this checklist to ensure regulations are met. Commissioning Checkpoint Date Signature Tank plates are cylindrical inside the vessel. -
Page 31: Installation Qualifi Cation Checklist
Geometry of vessel • Type of mixing required General Information Vessel number Vessel type GMP type Vessel Manufacturer Country Site Location Millipore Representative GMP Mixer Information Serial Number Catalogue Number Notes Drive unit Tank plate Welded fl ange (if applicable) Mixing head... -
Page 32: Check Points
Check Points Frequency Converter Settings Original Value New Value Comments Standard Control Unit CE2 Confi guration C10 Min Frequency (Hz) C11 Max Frequency (Hz) C12 Acceleration Time (sec) C13 Deacceleration Time (sec) C14 Operation Type C16 Umin C22 Imax (%) -
Page 33: Maintenance Checklist
NovAseptic GMP Mixer Installation and User Guide Maintenance Checklist To ensure safety and proper performance, perform quarterly inspection of the GMP Mixer according to the following table. Make copies of this table to use at each inspection. Refer to applicable instructions within this guide. Note: Follow all installation recommendations, cautions and warnings in this manual. - Page 34 Component / Maintenance Check Notes Complete Drive Unit Check cables for damage Check the gearbox for leakage Check the gearbox for noise Check for any contact mark on Tank Plate Check shaft and outer drive head rota- tion and wobbling movement...
-
Page 35: Spare Parts
NovAseptic GMP Mixer Installation and User Guide Spare Parts The number of spare parts to keep on hand depends on the number of mixers in production and their application. For further information, please contact Millipore. Millipore recommends the following equipment be kept in stock: •... -
Page 36: Troubleshooting
Troubleshooting During troubleshooting, follow the instructions in this manual. A correct installation is crucial to proper operation. Before repair or service of the GMP Mixer, personnel must study and understand the user guide. Before performing maintenance on the GMP Mixer, make sure that the vessel is: •... - Page 37 Incorrect order of addition nection of mixing under “Operation/Starting of substances, dry running head (decoupling) the Mixer.” Unexpected viscosity/density Call your Millipore repre- changes sentative for consultation. Remove male bearing. Inspect male bearing and tank plate for damage. If it Incorrect rotational direction...
- Page 38 Problem Possible Causes Solutions Speed counter: Speed counter unit is incor- Ensure that the speed incorrect number rectly mounted on the drive sensor unit is completely of signals unit fl ange aligned and completely in contact with the drive unit fl...
-
Page 39: Standard Warranty
In the event of a breach of the foregoing warranty, Millipore’s sole obligation shall be to repair or replace, at its option, the applicable product or part thereof, provided the customer notifies Millipore promptly of any such breach. - Page 40 Millipore and NovAseptic are registered trademarks of Millipore Corporation. The M logo is a trademark of Millipore Corporation. Mobilarma is a trademark of Mobil Oil Corporation. ISO is a trademark of The International Organization for Standardization or an affi liated company.
Need help?
Do you have a question about the NovAseptic GMP Series and is the answer not in the manual?
Questions and answers