
Related Manuals for Elektral ThruScan Series


Summary of Contents for Elektral ThruScan Series
- Page 1 WTMD/User Manual Version: 15.10 MAIN CONTACT-FACTORY: Ataturk Industrial Zone M.K. Ataturk Blv. 23 Cigli 35620 Izmir -TURKEY Phones : +90(0)232 376 7300 : +90(0)232 376 7030 e-mail : elektral@elektral.com.tr www.elektral.com.tr...
-
Page 2: Table Of Contents
Contents Page PREFACE ........................4 Contents ......................... 5 Before Use ........................6 1. GENERAL DESCRIPTION .................... 8 1.1 ThruScan s3 Walk Through Metal Detector ............9 1.3 ThruScan s6 Walk Through Metal Detector ............10 1.3 ThruScan s9 Walk Through Metal Detector ............11 1.4 ThruScan sX Walk Through Metal Detector ............ - Page 3 4.1.5.1 ThruScan s3/s6/s9/sX/sX–WP ..............26 4.1.5.2 Alarm Counter for ThruScan sX-i ..............27 4.1.6 In-Coming / Out-Going Counter (Traffic Counts) ..........27 4.1.6.1 For ThruScan s3/s6 ..................27 4.1.6.2 For ThruScan s9/sX/sX-i/sX-WP ..............28 4.1.7 Factory Settings ....................28 4.1.8 Language Selection .................... 29 4.1.9 Counter Visibility ....................
- Page 4 Metal Detectors All rights reserved. Protected by Law Number 4110 and Ideas and Works of Art Law 5846, unless a written consent by its copyright owner, ELEKTRAL® A.Ş. according to the 52. Article is provided, this manual, under no circumstances may be processed, copied, its duplicated copies published, represented, presented, in any form or by any means by mechanical and/or electronic ways be transmitted or used.
-
Page 5: Preface
You have taken some serious measures on entrance-control security in environments where it’s required, with the Magnetic Walk Through Metal Detector - (WTMD) you have purchased. Thank you for choosing an ELEKTRAL product with ELEKTRAL’s warranty. With ELEKTRAL ThruScan (s3/s6/s9/sX/s15-i/sX-i/sX-WP) Multizone Walk Through Metal Detectors your security searches will be more effective and your estates will be more secure, providing you peace of mind. -
Page 6: Contents
C O N T E N T S Procedures and Safety Warnings before using ThruScan Technical specifications of ThruScan Preparation and mounting ThruScan usage programming and relevant procedures DO NOT OPEN ThruScan® ELECTRONIC CASE RISK OF ELECTRIC SHOCK The arrow-end lightning symbol inside The exclamation mark inside the eqilateral triangle informs the equilateral triangle informs the user the user that there are important instructions of useage and... -
Page 7: Before Use
Necessary Procedures and Safety Warnings Prior to Using ThruScan Prevent direct light exposer to the infrared sensors (see Sec. 6.10) of your ThruScan WTMD. Leave minimum 1m of distance between your ThruScan and any objects such as metal doors, X-Rays, turnstiles, as such. Do not place any covers, plating or loads that would induce weight over your ThruScan unless being recommended by the factory. - Page 8 CAUTION! Misuse of this equipment specified by the manufacturer may damage the metal detector or injure people. Technical Specifications: Electrical : 70 – 270 VAC (Electricity power supply should be earthed & stable) 10 Watts standby, 20 Watts max in alarm. A-Class Energy Save Frequency: 50/60 Hz Maximum Relative Humidity : 95% non-condensing...
-
Page 9: General Description
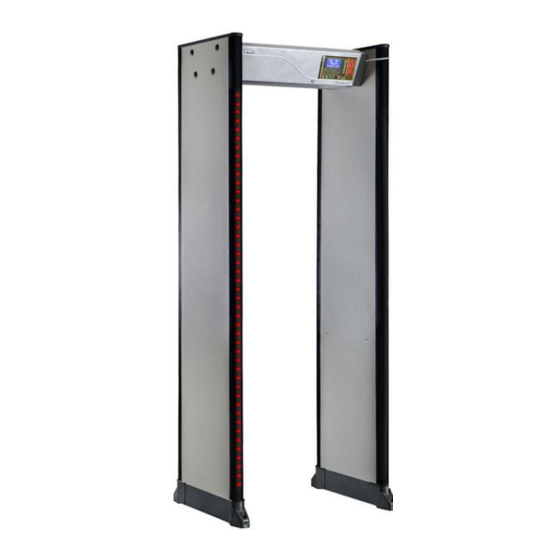
GENERAL DESCRIPTION ThruScan WTMD’s are all easy to operate, advanced microprocessor controlled, with digital pulse induction utilizing VLF Technology that provides superior metal discrimination and detection. ThruScan sX/sXWP/s15-i/sX-i are versatile and easily portable walk-through metal detection units providing high level of detection with a walk-thru rate of up to 60 persons per minute. (* for ThruScan s3/s6 approx. -
Page 10: Thruscan S3 Walk Through Metal Detector
Unique Designs & in variety of colours, Easy mounting/dismounting in aprx.15 minutes, With the Outdoor Package can be used outside (*optional), Exported to 4 continents. NOTE: You may access s3 Photo Gallery through www.elektral.com.tr website. ThruScan... -
Page 11: Thruscan S6 Walk Through Metal Detector
Easy-to-mount and assemble walk through metal detector (15 minutes) / No necessity for maintenance Unique Compact design-Grey color Exported to more than 70 countries / Customer Specifications and OEM / ODM orders welcome NOTE: You may access Photo Gallery through www.elektral.com.tr website. ThruScan... -
Page 12: Thruscan S9 Walk Through Metal Detector
Unique Designs & in variety of colours, Easy mounting/dismounting in approx.15 minutes, With the Outdoor Package can be used at outside (*optional), Exported to 4 continents. NOTE: You may access s9 Photo Gallery through www.elektral.com.tr website. ThruScan... -
Page 13: Thruscan Sx Walk Through Metal Detector
Unique Designs & in variety of colours, Easy mounting dismounting (15 Min.), With the Outdoor Package can be used at outside (*optional), Exported to 4 continents. NOTE: You may access Photo Gallery through www.elektral.com.tr website. ThruScan... -
Page 14: Thruscan Sx-Wp Walk Through Metal Detector
Power Supply; Switching Mode Power Supply (SMPS), low voltage usage feature, Elinno Unique Designs & in variety of colours, Modern, Contemporary, /Innovative Design, Easy mounting /dismounting (15 Min.), Exported to 4 continents. NOTE: You may access SX-WP Photo Gallery through www.elektral.com.tr website. ThruScan... -
Page 15: Thruscan S15-I Walk Through Metal Detector
Audio-Visual alarms are noticeable at a range of 4 meters Adjustable Random Alarm feature to give alarm for clean visitors at a selected ratio. Option: Outdoor usage capability with the Optional Outdoor Pack You may access s15-i Photo Gallery through www.elektral.com.tr website. ThruScan... -
Page 16: Thruscan Sx-I Walk Through Metal Detector
Audio-Visual alarms are noticeable at a range of 4 meters Adjustable Random Alarm possibilities to give alarm for clean visitors at a selected ratio. Option: Outdoor usage capability with the Optional Outdoor Pack NOTE: You may access sX-i Photo Gallery through www.elektral.com.tr website ThruScan... -
Page 17: Installation
INSTALLATION TRANSPORTATION AND SITE SELECTION ThruScan WTMDs are being packed and shipped in two separate boxes “Control Unit” and “Side Panels”. Control Unit, Back Fixing Crosspiece and screws with Allen Keys are packed in the Control Unit Box (*Only for ThruScan/s3/s6/s9). Side Panels and Floor Fixing Metal Plates are being packed in the Side Panels Box. -
Page 18: Assembling
2.2.2 Arrange the major components as shown above. (with the control panel facing down) 2.2.3 Lay the main Control Unit onto a soft, scratch free (the packing (bubbled pe) is ideal) surface 2.2.4 Remove the rear panel of the main Control Unit by undoing the two small fixing screws. Retain these screws to screw them back in their places later (Note: The arrow signs on the control unit and the panel parts, which are fixed on the top of each other, have to point to the same direction) -
Page 19: Control Display Panel & Indication Information
CONTROL (DISPLAY) PANEL & INDICATION INFORMATION The control panel functions are protected from unauthorized tampering by a lockable see through control cover in the overhead main Control Unit. Operators should not normally need to adjust these controls, which should only be altered by a supervisor or manager in order to change the sensitivity settings of ThruScan, reset counters, perform installation adjustments and to switch the unit on /off etc. -
Page 20: Vu Display (Led Array)
3.1.3 VU Display (LED array) The LED VU comprises of five green, three yellow and three red LED’s providing a graphical indication of the level of metal detection activity occurring within the archway. The degree of detection intensity varies depending on the quantity and composition of the metallic object(s). -
Page 21: Sel(√) Button
3.2.3 SEL(√) BUTTON The SEL(ect) touchpad button is to access and enter the programming modes and to confirm programming changes. 3.2.4 UP&DOWN BUTTONS The UP&DOWN touchpad buttons are used for moving up and down through the programming options when in the MENU and the programming mode. TRAFFIC LIGHTS Location of the Traffic lights may vary as per different models. -
Page 22: Relay-Contact Outputs
lighting or other sources. The ThruScan’s infrared sensors are a feature that helps to minimise the audible false alarms by ensuring that an alarm activates only if a person passes through the archway. Rarely a false source, such as a person passing and bumping to the archway, may also trigger the alarm. -
Page 23: Programming & Set Up
4. PROGRAMMING & SET UP Programming and set up can be performed as follows after the password is entered using the touch pad on the control panel: NOTE: Default Password for all ThruScan WTMD’s is “ 0000 ”. If the optional Real Time Video Prosecution Unit is being used, the password must not be set up as “... -
Page 24: Security Level & Sensitivity Level Adjustments
4.1.1 SECURITY LEVEL & SENSITIVITY LEVEL ADJUSTMENTS ThruScan s3-s6-s9 : Consisting of 10 separate security levels (channels), each security level (except for NC levels) can be set to operate at a different sensitivity level. It is possible to adjust a total of 246 sensitivity levels from security level 000 (the highest sensitivity) to 245 (the lowest sensitivity). - Page 25 Factory default settings Security Levels for ThruScan s3/s6/s9 and ThruScan sX/ sX- WP /s15-i/sX-i are as follows: ThruScan ThruScan s3/s6/s9 : sX/ sX-WP /s15-i/sX-i: SECURITY LEVEL SENSITIVITY ADJUSTMENT SECURITY LEVEL SENSITIVITY ADJUSTMENT Security Level 1 Security Level 01 Security Level 2 Security Level 02 Security Level 3 Security Level 03...
-
Page 26: Security Level & Sensitivity Level, Zone Adjustment (Sx Series)
3. Select the required security level by using the UP&DOWN buttons – Then press SEL, SECURITY LEVEL 4. The display will change to show the current sensitivity setting for that security e.g. Level 5 LEVEL 5 5. To change the sensitivity setting use the UP&DOWN buttons until the desired setting is reached –... -
Page 27: Alarm Volume & Tone Adjustment
The assigned sensitivity level in this MENU is approximate. For more SECURITY LEVEL precise security requirements, it is recommended that the user decides on the necessary sensitivity level by using the displayed (AD) sensitivity level only as a reference and proceed further adjustments ECAC STD1 ECAC STD2 manually. -
Page 28: Alarm Counter For Thruscan Sx-I
ThruScan sX/sX-WP/ 4.1.5.2 FOR; s15-i/sX-i ThruScan s15-i / sX-i counts Alarm and Randomly Generated MAIN MENU Alarms separately (Article. 4.1.15). From Left to Right the Menu SETTINGS Displays the Alarm – Random Alarm Counters. When required you STATISTICS can check these counter values by entering ALARM COUNTER Menu. Counter Values can be displayed in two ways or can be reset to zero. -
Page 29: For Thruscan S9/Sx/Sx-I/Sx-Wp
2. Counter value stored in the memory will be displayed for both the IN & OUT counters separately, 3. To reset the counters press SEL(√) button to enter the reset MENU, 4. Select either 00 (do not reset), 01 (reset the IN count), 02 (reset the OUT count) or 03 (reset BOTH COUNTERS) by IN <... -
Page 30: Language Selection
2. To reset return to factory settings press SEL(√) button to FACTORY SETTINGS enter the factory reset MENU. 3. Use UP&DOWN buttons to select YES or NO. 4. Press SEL(√) button to select and fix the setting. NOTE: The reset to Factory defaults does not alter the in & counters. -
Page 31: New Password
MAIN MENU 4.1.10 NEW PASSWORD NEW PASSWORD PASS SENSOR A four digit numerical password – PIN CODE (default factory ALARM DURATION setting (0000) secures ThruScan’s programming and data. This DATE & TIME password may be changed at any time as follows; 1. -
Page 32: Pass Sensor
MAIN MENU 4.1.12 PASS SENSOR PASS SENSOR *only for ThruScan sX/ sX-WP /s15-i/sX-i ) ALARM DURATION ThruScan operates to detect only the metals passing through the DATE & TIME RANDOM ALARM RATE archway. With this extra feature it is possible to change this condition. -
Page 33: Random Alarm Rate Selection
“OPERATION DURATION” menu 2- Enter Menu by SEL(√) button, 3- Use UP&DOWN buttons for Selection 4- Press RUN(X) button to return to normal operating mode. 4.1.15 RANDOM ALARM RATE SELECTION MAIN MENU ThruScan only) s15-i/sX-i RANDOM ALARM With Adjustable Random Alarm Rate feature you can set your OPERATION CHANNEL MAJOR ERROR WTMD to Give Alarm with a Different Alarm Tone for persons who... -
Page 34: Date And Time Settings
1. Press UP&DOWN buttons to find “OPERATION CHANNELS” menu. OPERATION CHANNEL 2. Press SEL(√) button to Enter menu. 3. Use UP&DOWN Buttons to select the Operation Channel. CHANNEL [0] 4. Press SEL(√) button to save your settings. Press UP&DOWN buttons and change to the next sub-MENU option or press RUN(X) button to store the changes and thus return to the normal operating mode. -
Page 35: Scada Address
MAIN MENU 4.1.20 SCADA ADDRESS ThruScan (Only sX-i) SCADA ADDRESS ThruScan When is controlled via a connected PC, this feature is used [000] to designate an address to the WTMD. PANEL VISIBILITY SCD STATISTICS 1. Use UP&DOWN buttons to find “SCADA ADDRESS” menu. 2. -
Page 36: Statistics Menu
4.1.23 STATISTICS MENU STATISTICS ALARM COUNTER This menu is used for viewing recorded statistics information and for 00078 00012 resetting this to zero when needed. ALARM RATE RUN TIME 5. SYSTEM OPERATION ThruScan is easy to operate however; the unit must be used in a proper way to ensure correct detection &... -
Page 37: Alarm State
1. Switch on ThruScan ( Press ON-OFF Button), 2. Check the correct Security Level is selected for the required operational risk (see section 4.1.1), 3. A ‘clean tester’ i.e. a person who has no metal objects on, should walk through the gateway to ensure that no alarm condition is activated. -
Page 38: Detection Field
control circuitries comprise microprocessors.) Modular-designed electronics facilitate mounting and maintenance easily. DETECTION FIELD ThruScan’s multi-zone detection field provides and completes horizontal and vertical uniformity. The sensitivity of each field can be adjusted to meet the requirements of specific security (*only for applications sX/ sX-WP /s15-i/sX-i ThruScan’s unique design enables the operator... -
Page 39: 6.6 Sensitivity-Memory
SENSITIVITY ThruScan has 246 sensitivity settings available for each security level(channel) providing a high degree of detection accuracy. Sensitivity is used to calibrate the detector to detect precise quantitiy of metal for any defined object. NOTE: is a highly advanced and reliable security metal detector. However, its ThruScan success ultimately depends on the training and diligence of the person who operate it and the overall security plan of which it is a part. -
Page 40: 6.12 Electromagnetic Noise & Interference Rejection-Masking
• Greatly reduces the occurrence of false alarms by inhibiting alarm activity without a person in the archway. In circumstances where large metal objects, such as luggage or supply carts and x-ray equipment, pass by or are located near the unit, the sensor automatically inhibits the alarm, •... -
Page 41: 6.15 Electrical Requirements & Consumption Efficiency
6.14 ELECTRICAL REQUIREMENTS Operating voltage: 70 – 270 VAC (supply should be well grounded/earthed and the ground must be in proper electrical norms) - 50/60 Hz. *External SMPS (Input:100-240 vac, 50/60Hz, 1.0 A Output: 15 vdc, 2.66 A) (*only ThruScan sX WP) Power consumption: 10 Watts in standby mode 20 Watts in alarm mode (max) 6.15 CONSUMPTION EFFICIENCY... -
Page 42: Options
*These dimensions have an approximation of +/- 10mms. ThruScan sX/sXWP/s15i Packing dimensions, Side Panels: için 620x2265x230 mm NOTE: The place where the WTMD will be fixed should have an extra 50 cms. extra space than the unit’s exterior measurements Dimensions on sX-WP have to be with tolerance of 30 mm and a project has to be prepared if the fixation will be at the top of the unit. -
Page 43: Remote Control (By Modem)
(*) with the courtesy of Messrs., Microsoft Inc. The program can be installed from the factory’s web site (www.elektral.com.tr) or the CD given with the WTMD as an option. User’s password is required for the activation through mail or telephone from the factory or the dealer. -
Page 44: Outdoor Package
OUTDOOR PACKAGE For outdoor weather-proof execution please prefer, ThruScan sX-WP. You may buy outdoor package to use ThruScan s3/s6/s9/sX/s15-i/sX-i outdoors temporarily. 7.2.1 RAIN PROTECT SHELTER/HAT In cases where ThruScan should be used outdoor, a peculiar “Rain Shelter/Hat” is provided. This shelter is designed to protect your WTMD from direct rain. -
Page 45: Irda Remote Control
IRDA REMOTE CONTROL (*only for ThruScan sX/s15-i/sX-i) This unit enables to operate and manipulate WTMD in an adequate distance by IRDA technology. Security personnel can control the unit from a distance behind a bullet-proof cabin under threat. (see 10.3) REAL-TIME VISUAL PROSECUTION UNIT Walk-Through Metal Detectors (WTMD) This unit can be assembled on ThruScan as an... - Page 46 Capturing : Capturing with motion detect or alarm. Memory Size : Max. 2GB SD Card supported. Unless SD Card is not on it. it can store in its memory for a few images. Maximum 1024 folders and for each folder 1024 images can be stored. Operation ThruScan Users can make his own keyboard according to the key definition stated and perform the following...
-
Page 47: Alarm Output
Set Up Screen 7.1 Set up Date time 7.1.1 Use (V -/V +)key to select date or time and (CH +/ CH -) key to set the correct digit. The setting will then store into system. Press ( OK ) to confirm. 7.2 Set up auto capture –... - Page 48 Advanced Settings Return preview Select image quality mode or Low Select image quality Motion detect interval or Low setting Motion detect AVI frame setting sensitivity AVI duration setting Quit Photo Management Delete one photo Format memory, clear all files Delete one photo REMOTE CONTROL BUTTONS Is used to exit from IR control menu.
-
Page 49: Nilecj Test Kit
7.9 NILECJ Test Kit NILECJ Test Pieces Bag, American National Law Enforcement and Justice norms to test Walk-Through Metal Detectors. Consists of different size Metal Objects simulating Guns, Smaller Threat Objects to be detected and some Everyday use Metal Belongings considered not dangerous which the WTMDs should not Give alarm at Certain Sensitivity Levels. -
Page 50: Maintenance & Repair
(for components and labour) for a period of 24 months (pls. see our “Warranty Conditions”). During this 24-month period ELEKTRAL® will inspect and evaluate all security equipment returned to its authorised repair station or factory to determine if the equipment meets Elektral®’s performance specifications. -
Page 51: Troubleshooting
Elektral® in Izmir-Turkey- Ataturk Industrial Zone and the transport costs or the travel costs of technicians are not beard by Elektral® himself. (see Section 10.5) This Warranty does not cover batteries nor any and all failures caused by abuse, tampering, theft, failure due to weather, battery acid or other contaminants and equipment repairs made by an unauthorized party. -
Page 52: Installation Problems
*How do I clean it? You may clean it with dry or damp clothing and/or with anti-static fluids for electronic equipment. Never clean using direct water or chemicals, detergents etc… See section 8.1 9.2 INSTALLATION PROBLEMS *What kind of equipment do I need for mounting the WTMD? All tooling and accessories for the mounting are included. - Page 53 A special connection cable is provided by the producer along with the Remote Control SCADA Software. Plug in the appropriate end of this cable to the socket explained in Section 3.7 and the other end to the Communication Port of your computer (COM). You may also use BUS Network or the Star Network as the Communication Technology.
-
Page 54: Operational Problems
For MODEM execution; * I want to synchronise my WTMDs and use the Remote Control SRC-SCADA Software at the same time. How should I make a connection The same connector (SYNC/SRC SOCKET) socket is used for SRC-SCADA Remote Control and Synchronized operation.(See 3.7) The terminals/wires(5-6) should be used from the “synchronizing operation cable”... - Page 55 *How should I use the AD-Auto-Detection, sensitivity assignment MENU ? (*for sX series only) ThruScan Please refer to user’s manual. This MENU is designed in assigning a sensitivity level and states an approximate value. It is recommended that the Sensitivity should be further adjusted by the user, depending on experience, in cases of critical security.
-
Page 56: Appendix
10.1 CERTIFICATE OF EXPERTISE Certificate of Expertise, certifies that the ThruScan taken, in random from the production line of Elektral® A.S, conforms to the general test criteria and matches the standards envisioned throughout the world. The Magnetic Field Strength of ThruScan, appears much lower than have been stated by FDA. -
Page 57: Thruscan Sx/Sx-I/Sx-Wp Src Scada Program Manual
a) Arrange the communication. (Select right COM port) b) Press “STOP” button, c) Write “NEW”(Caps Letters!) to “IN COUNT” window, d) Write the index number(1-16) you want to assign to that ThruScan s3/s6/s9 to “OUT COUNT” window, e) Pres to “IN COUNT” button, You can repeat this process with the other Magnetic Walk-Thru Metal Detectors under communication to assign your own index number. -
Page 58: Irda Remote Control Unit Manuel
In “Level Select” window; 20 security levels are existing of which NC (NILECJ) can not be changed. The other 19 1.6- can be assigned to the desired sensitivity. Last channel AD (AUTO DESIGNATE) is assigned for the automatic designation of the metal volume. (Pls. refer to your “Manual” for further information) You can change several Security Levels simultaneously and send together to your Magnetic Walk-Thru Metal Detector. -
Page 59: Users Manuel For Wheeled Transportation Accessory
Security Level Adjusts (adjusts between security level “NC” and security level “09”) YES button (to select YES/OK in all above MENUs) NO button (to select NO/REJECT in all above MENUs) Language Selection; 1. English, 2. German, 3. Turkish, 4. Spanish 10.4 User’s manual for Wheeled Transportation Accessory /WTMD Wheeler Operation:... - Page 60 4- Place item number (f) through item number (e-the wheels) to be fixed at both ends of item number (c) as shown on the Figure 1 and Figure 2 5- Item number (g) should be fixed at both ends. *To disassemble; the steps described above should be followed in reverse.
-
Page 61: Certificate Of Warranty
Please complete and include this card whenever you return a product again. Thank you once again for selecting our product. We hope this will be one of the many ELEKTRAL® products you will own. Date/Place Purchased :........
Need help?
Do you have a question about the ThruScan Series and is the answer not in the manual?
Questions and answers