Table of Contents
Advertisement
Quick Links
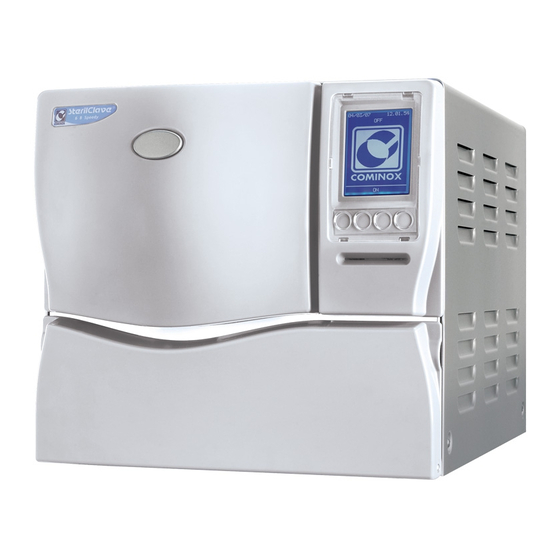
USE and MAINTENANCE MANUAL
-Steam sterilizer-
FOREWORD
This manual must be considered an integral part of the sterilizer, and must always be
available to users. The manual must always accompany the sterilizer, even if it is sold to
another user.
All operators are responsible for reading this manual and for strictly complying with the
instructions and information it provides. COMINOX is not liable for any damage to people,
things, or the sterilizer itself in the event that the operator fails to comply with the
conditions described in the manual.
These instructions are confidential and the customer may not disclose any information to
third parties. Further, this documentation and its attachments may not be tampered with
or modified, copied, or ceded to third parties without authorization from COMINOX.
Advertisement
Table of Contents

Related Manuals for COMINOX Sterilclave 6 B Speedy


Summary of Contents for COMINOX Sterilclave 6 B Speedy
- Page 1 All operators are responsible for reading this manual and for strictly complying with the instructions and information it provides. COMINOX is not liable for any damage to people, things, or the sterilizer itself in the event that the operator fails to comply with the conditions described in the manual.
-
Page 3: Table Of Contents
Table of contents TABLE OF CONTENTS TABLE OF CONTENTS........................3 Reference index ..........................6 Graphic representation of references Mod. 6 ................7 INTRODUCTION ..........................9 GENERAL SUPPLY CONDITIONS......................9 PURPOSE OF THE DOCUMENT ......................10 EQUIPMENT............................10 OPERATING USE ..........................11 Table of cycles/sterilizable material 6 B SPEEDY............... - Page 4 Table of contents Water connection ......................... 21 Water supply table ........................21 MANUALLY FILL/EMPTY CLEAN WATER TANK ................. 22 PREPARING FOR BUILT-IN INSTALLATION ..................22 OPERATION ............................ 23 SWITCH-ON ............................23 STAND BY ............................. 27 MENU..............................28 Cycle Menu..........................29 Main Settings Menu.......................
- Page 5 Table of contents INDICATORS........................... 54 ALARMS ............................56 List of alarm codes ..........................62 MAINTENANCE ..........................63 GENERAL CONDITIONS ........................63 Cleaning............................63 Filters..............................64 Checks............................. 64 Fuses..............................64 STORAGE AND DISPOSAL........................65 Machine storage or long-term disuse ..................65 Disposal and Scrapping .......................
-
Page 6: Reference Index
Table of contents Reference index 01: tray handle 02: waste pipe 03: power cable 04: tray 05: metering funnel 06: SterilCard 08: support for 2 trays 09: chamber 10: clean water tank 12: chamber safety valve 12A: steam generator safety valve 13: main switch 14: filler 15: air sterilization filter... -
Page 7: Graphic Representation Of References Mod. 6
Table of contents Graphic representation of references Mod. 6... - Page 8 Table of contents...
-
Page 9: Introduction
COMINOX declines all responsibility if the sterilizer is not installed properly or if it is not installed by duly trained and qualified personnel. -
Page 10: Purpose Of The Document
EQUIPMENT In addition to this Use and Maintenance Manual, each sterilizer is supplied with a Guarantee Certificate and the EC Declaration of Conformity. The Cominox SterilClave sterilizer also includes the following accessories: 6 B SPEEDY Tray handle 01 •... -
Page 11: Operating Use
Comply with the maximum total load weight (see Table of cycles/sterilizable material). Use the load support system supplied by COMINOX (see Preparation of the load to be sterilized). Use of load supports other than the standard support provided may compromise the steam penetration and drying performance confirmed during approval tests. -
Page 12: Table Of Cycles/Sterilizable Material 6 B Speedy
Introduction Table of cycles/sterilizable material 6 B SPEEDY DENTAL BOWIE & VACUUM POROUS / POROUS / 134 PRIONS HAND DICK TEST TEST WRAPPED WRAPPED HOLLOW HOLLOW PIECES Type according to EN 13060 Temperature (°C) Pressure (bar) Duration of 3.5' sterilization phase 4’... - Page 13 Introduction TOTAL MAXIMUM DURATION: the total time the sterilizer requires to run a complete cycle, calculated from cold startup (room temperature) and maximum load. TOTAL MINIMUM DURATION: the total time the sterilizer requires to run a complete cycle, including hot startup (one cycle after the other) and minimum load (load support only).
-
Page 14: Technical Specifications
Technical specifications TECHNICAL SPECIFICATIONS Technical specifications table 6 B SPEEDY U.M. 6 B SPEEDY Steam generation Independent generator Chamber capacity Clean water tank capacity Water consumption per cycle cm³ 200 - 500 (minimum/maximum) Maximum flow discharge rate (direct) cm³/s Maximum discharge temperature (direct) °C Absolute operating pressure (maximum) Electrical voltage and frequency... -
Page 15: Dimensions
Technical specifications DIMENSIONS General dimensions SterilClave 6 Width Height Depth Unit depth with door open Dimensions required when the unit is to be built-in SterilClave 6 Width Height Depth NEVER place the machine on soft surfaces (such as cloth or foam) and never remove the adjustable feet. -
Page 16: General Safety Conditions
• Never remove or dismantle any part from the sterilizer. Only authorized personnel trained in advance by COMINOX may remove the exterior protective cover and access the interior parts. •... -
Page 17: Noise
The unit is not equipped as standard for operation in environments that present a particular risk of fire or explosion. COMINOX is not liable for the disposal of materials required for the operation or production of the sterilizer (e.g.: plastic packaging or potentially contaminated waste water...). -
Page 18: Transportation And Packaging
The sterilizer may be transported only after fully emptying the clean water tank COMINOX does not accept sterilizers for repair if they have full tanks (see Chap. MANUALLY DRAIN TANKS). Very heavy items or equipment (heavier than 30 kg) must only be moved or lifted using appropriate lifting devices. -
Page 19: Storage
Transportation and packaging The load support system and the external surface of the sterilizer are sometimes protected by a plastic film: it must be removed before using the machine. Storage If the sterilizer will not be used immediately or if will be removed from the installation site, it must be stored in a dry, protected location. -
Page 20: Installation
Installation of the sterilizer is to be carried out according to Customer requirements and those of the site where the machine is to be installed. Therefore, it is important that the Customer promptly informs COMINOX of any special situations (such as ambient conditions, size, or built-in limits). -
Page 21: Connections
A) FROM EXTERNAL CAN (maximum height differential 1 m): the auto water fill 29 tube can be connected directly to a can of demineralized or distilled water purchased on the market, or to a can of distilled water produced by a Cominox water demineralization system (Discom). -
Page 22: Manually Fill/Empty Clean Water Tank
Installation MANUALLY FILL/EMPTY CLEAN WATER TANK If AUTO WATER FILL is not available or not selected (see WATER CONNECTION), fill the tank manually. Unscrew and remove the cap from the filler 14, insert the metering funnel 05 provided, and pour in distilled or suitably demineralised water (see Water supply table and Technical specifications table for the quantity). -
Page 23: Operation
Operation OPERATION SWITCH-ON To turn on the sterilizer, press the main switch 13 located behind the inferior panel 18. The sterilizer switches to OFF: If the sterilizer is OFF, we advice you to keep the door 16 open to protect the door gasket 31 on it. - Page 24 Operation Pressing CODE will display the message: Pressing YES causes the sterilizer to deactivate the SterilCard 06 for the next usage section, and it proceeds to another screen that asks for a security code (set to 1 by default): Pressing the key deletes the last number entered, or, if no numbers are shown on the display, it returns to OFF mode.
- Page 25 Operation After the SterilCard 06 (or Security Code in case of emergency) is inserted, the sterilizer checks the steam generator 47 temperature: if it is over 80°C, the sterilizer switches to STAND BY mode. Otherwise the sterilizer starts the preparation of the steam generator 47. In this case, SterilClave checks if the clean water tank 10 is full and if the door 16 is closed.
- Page 26 Operation Before starting the steam generator 47 prevacuum, if the door 16 is open, SterilClave displays: Then the steam generator 47 prevacuum begins: During steam generator 47 prevacuum, the user can only turn OFF the sterilizer pressing one of the four multi-function keys. When the prevacuum pressure in the steam generator 47 is reached, SterilClave switches to STAND BY mode.
-
Page 27: Stand By
Operation STAND BY Current date Current Time Cycle selected Pressure Temperature Messages, if any The display will show the current date and time, the cycle selected, the temperature and pressure of the sterilization chamber, and any messages: Generator warm up: indicates the heating of the steam generator 47. During generator warm up, the user can start only the VACUUM TEST;... -
Page 28: Menu
Operation Cooling pause: indicates that the temperature in the chamber 09 is not suitable to start or continue a cycle. Max water level: maximum level clean water tank10. MENU From STAND BY, using the four multi-function buttons, you can navigate the menu and program the various SterilClave functions. -
Page 29: Cycle Menu
Operation Cycle Menu Use the ↑↓ arrows to highlight the various cycles: 1. 121 UNWRAPPED: cycle at 121°C for delicate solid products, unpackaged only 2. 134 UNWRAPPED: cycle at 134°C for solid products, unpackaged only 3. 134 DENTAL HANDPIECES: cycle at 134°C for dental hand pieces, unpackaged only 4. -
Page 30: Language
Operation The main settings that can be changed are: 1. Language 2. Date and Time 3. Button sound 4. Self-stop 5. Self-filling 6. Printer 7. Cycle recording 8. Data logging Use the ↑↓ arrows to scroll through the list of settings; press ENTER to change the value of the setting selected. -
Page 31: Self-Filling
Operation Self-filling This item is only available if the auto water fill 29 is installed. Press ENTER to show the value of the automatic fill setting (ON/OFF). Change the setting with the ↑↓ arrows if required. Press ENTER to confirm the information, or press to exit without changing the value of the setting. -
Page 32: Advanced Menu Functions
Operation Advanced Menu Functions This menu gives you access to the Advanced Tools: 1. Prog. SPECIAL 2. Programmed start 3. Hollow loads 4. Change sec. code 5. SterilCard option Use the ↑↓ arrows to scroll through the list of advanced tools and press ENTER to access the item selected. -
Page 33: Programmed Start
The SPECIAL cycle is not covered by the technical requirements of the EN 13060 standard with which the COMINOX autoclaves comply: for this reason, only qualified laboratory personnel are permitted to use the SPECIAL cycle. -
Page 34: Hollow Loads
Operation Press the key to exit without programming any cycle to begin. After you have selected the cycle, press ENTER to view the day. This value can be changed using the ↑↓ arrows. Press ENTER to confirm the information and move on to the next setting. -
Page 35: Change Sec. Code
Operation Press the button to exit. 3.4a Change sec. Code This function is available only if SterilClave is activated with the access code. This function allows the user to change the sterilizer access code. Pressing ENTER takes you to a new screen that asks you to enter the current security code. Press ENTER to move on to entry of the new binary security code (maximum 6 digits): Press the button to delete the last number entered, or, if there are no numbers on the... -
Page 36: Sterilcard Option
Operation 3.4b SterilCard Option This item is only present if the SterilCard 06 inserted is at Administrator level. There are three SterilCard 06 management functions: 1. Generate User 2. Delete User 3. Enable User 3.4b.1 Create User Press ENTER to access the screen for entering the name of the new user: <>... - Page 37 Operation The ON/OFF value for the first cycle is displayed and can be changed using the arrows ↑↓. Cycles set to ON will be entered in the new user profile. Press ENTER to confirm the selection and move on to the next cycle. If the SPECIAL cycle is set to ON, you will be shown the screen for setting the values for the SPECIAL cycle parameters: If user programming is ON, the new user will be allowed to change the parameters of...
- Page 38 Operation Press CANCEL to return to the SterilCard option menu. Press PROGRAM to save the profile just created on the SterilCard 06 inserted in the machine. If the operation finishes successfully, the following message will appear: Otherwise, if errors occurred, the screen will read: In both cases, press one of the 4 multi-function buttons to return to STAND BY.
-
Page 39: 3.4B.2 Delete User
Operation Press REWRITE to overwrite the new profile onto the SterilCard 06 inserted, and then view the results of the operation. Press CANCEL to return to the SterilCard option menu. Only User SterilCards 06 can be programmed. If an Administrator SterilCard 06 is inserted, the screen will read “STERILCARD LEVEL NOT COMPLYING”, and a User SterilCard 06 must be inserted to proceed with programming. -
Page 40: 3.4B.3 Enable User
Operation 3.4b.3 Enable User Press ENTER to display the request to enter the User SterilCard 06 that you want to enable: Press CANCEL to return to the SterilCard option menu. Press ENABLE, and the User SterilCard 06 inserted will be enabled to use the current serial number. -
Page 41: Cycle Records Menu
Operation Cycle Records Menu After you press ENTER, the list of cycles saved on the SterilCard 06 or in the internal memory (for sterilizers not equipped with SterilCard 06) will appear in chronological order, starting with the most recent. Use the ↑↓ arrows to scroll through the list, and press ENTER to access the cycle selected: For each cycle the following are displayed: the serial number, the user who launched it, the cycle number, and the date and time it was initiated. -
Page 42: Maintenance Menu
Operation Maintenance Menu Two options are available under this menu: 1. Items 2. Save Maintenance Items Press ENTER to view the list of components subject to scheduled maintenance: For each component, the remaining days and cycles are shown, along with the last three replacements, the date of the operations, and the total number of cycles at that point. -
Page 43: Save Maintenance
Operation Pressing YES will record the replacement; pressing NO will take you back to the list of items. Only authorized technicians can replace and record the other items. Save Maintenance Press ENTER to access this screen: Press NO to return to the Maintenance menu. Press YES to save the maintenance record on the SterilCard 06 inserted. -
Page 44: Information In Stand By
Operation INFORMATION in STAND BY When in STAND BY mode, pressing INFO will bring up a screen containing information about the machine: Use the ↑↓ arrows to scroll through the information and view: • Relative pressure • Theoretical steam temperature •... -
Page 45: Starting The Cycle
Operation STARTING the CYCLE From STAND BY, press START to launch the cycle shown on the display. If the message “Generator warm up” is shown in STAND BY, the key START is available only for the VACUUM TEST, so the user can’t start the other cycles. As soon as the steam generator 47 is ready, the key START is available for all cycles. -
Page 46: Stop The Cycle
Operation STOP the CYCLE The STOP button will halt the cycle in progress. You can interrupt the cycle at any time by pressing STOP, but you are advised to stop the cycle only in an emergency. If a cycle is interrupted with a load of packaged instruments, even when the sterilization phase is complete, sterility is not guaranteed because the load has not dried. -
Page 47: Events In The Cycle
Operation EVENTS in the CYCLE Press EVENT to access the cycle events screen: The display will show information about the phases of the cycle in progress: the phase name, the time the phase began, the temperature, and the pressure of the sterilization chamber at the beginning of the phase. -
Page 48: Information About The Cycle
Operation INFORMATION about the CYCLE Press INFO to access the screen containing information about the cycle in progress: Use the ↑↓ arrows to scroll through the information and view: • Relative pressure • Theoretical steam temperature • Steam generator 47 temperature •... -
Page 49: Control Tests
The Bowie & Dick test is used to check the proper steam penetration into porous loads (e.g. gauzes and fabrics) and the efficiency of the air drain system. The Cominox Bowie & Dick Test Pack consists of a package containing a chemical process indicator, and its even color change ensures that the steam has penetrated properly. - Page 50 Operation - close the door 16. - enter the access code or insert the SterilCard 06. - press MENU from STAND BY mode, select Menu Cycle (number 1) and press ENTER. - use the ↑↓ arrows to select the Vacuum test cycle and press ENTER to return to STAND BY. - press START from STAND BY: - wait for the test to finish, shown on the display by the words “VACUUM TEST CONSISTENT”: - press STOP, wait for the “Wait door unlock”...
-
Page 51: Helix Test
134 PRIONS) or on 134 DENTAL HAND PIECES cycle. The Cominox Helix test consists of a metal capsule containing a chemical process indicator and a Teflon tube that is 1.5 m long with an internal diameter of 2 mm. The even color change of the chemical indicator ensures that the steam has properly penetrated through the hollow body. -
Page 52: Cycle Recording On Sterilcard
Operation When printing, the screen will read: The machine then changes to STAND BY mode. To insert or replace a printer 26 paper roll, simply open the inferior panel 18 and then the interior printer door. Both of these tilt downward. Insert or replace the paper roll with a compatible replacement (thermal paper) and thread one end through the upper slot. - Page 53 Operation If the memory available on the SterilCard 06 is nearly full, when you press START to begin a cycle, the display will show this message: In this case, you are advised to transfer the files saved on the SterilCard 06 to a PC. If the memory is entirely full, when you press START the screen will read: The saved data can be transferred to a computer with the CominoxReader kit (optional), which allows you to download and save the cycles and maintenance performed using...
-
Page 54: Indicators
Indicators INDICATORS Indicators are messages containing notices or warnings that in most cases require a simple corrective action or check from the user. The indicators are shown on the display with the corresponding icon and a brief description. • Description / Solution Indicates that the steam generator 47 is heating. - Page 55 Indicators Activates at the end of a cycle or immediately after WAIT DOOR turning the sterilizer on, and indicates that the door 16 UNLOCK release is underway. To access the chamber 09, wait until the indicator disappears, without attempting to open the door.
-
Page 56: Alarms
SterilCard 06 and press SILENCE ALARM. Once the alarm has been reset and the cause behind it has been resolved if possible, begin a new cycle. If the problem persists, contact an AUTHORIZED COMINOX TECHNICAL SERVICE CENTER. - Page 57 Alarms Indicates that small steam leaks or an unsaturation of PRESSURIZATION steam has prevented the correct rise in temperature in the ALARM chamber 09 during the pressurization phase. • Follow the instructions specified in the case of the “INSUFFICIENT STEAM” ALARM. •...
- Page 58 Alarms Indicates a problem with the level probes. LEVEL PROBES • Empty and refill the clean water tank 10 when the ALARM unit is off and idle. Indicates that the chamber 09 is overheated, and the COILS safety thermostat 17 has been triggered. ALARM •...
- Page 59 Alarms Indicates that during a cycle, there was a drop in the POWER MISSING power supply to the unit. When power is restored to the ALARM unit, the display will show a message about the phase in which power dropped. Whenever there is a power cut while an alarm is active, the display will show the last alarm triggered.
- Page 60 Alarms Indicates that a time-controlled phase (sterilization, drying EVENTS or maintenance in the Vacuum Test) was not correctly ALARM completed. • Contact a technical service center. • Check the power supply at the plug, and that the NO MESSAGE IS power cord 03 is inserted correctly in the plug and SHOWN ON THE in its connection in the machine.
- Page 61 If the tap is open and the CHECK AUTO FILL ALARM is active, check that water is flowing downstream from the Cominox demineralization system. • If none of the solutions provided here solves the...
-
Page 62: List Of Alarm Codes
Alarms List of alarm codes Code Type of alarm COILS ALARM PT1 OVERTEMPERATURE ALARM INSUFFICIENT STEAM ALARM INSUFF. WATER LEVEL ALARM MAX WATER LEVEL ALARM DOOR ALARM GENERATOR LEVEL ALARM MANUAL STOP ALARM INSUFFICIENT VACUUM ALARM FRAC. VACUUM ALARM PROBE LEVEL ALARM PRESSURIZATION ALARM OVERTEMP. -
Page 63: Maintenance
COMINOX declines all responsibility if the maintenance plan indicated in this manual is not followed (see Scheduled Maintenance table). Cominox also declines all responsibility if maintenance is entrusted to untrained personnel or if the procedures suggested by our installation technicians are not respected. -
Page 64: Filters
At least annually, check the calibration of the pressure and temperature probes. The probes check must be performed strictly by specialized personnel or at a COMINOX TECHNICAL SERVICE CENTER Fuses To calibrate the fuses 32, refer to the label plate inside the inferior panel 18. -
Page 65: Storage And Disposal
In any event, avoid creating any sort of pollution. N.B. COMINOX declines all responsibility for damage to the environment or for systems used in the disposal of the materials that comprise the machine or that are used in its operation. -
Page 66: Scheduled Service Table
Maintenance Scheduled service table # of cycles # of cycles at or maximum Date of Technician's Item the time of the time operation signature operation permitted Air Filter* 1 year 1500 Water Filter 2 years 1000 Vacuum pump kit 2 years 1500 SV2 drain 2 years... -
Page 67: Appendix 1: Graphics 6 B Speedy
Appendix 1 APPENDIX 1: GRAPHICS 6 B SPEEDY 121 UNWRAPPED 134 UNWRAPPED 121 HOLLOW/POROUS 134 HOLLOW/POROUS 134 PRIONS 134 DENTAL HAND PIECES... - Page 68 Cominox S.r.l. via G. Viganò, 7 - 20048 Carate B.za (Mi) Italia tel. +39 0362 912312 - Fax +39 0362 900940 www.cominox.it...
Need help?
Do you have a question about the Sterilclave 6 B Speedy and is the answer not in the manual?
Questions and answers