Table of Contents
Advertisement
Advertisement
Table of Contents

Related Manuals for MIR MiR Charge 48V


Summary of Contents for MIR MiR Charge 48V
- Page 1 Operating guide (en) Date: 11/2019 Revision: v.1.3...
- Page 2 All rights reserved. No parts of this manual may be reproduced in any form without the express written permission of Mobile Industrial Robots A/S (MiR). MiR makes no warranties, express or implied, in respect of this document or its contents. In addition, the contents of the document are subject to change without prior notice.
-
Page 3: Table Of Contents
Table of contents 1. About this document 1.1 Where to find more information 1.2 Version history 2. Safety 2.1 Safety message types 2.2 General safety precautions 3. Getting started 3.1 In the box 3.2 Installing and powering up 3.3 Mark potentially hazardous floor area 4. -
Page 4: About This Document
How to set up MiR500 and MiR1000 robots for automatic charging in MiRCharge 48V 1.1 Where to find more information At www.mir-robots.com, several additional resources are available. To access more information, sign in to the Distributor site with your distributor account at http://www.mobile-industrial-robots.com/en/account/. -
Page 5: Version History
Select your product to see the list of available software versions and Product release notes. • Distributor site > How to http://www.mobile-industrial-robots.com/en/account/how-to/ This page contains how-to articles that describe how to perform specific tasks with MiR products. • Distributor site > Troubleshooting https://www.mobile-industrial-robots.com/en/account/troubleshooting/ This page contains troubleshooting guides to solve common issues with MiR products. -
Page 6: Safety
2. Safety 2. Safety Read the information in this section before powering up and operating MiRCharge 48V. Pay particular attention to the safety instructions and warnings. NOTICE Mobile Industrial Robots disclaims any and all liability if MiRCharge 48V or its accessories are damaged, changed or modified in any way. Mobile Industrial Robots cannot be held responsible for any damages caused to MiRCharge 48V, accessories or any other equipment due to programming errors or malfunctioning of MiRCharge 48V. -
Page 7: General Safety Precautions
2. Safety 2.2 General safety precautions This section contains general safety precautions. WARNING MiRCharge 48V is not approved for installation in areas with explosive gas atmosphere according to hazardous area classification zones 0, 1 and 2. Sparks from static electricity may cause fire or explosions. •... - Page 8 2. Safety WARNING Attempting to charge batteries outside the robot can lead to electrical shock or burns. • Never charge the batteries outside the robot. WARNING Risk of injury and electrical shock if used by unqualified personnel. • This appliance is not intended for use by persons (including children) with reduced physical, sensory or mental capabilities or lack of experience and knowledge, unless they have been given supervision or instruction concerning use of the appliance by a person responsible for their safety.
- Page 9 2. Safety CAUTION Metal parts placed or dropped on the charging connectors during charging may short circuit MiRCharge 48V or MiR500/MiR1000. The charging connectors carry voltage only when in contact with the robot. Both robot (including battery) and charging station are protected by fuses to prevent dangerous situations should the terminals be short circuited during charging.
-
Page 10: Getting Started
3. Getting started 3. Getting started This section describes how to get started with MiRCharge 48V. 3.1 In the box This section describes the content of the MiRCharge 48V box. MiRCharge 48V Operating guide (en) 11/2019 - v.1.3 ©Copyright 2019: Mobile Industrial Robots A/S. - Page 11 NEMA 5-15P plug - for use in 110/120 V installations; (only delivers 50% of the max. rated charging power) • CEE 7/7 plug - for use in 230/240 V installations MiR document folder containing EC Declaration of Conformity. MiRCharge 48V Operating guide (en) 11/2019 - v.1.3 ©Copyright 2019: Mobile Industrial Robots A/S.
-
Page 12: Installing And Powering Up
3. Getting started 3.2 Installing and powering up This section describes how to install and power up MiRCharge 48V. Before installing Before installing, please consider the following: • Place MiRCharge 48V against a wall on a clean, even and dry floor. • Keep the air vents on both sides of the charging station free to avoid overheating. -
Page 13: Mark Potentially Hazardous Floor Area
3. Getting started Label Description Label Description Four M8 mounting holes for fix- Mounting brackets ation to wall (all four corners) Air vents Power inlet Power button Mounting Follow these steps to mount MiRCharge 48V to a wall: Place MiRCharge 48V against the wall where it should be mounted. Mark the position of the four M8 mounting holes (1) on the wall. - Page 14 3. Getting started Why marking is required When docking to a charging station, the robot mutes its Personnel detection means temporarily. This includes turning off the protective fields around the scanner. The muting starts when the robot reaches the entry position approximately one meter from the charging station marker.
- Page 15 3. Getting started Figure 3.2 illustrates where the floor marking should be for a single charging station. 3.2. The floor around MiRCharge 48V must be marked to indicate where the personnel protection means are muted. This can for example be done with signal tape. •...
- Page 16 3. Getting started For more information on Personnel detection means and protective fields, see MiR500/MiR1000 User guide. MiRCharge 48V Operating guide (en) 11/2019 - v.1.3 ©Copyright 2019: Mobile Industrial Robots A/S.
-
Page 17: Product Presentation
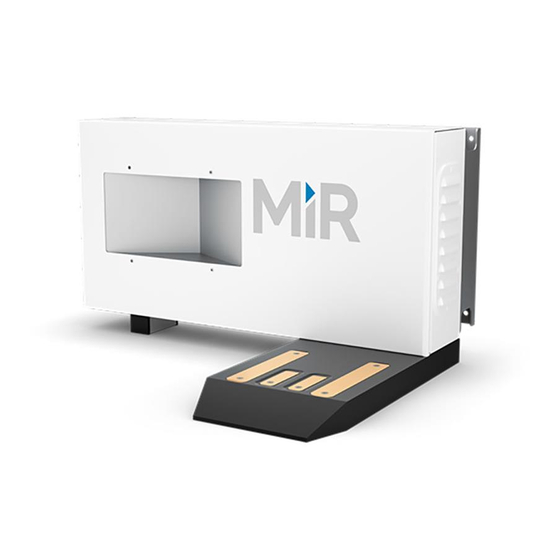
4. Product presentation 4. Product presentation MiRCharge 48V is a charging station that autonomously recharges docked robots, enabling autonomous operation 24/7. Multiple robots can share the same charging station; however, for this we recommend integrating the robots in MiRFleet to avoid bottleneck situations. For more information see the MiRFleet Getting started guide. - Page 18 4. Product presentation Figure 4.1 identifies the features of MiRCharge 48V. 4.1. Front view of MiRCharge 48V. Label Description Label Description VL marker: the V-shaped recess Charging plate combined with the front plate to the right forms a so-called VL- marker that the robot's front safety scanner uses to detect the charging station Charging connector, positive ter-...
-
Page 19: Identification Label
4. Product presentation When the robot is in position on top of the charging connectors (3) and (6), the robot must first deliver a small current to the charging station before the station starts charging. This ensures that charging only begins when the robot is correctly docked at the station. The connectors on both charging plate (3) and (6) and underneath the robot are voltage-free until connection between those is made and communication through CAN bus (4) and (5) is established... -
Page 20: Usage
5. Usage 5. Usage This chapter describes how to set up a robot for automatic charging in MiRCharge 48V. To do so, you must set up a marker on the map and create a mission that enables the robot to move to the charging station to start charging. If you are using MiRFleet, charging is handled automatically, and you should not create a mission that includes charging actions. - Page 21 5. Usage Manually drive the robot so its front is facing the MiRCharge 48V and is within one meter from it. In the robot interface, enter the map editor of the map where you want to create a marker. This is done by navigating to Setup > Maps and selecting the Edit icon next to the map you would like to work on.
- Page 22 5. Usage Select Detect marker. The Detect-marker function tracks the position of the charging sta- tion using the VL-marker and automatically sets the X, Y and Orientation values in the robot, enabling it to connect to the charging station. MiRCharge 48V Operating guide (en) 11/2019 - v.1.3 ©Copyright 2019: Mobile Industrial Robots A/S.
-
Page 23: Creating Charging Missions
5. Usage Select OK to create the marker. A new marker icon (2) represented by a lightning symbol is now visible on the map in front of the robot (1) and is ready to be used in missions. If the robot is too far from the charging station, a message that the robot failed to locate the marker is displayed. - Page 24 5. Usage presents how an If action may be used to control when the robot should recharge relative to its remaining power level. Create a simple charging mission In the robot interface, create a new mission. This is done by navigating to Setup > Mis- sions and selecting Create mission.
- Page 25 5. Usage In the create mission window insert the following actions: In the Move menu, select Docking. In the Battery menu, select Charging. In the Move menu, select Relative move. The mission should look like this: The next steps describe how to set the parameters of the chosen mission actions. To set the parameters of each action, open the action dialog by selecting the gearwheel icon of the action in question.
- Page 26 5. Usage In the Charging action dialog, define how the charging should be completed. In our example, there is no minimum time. When the battery reaches 40%, the charging is com- pleted. Select Validate and close. To read more about the different Charging action combinations, see Charging action parameters explained on page 33.
-
Page 27: Insert A Charging Action Into A Larger Mission
5. Usage The mission is complete. Select Save to save the mission. The mission is now visible in the missions list and ready to add to the missions queue. The mission can also be inserted in other missions. In that case the Relative move action is unnecessary. - Page 28 5. Usage Follow these steps to insert a charging action into a larger mission: In the robot interface, go to Setup > Missions and select Create Mission. Name the mission, select the correct site and select Create mission. MiRCharge 48V Operating guide (en) 11/2019 - v.1.3 ©Copyright 2019: Mobile Industrial Robots A/S.
- Page 29 5. Usage Within the Create mission window complete the following steps to add the necessary actions: In the Logic menu, select Loop. Select the gray bar that reads Content to embed the next action into the Logic action. In the Logic menu, select If. Select the gray bar that reads True to embed the next actions into the If action.
- Page 30 5. Usage In the Loop action dialog, select the check box Endless under Iterations. Select Validate and close. In the If action dialog, do the following: • Select Battery Percentage under Compare. • Select >= (greater than or equal to) under Operator. •...
- Page 31 5. Usage Under True in the If action, select a position for each of the three Move actions. Then select Validate and close. MiRCharge 48V Operating guide (en) 11/2019 - v.1.3 ©Copyright 2019: Mobile Industrial Robots A/S.
- Page 32 5. Usage Under False in the If action, set the parameters for the Dock to and Charging actions: • In the Docking action dialog, select the marker position in front of the charging station that you created on the map. Then select Validate and close. •...
-
Page 33: Charging Action Parameters Explained
5. Usage 5.4 Charging action parameters explained A charging action can be defined with a minimum time, a minimum percentage, or a combination of those two. This section explains the four options for setting the charging duration. Minimum Time If you want to ensure that the battery stays in the charging station for a minimum amount of time, you can select the Ignore value check box under Minimum Percentage. - Page 34 5. Usage Charge until new mission in queue You can choose to let the robot stay in the charging station until it receives a new mission by selecting Charge until new mission in queue. This is useful, for example when the charging action is not followed by other actions, or the charging action is not included in a looped mission in which case the robot will continue after the set charging time or per- centage is fulfilled.
Need help?
Do you have a question about the MiR Charge 48V and is the answer not in the manual?
Questions and answers