Table of Contents
Advertisement
Quick Links
Advertisement
Table of Contents

Subscribe to Our Youtube Channel
Related Manuals for Pyle PLCMDVR8


Summary of Contents for Pyle PLCMDVR8
- Page 2 BUTTON CONTROL & SYSTEM LAYOUT MIRROR ASSEMBLY CONTROL A. MICROPHONE B. VIDEO CAMERA DISPLAY C. VOLUME DOWN D. POWER E. VOLUME UP F. MENU/BACK TO VIDEO DISPLAY G. LCD MONITOR I. BUILT IN SPEAKER J. POWER & WIRING CABLE K. ADJUSTABLE CAMERA L.
- Page 3 DVR POWER ON/OFF 1. Turn on DVR Start car engine to tun on DVR power 2. Turn o DVR Shut o car engine to turn o DVR power. Note: Short press button , DVR will turn to sleep mode only. MAIN MENU Main Menu When you select an icon, the selected icon turns green...
-
Page 4: Function Description
1. ICONS Sound recording on Sound recording o System beep on System beep o 2. FUNCTION DESCRIPTION Stop recording: Make sure that the SD card is fully inserted or it will stop recording. Normal recording: In loop mode, whenever the recording time reaches user-set loop recording time, a new le will be saved. -
Page 5: Camera Function
1. ICONS means when recording image changes and becomes static again, it will continue recording for10 seconds and then stop. 2. BUTTON FUNCTION : Short press" "to enter sleep mode UP: No function DN: No function OK: No function MENU: Exit recording and back to main menu CAMERA FUNCTION Camera image In this mode you can shoot photos of the following sizes:... -
Page 6: Button Functions
1. ICONS 1. DELETE FILES Select the les that you want to delete, long press 'UP' button, then click 'OK' , the les selected in the project folder will be deleted. Note: Deleted les in four folders cannot be recovered. 2. - Page 7 Select the image les that you want to delete, long press 'UP' button, then click 'OK' the image les selected will be deleted. Note: Deleted image les can not be recovered. BUTTONS : Short press“ ” to enter sleep mode. UP: Select previous le DN: Select next le OK: Pause/Resume play...
-
Page 8: Photo Size
SETTINGS Recording Mode 1. VIDEO QUALITY 1296SHD: 2304x1296 ; 1080FHD: 1920x1080 ; 1280x720 ; 720HD: 2. BUTTON FUNCTION : Short press to enter sleep mode. UP: Select previous item DN: Select next item OK: Enter settings or con rm the change of settings. MENU: Exit or discard the change of settings. -
Page 9: Sound Record
SOUND RECORD ON: Record video with sound (default setting) OFF: Record video without sound. MD SENSITIVITY Set MD sensitivity as HIGH / MIDDLE / LOW. G SENSOR O /High/Medium/Low sensitivity for di erent environment. Default setting is MIDDLE BUTTON SOUND ON: Turn on button sound. -
Page 10: Volume Setting
VOLUME SETTING Volume setting on Mute or 5%~100%. BACKLIGHT TIME ON: Turn on backlight all the time(Default setting). 30s: Turn o backlight after no operation for 30s. 1 min: Turn o backlight after no operation for 1 minute. 5 min: Turn o backlight after no operation for 5 minutes LIGHT FREQUENCY 50Hz: Remove light frequency interference of 50Hz 60Hz: Remove light frequency interference of 60Hz... -
Page 11: Set Clock
SET CLOCK BUTTON FUNCTION : Short press“ ” to enter sleep mode. UP: + DN: - OK: To con rm the change of date and return to previous menu. MENU: Switch to next adjustment. LANGUAGE The system supports English, Simpli ed Chinese, Traditional Chinese, Korean, Russian, Deutsch, French and Japanese language. - Page 12 FORMAT BUTTON FUNCTION : Short press“ ” to enter sleep mode. UP: Move yellow cursor DN: Move yellow cursor OK: Click 'OK' to format SD Card; Click 'Cancel' to cancel and return to previous menu. MENU: Cancel Format setting and return to previous menu. PRECAUTIONS Before formatting, please make sure there is no important data in SD card.
-
Page 13: System Message
SYSTEM MESSAGE No SD Card In video recording or camera mode, if the unit does not detect SD card, this picture and voice prompt will appear on screen. Insert SD card, the prompt will disappear and you can start recording or shootting photos. SD Card has no storage space In video recording or camera mode, if SD card has no storage space, this picture and voice prompt will appear on screen,... - Page 14 BACKUP CAMERA SYSTEMS Angle Adjustable Camera Lens Located on the camera housing are 2 screws which lock the camera lens angle in position. The screws may be loosened to allow camera lens angle adjustment Loosen the screws, adjust the camera lens into the desired angle.
-
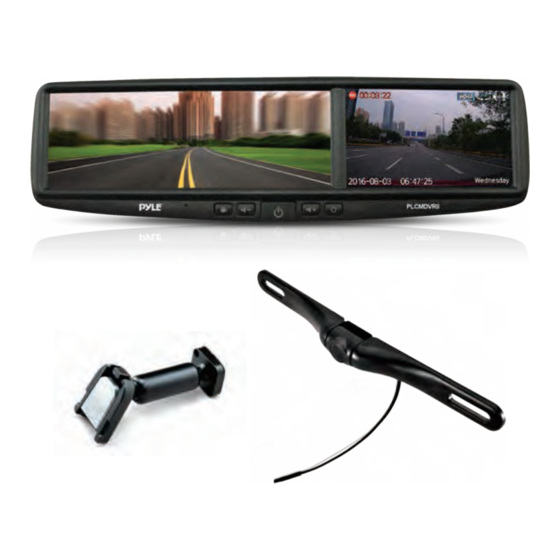
Page 15: Wiring And Installation
WIRING AND INSTALLATION Back up camera Video & Power Wiring Harness The PLCMDVR8 features a built-in, retractable and pullout camera. Manually release the camera from the mirror housing and adjust to the desired viewing angle. *For additional installation support visit www.pyleaudio.com...
Need help?
Do you have a question about the PLCMDVR8 and is the answer not in the manual?
Questions and answers