Advertisement
Quick Links
1. Packet Contents
VERIFY THE CONTENTS INSIDE THE PACKAGE BOX
The package should contain the items plus CAM-AHD325/
CAM-AHD425. If any item is missing or damaged, please
contact the seller immediately.
Quick installation guide x 1
CAM-AHD325
Screw packet for each model x 1
3. Hardware Installation
1. Place the camera in a suitable location and attach with
screws.
2. Adjust the camera to the correct direction.
3. Connect a 12V DC power adapter to the power input
connector.
4. Connect to the DVR and select your channel. Next, select
required mode via the OSD control button and hold the
button for about 5 seconds to take effect. After that, the
image of camera will be shown on the channel.
5. Press the OSD control button to enter the main menu of
OSD function for configuration.
Before connecting the power adapter to the
camera, please make sure the power output
voltage is 12V DC (max. ±5%). If you are not
sure of this part, we suggest you use a 12V
Note
DC switching power adapter. It can provide
stable power output.
3.1 OSD Function
Hex wrench x 1
(CAM-AHD325 only)
CAM-AHD425
– 1 –
– 3 –
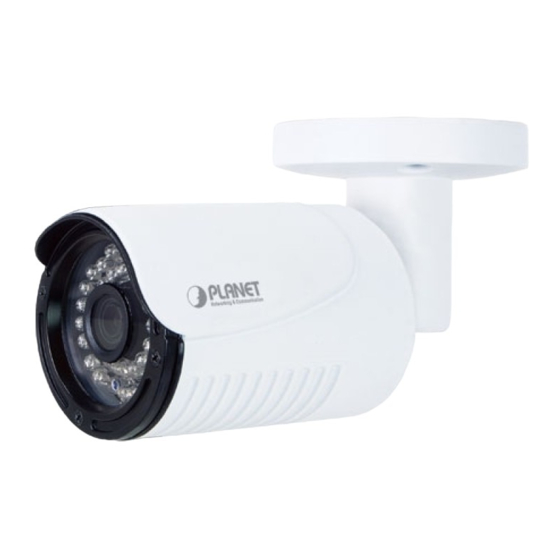
2. Physical Introduction
CAM-AHD425
IR LED
OSD Control Button
Connector
Description
Power Input
Connect to a 12V DC power adapter.
Video Output
BNC connector for analog video output.
OSD Control
Description
Button
H
AHD Mode
T
TVI Mode
C
CVI Mode
A
CVBS Mode
Press &
OSD Configuration
Direction Control
3.2 Setting Steps
1. Exposure
2. White Balance
3. Day & Night
4. Adjustment
CAM-AHD325
IR LED
Sunshield
Power Input
Video Output
– 2 –
– 4 –
Advertisement

Related Manuals for PLA.NET CAM AHD425

Summary of Contents for PLA.NET CAM AHD425
- Page 1 1. Packet Contents 2. Physical Introduction VERIFY THE CONTENTS INSIDE THE PACKAGE BOX CAM-AHD425 CAM-AHD325 The package should contain the items plus CAM-AHD325/ CAM-AHD425. If any item is missing or damaged, please contact the seller immediately. IR LED IR LED Sunshield OSD Control Button Power Input...
- Page 2 Quick Installation Guide AHD 1080p IR Camera www.PLANET.com.tw CAM-AHD325/CAM-AHD425 ► PLANET Technology Corp. 10F., No. 96, Minquan Rd., Xindian Dist., New Taipei City 231, Taiwan 2011-L00290-002 材質: 100P特銅紙, 水性光 4. Specifications 尺寸: 105 x 148 mm(A6), A4二折單張彩色 Shutter Speed 1/25s~1/45,000s Digital Noise 2D DNR Reduction...
Need help?
Do you have a question about the CAM AHD425 and is the answer not in the manual?
Questions and answers