
Related Manuals for SaberTec Golden Harvest v3


Summary of Contents for SaberTec Golden Harvest v3
- Page 1 SaberTec Contact: info@sabertec.net Owner: Frederic Folz Website: https://sabertec.net Brentanoweg 3 66802 Überherrn GERMANY...
- Page 2 SaberTec with the goal to develop a soundboard that can provide the most impressive and realistic saber experience imaginable – four years of hard work later the Golden Harvest v3 was born. Our company’s fundamental philosophy is to closely include you, the community, into everything we do –...
- Page 3 We cannot be held responsible for any damage that arises from a faulty install or use of the board. Furthermore, be cautious when using the Golden Harvest v3 if you have photosensitive epilepsy or if you are photosensitive in general because the light effects can contain a series of flashing lights.
-
Page 4: Table Of Contents
Content Features of the Golden Harvest v3 ......................6 Technical Specifications........................6 Installation and Use ..........................6 Audio Engine ............................6 Motion Detection ..........................7 Light Effects ............................8 Firmware Updates ..........................10 USB Charging and File Transfer ......................10 Evolution of the Board .......................... - Page 5 Focus Deflection ..........................57 Thunder Storm ..........................61 Kylo Blade ............................64 Unstable Blade ..........................65 Magnetic Flare ..........................67 Shockwave ............................. 68 Responsive Lockup ........................71 Responsive Drag ..........................72 Battery Indicator............................ 73 Color Wheel ............................73 Volume Control ............................. 73 Accent Fonts ............................
-
Page 6: Features Of The Golden Harvest V3
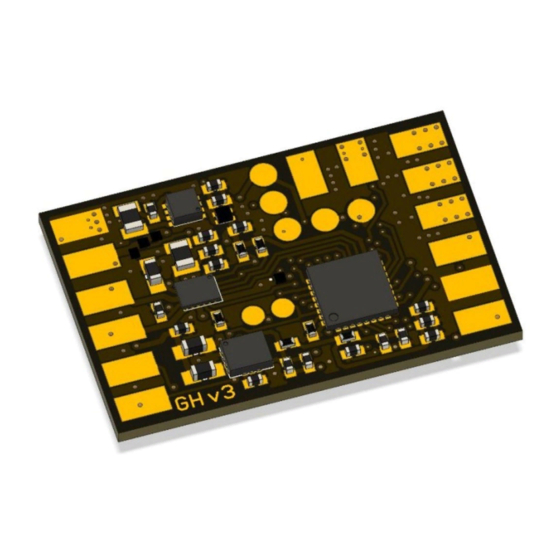
Features of the Golden Harvest v3 Technical Specifications ➢ tiny dimensions of 28.5 mm x 18.5 mm x 3.7 mm / 1.12 ” x 0.73 ” x 0.15 ” ➢ powered by 3.7 V (single 18650 Li-ion cell for example) ➢... -
Page 7: Motion Detection
o unlimited end lockup sounds o unlimited begin melt sounds o unlimited melt sounds o unlimited end melt sounds o unlimited begin drag sounds o unlimited drag sounds o unlimited end drag sounds o unlimited blaster sounds o unlimited force sounds o unlimited boot sounds o unlimited pre-on sounds o unlimited power on sounds... -
Page 8: Light Effects
Golden Harvest board remembers with which effect font a sound font was lastly used default effect fonts and manual available on https://sabertec.net/downloads ➢ in-hilt LED effects: o overwhelming light effect engine... - Page 9 o independent spin effects o independent lockup effects o independent melt effects o independent blaster effects o independent force effects o as there are more than 600 parameters, you can literally invent your own light effects o assuming there are 1000 possible values for each parameter (which is a hard under- estimation), you could create 10^1800 (a one with 1800 zeros) possible effect fonts –...
-
Page 10: Firmware Updates
• Window • Unstable Blade • Flame Blade o configurable effect duration o localized lockup o localized drag o localized melt o localized blaster block o independent basic effects o independent clash effects o independent stab effects o independent swing effects o independent spin effects o independent lockup effects o independent blaster effects... -
Page 11: Evolution Of The Board
Evolution of the Board Since its first release, several minor hardware changes of the Golden Harvest v3 have been implemented. The different hardware iterations of the board are labelled as phase 1, 2, 3 and 4. Each of these boards is capable of using the very same firmware. In the following, we describe how you can determine which hardware iteration you own and what the differences are. -
Page 12: Wiring Of The Board
Changes introduced by phase 2: - Decreased wait time when disconnecting and connecting the battery. - Batt. + pad on the top side instead of on the back side. Changes introduced by phase 3: - Wait time when disconnecting and connecting the battery completely removed. - Part in the upper left corner of the top side of the board replaced by a protected one to make it more robust against mistakes during install. - Page 13 Top side of the board Back side of the board The position of the Batt. + pad indicated above holds only for the black boards. For the green boards, please use the Batt. + pad on the back side. The LED channel 5 is only available on phase 3 and phase 4 boards.
-
Page 14: Power Rating And Polarity Of Led Channels
Soldering Advice The pads of the Golden Harvest v3 were designed to be as big as possible in order to make the soldering process as easy as possible. Compared to the other pads, the pad "Batt. -" has an even higher electrical and thermal conductivity. -
Page 15: Handling Advice
Handling Advice In general, electronics are sensitive to electrostatic discharge. Please always make sure to be grounded when touching the board. Furthermore, make sure that the speaker wires never touch each other and that no speaker wire touches a GND, positive wire or the Pixel data line (at least not their exposed parts). - Page 16 In the following, the wiring diagrams for different LED setups are shown. For in-hilt setups, the resistors can be added either to the positive or the negative of the LEDs. Single color blade with separate clash color The wiring of an in-hilt LED as single color blade with separate clash color is shown below. The wiring of an in-hilt RGB LED is shown below.
- Page 17 RGBW The wiring of an in-hilt RGBW LED is shown below. Pixel strips without Pixel accents The wiring of a Pixel strip is shown below (commonly known as Neopixel™ which is a trademark of Adafruit™ with whom we are not affiliated). There is already a 470 Ohm data line resistor on the board so that you don’t need to add one.
- Page 18 Pixel strips with Pixel accents The wiring of a Pixel strip with Pixel accents is shown below. There is already a 470 Ohm data line resistor on the board so that you don’t need to add one. If your blade is pre-resistored, this will not affect the functionality.
-
Page 19: Battery Recommendation
Usually, the number is between 110 and 135. The number of LEDs is internally clamped to 140. There are even more customizable parameters in the "general.txt" of course, but to configure your Golden Harvest v3 for your hardware setup, only these three parameters need to be adjusted. -
Page 20: Choosing Your Light Effects
Folder Structure on microSD Card The Golden Harvest v3 comes with a microSD card containing the default package. In the picture below, you can see the folder structure of the microSD card. Let’s go through it from top to bottom. The first folder is the "EffectFonts"... -
Page 21: Motion Detection Engine
General Settings The general settings of your Golden Harvest v3 board can be found in the "general.txt" file on your microSD card. When the board boots, it loads all the parameters that are contained in this file. These parameters define the behavior of your board. - Page 23 PARAMETER DESCRIPTION volume Defines the maximum possible volume of your saber. Ranges from 0 (mute) to 400 (maximum loudness). Recommended value of 100. Please check if your speaker can handle such a high volume when increasing the volume to higher values than 100. We cannot be held responsible for any speaker damage that results from overpowering them.
- Page 24 latching switch and a value of 2 corresponds to two momentary switches. For more options, please check the section "Menu navigation". button_reverse Defines if the auxiliary and the power button are swapped. A value of 0 means that they are not swapped and a value of 1 means that they are swapped.
- Page 25 value of 3 allows to change the volume both by tilting the saber and twisting it. volume_control_tilt_speed Defines the sensitivity of the volume control to tilting the saber. volume_control_twist_speed Defines the sensitivity of the volume control to twisting the saber. orientation Defines the orientation of the board in your saber which is required for the orientation detection based features...
- Page 26 stab_cooldown Defines how long no other stab can be triggered after a stab has been detected. Can protect stabs from a too fast interruption by other stabs. spin_cooldown Defines how long no other spin can be triggered after a spin has been detected. Can protect spins from a too fast interruption by other spins.
-
Page 27: Effect Fonts
– due to the great variety of our settings, you can realize almost every effect you can imagine and literally even invent own ones. On the Golden Harvest v3, you can use more than 600 parameters for in-hilt setups and several thousands for Neopixel setups which are customizable by using our online configurator. -
Page 28: In-Hilt
The support of Neopixel is currently on the way. Our configurator will be accessible on our website soon. Now, we come to the description of the parameters you can customize manually in the effect fonts or with our configurator. - Page 29 In the "color.txt" file, you can define the color of your blade, whether an LED channel drives a blade LED or an accent LED and whether one of the LED channels should display a delayed ignition (the latter is not active yet). One of the fascinating features of our board is that the accent channels are not different from the blade channels with respect to the customizability of the light effects.
- Page 30 As you can see, you have the same degree of customizability just as in the basic state, whereby the parameters here have the additional prefix "cl_" which indicates that they belong to the clash state. In addition to these settings you also have the parameters "cl_duration" and "cl_fade_out". The parameter "cl_duration"...
- Page 31 The structure consists of two parts: a flicker part and a pulse part. Let’s have a look at the flicker part first. It’s called the flicker part as the parameters that it contains define a flicker effect. This effect creates random (but also deterministic if you want) and sudden drops in the power level defined by the parameter "led".
- Page 32 In the following, we give an overview of the parameters of the flicker part and a short description. The parameters are marked by different colors. These indicate whether they’re for users who only want to change a few parameters (black) or for more advanced users who want to unleash the full-blown effect engine (green).
- Page 33 time using a flicker effect with the same intensity parameters as in channel 1 in the previous example. As you can see, the depth of each drop in the LED power varies randomly within the interval between the flicker minimum and maximum intensity, i.e.
- Page 34 maximum flicker delay are 1. This means that the actual flicker delay is always The picture above is a screenshot from our online configurator and illustrates the meaning of both the "flicker_min_delay" and the "flicker_max_delay" parameter. It shows the change of the LED power over time using a flicker effect with the same delay parameters as in channel 1 in the previous example.
- Page 35 phases: no flicker present and flicker present. This could simulate a saber that undergoes a transition between a stable and an unstable state for example. In LED channel 2, there is no smooth change in the flicker intensity over time (the flicker transition effect is disabled).
- Page 36 flicker_type Defines the type of the flicker effect. A flicker effect cannot only create sudden power drops which is called "subtractive type", but also sudden power peaks which is called "additive type". Furthermore, a flicker effect also can mix both types by creating sudden power drops and peaks in a random manner which is called "mixed type".
- Page 37 pulse intensity describes how deep the pulse effect smoothly digs into the LED power. In addition to that, the pulse period describes the duration of one drop. Thus, it is a measure for the pulse speed. The smaller the values of the pulse period, the faster the LED pulses. The picture below illustrates these two characteristic properties of the pulse effect graphically.
- Page 38 measure for how fast the transition between a pulse with intensity "pulse_min_intensity" and one with intensity "pulse_max_intensity" occurs. The smaller the value of "pulse_intensity_change_period", the faster the transition occurs. If you turn your saber on and if you have set a pulse effect with an intensity transition, the pulse will begin with its maximum intensity, before changing to its minimum intensity (see picture below).
- Page 39 pulse_min_period=100,100,1000,1000 pulse_max_period=100,1000,1000,1000 In this case, the pulse period is constant at a value of 100 in LED channel 1 as both minimum and maximum period have the same value. LED channel 2 shows a pulse with a period that changes back and forth within the interval between 100 and 1000.
- Page 40 value of 5 to a rectangular shape (see the picture below). Each LED channel has its own value. Example: pulse_shape=0,1,0,0 In this case, the pulse effect in LED channel 1 creates sine shaped periodic, smooth drops in the LED power. LED channel 2 shows a pulse effect that creates impulse shaped periodic, smooth drops in the LED power.
-
Page 41: Neopixel
Neopixel The structure of the Neopixel background effect and on top effect files is shown below. The Neopixel light effects engine of our board uses these two different types of effects in order to provide you with the highest possible customization. You can imagine background effects and on top effects as different layers of effects. - Page 42 As the set of parameters that define the light effects is almost the same for all of the states, we consider the basic state as an example in the following. This is the state the saber is in when no motion is triggered.
- Page 43 Similarly to the in-hilt setup, the other states, namely ignition, clash, stab, swing, spin, lockup, melt, blaster block and force push have exactly the same parameters. Thus, they can be customized in the same manner as the basic state. For all of these additional states, there are even more parameters in comparison to the basic state.
- Page 44 As you can see, you have the same degree of customizability just as in the basic state, whereby the parameters here have the additional prefix "cl_" which indicates that they belong to the clash state. In addition to these settings you also have the parameters "cl_duration" and "cl_fade_out" among other parameters.
- Page 45 displays the clash light effects. The value are given as number of LEDs. The position of the section of the blade that displays the clash light effects varies randomly between "cl_min_position" "cl_max_position". The smoothness of the transition between the section that displays the clash light effects and the rest of the blade is given by "cl_smooth".
- Page 46 the fading parameters of the ignition state are shown. In addition to the parameters we already know from the other states, there are a series of parameters that we will describe in the following. PARAMETER DESCRIPTION ig_stuttering Defines whether or not the stuttering ignition effect should be used. A value of 0 disables this ignition effect and a value of 1 enables it.
- Page 47 its top when it is ignited. The tip flash effect can be deactivated by choosing a value of 0. Example: ig_tip_flash_size=1 In this case, the size of the dot that moves from the bottom of the blade to its top is 1. ig_tip_flash_color The tip flash effect is an ignition effect.
-
Page 48: Classic
Example: ig_base_flash_color=255,255,255 In this case, the color of the flash at the bottom of the blade is white. ig_use_basic_effects Defines whether you want to use custom ignition effects or the basic light effects should be displayed during ignition. A value of 0 means that the custom ignition effects are used and a value of 1 means that the basic light effects are used. -
Page 49: Color Flow
Color Flow The background effect Color Flow generates a smooth sequence of colors that enlighten the blade emerging from its lower end and moving ahead to its tip with a configurable speed. Also the color sequence and the width of each color section as well as the smoothness of the transition between the different color sections can be customized. -
Page 50: Frozen Pulse
color_flow_color6=255,0,255 In this case, the sixth color of the color sequence is magenta which is given by the RGB value (255, 0, 255). color_flow_range Defines the length of each color section of the six different color sections of the sequence. This parameter takes six different values. The first value defines the length of the first color section, the second value defines the length of the second color section and so on. - Page 51 defines the color of each channel which can be assigned to red, green or blue. The effect channels can be customized independently from each other. If one of the values of this parameter is set to 0, this assigns the corresponding effect channel to red.
-
Page 52: Wave
In this case, the first effect channel has an offset of 0, the second has an offset of 90 and the third has an offset of 90. frzn_pls_min_dens The spatial pattern of the Frozen Pulse effect consists of brighter and darker spots on the blade. The inverse distance of these spots is referenced as density in the following. - Page 53 PARAMETER DESCRIPTION wave_led Defines the background intensity of each effect channel. This is the intensity that would be displayed when no wave would propagate along the blade. The wave pattern digs into this background intensity. Example: wave_led=255,0,0 In this case, the background intensity of the first effect channel is 255, the background intensity of the second effect channel is 0 and the background intensity of the third effect channel is 0.
- Page 54 Example: wave_max_intensity=255,0,0 In this case, the maximum depth of the first effect channel by which the wave digs into the background intensity is 255, the maximum depth of the second effect channel by which the wave digs into the background intensity is 0 and the maximum depth of the third effect channel by which the wave digs into the background intensity is 0.
- Page 55 parameter defines the time needed for a transition between "wave_min_period " and "wave_max_period" to take place. Example: wave_modulation_period=1000,2000,2000 In this case, the modulation period of the first effect channel is 1000, the modulation period of the second effect channel is 2000 and the modulation period of the third effect channel is 2000.
-
Page 56: Flame Blade
Flame Blade The background effect Flame Blade lets your blade look like a flame that evolves over time as new sparks of the fire ignite at the lower end of your blade. The underlying algorithm that creates the flame effect simulates the behavior of a real fire which makes the flame effect as authentic as possible. The color gradient of the flame is determined by four different colors characterising the color of the hottest part of the flame, the higher medium temperature part of it, the lower medium part of it and the coolest part of it. -
Page 57: Gradient
RGB value (0, 0, 255). Now, let’s have a look at the on top effects of the Golden Harvest v3 for Neopixel setup. There are 6 different categories: Focus Deflection, Thunderstorm, Kylo Blade, Unstable Blade, Magnetic Flare and Shockwave. - Page 58 PARAMETER DESCRIPTION focus_defl_color All the parameters of the Focus Deflection effect take three values. The first values of all parameters belong to the same effect channel as do the second and third values. This parameter defines the color of each channel which can be assigned to red, green or blue.
- Page 59 focus_defl_size Defines the size of the focus point. Example: focus_defl_size=1,1,5 In this case, the first effect channel displays a focus point of size 1, the second displays a focus point of size 1 and the third displays a focus point of size 5. focus_defl_position_offset Defines the offset of the starting point of the focus point when you ignite your blade.
- Page 60 Example: focus_defl_min_range=50,90,100 In this case, the first effect channel displays a focus point with minimum range of 50, the second displays a focus point with minimum range of 90 and the third displays a focus point with minimum range of 100. focus_defl_max_range Defines the maximum range in which the focus points moves forward and backward along the blade.
-
Page 61: Thunder Storm
In this case, the first effect channel displays a focus point that moves at a maximum speed of 100, the second displays a focus point that moves at a maximum speed of 50 and the third displays a focus point that moves at a maximum speed of 50. - Page 62 parameter defines the color of the third effect channel. The effect channels can be customized independently from each other. Example: thnd_strm_color1=0,0,255 In this case, the first effect channel displays blue lightnings as is given by the RGB code (0, 0, 255). thnd_strm_min_intensity Defines the minimum intensity of the lightnings of each effect channel.
- Page 63 thnd_strm_swarm_min_del Defines the minimum delay between successive lightnings within a swarm of each effect channel. Example: thnd_strm_swarm_min_del=1,10,50 In this case, the first effect channel displays lightnings with a minimum delay of 1 between successive lightnings within a swarm, the second effect channel displays lightnings with a minimum delay of 10 between successive lightnings within a swarm and the third effect channel displays lightnings with a minimum delay of 50 between successive lightnings within a...
-
Page 64: Kylo Blade
Example: thnd_strm_light_min_del=1,10,50 In this case, the first effect channel displays swarms of lightnings with a minimum delay of 1 between successive swarms, the second effect channel displays swarms of lightnings with a minimum delay of 10 between successive swarms and the third effect channel displays swarms of lightnings with a minimum delay of 50 between successive swarms. -
Page 65: Unstable Blade
Example: kylo_blade_density=250 In this case, a density of 250 is chosen. kylo_blade_smoothness Defines the smoothness of the grained structure. Example: kylo_blade_smoothness=100 In this case, a smoothness of 100 is chosen. kylo_blade_dissipation Defines the stability of the grained structure. Higher values lead to increased instability. - Page 66 altered and the color component of the background effect that is affected by the third effect channel is not altered. unst_blade_contrast Defines the contrast of the spatial structure applied to the color component of the background effect that is affected by the corresponding effect channel.
-
Page 67: Magnetic Flare
In this case, the density of the intensity drops of the first effect channel is 100, the density of the intensity drops of the second effect channel is 500 and the density of the intensity drops of the third effect channel is 1000. unst_blade_smooth Defines the smoothness of the spatially distributed, random intensity drops of each effect channel. -
Page 68: Shockwave
Example: mag_flare_dens=100 In this case, the regular, pulsating spatial pattern has a density of 100. mag_flare_spd Defines the speed at which the regular, pulsating spatial pattern moves from the lower end of your blade to its tip. Example: mag_flare_spd=10 In this case, the speed at which the regular, pulsating spatial pattern moves from the lower end of your blade to its tip is Shockwave The on top effect Shockwave gives your blade a fluid structure by creating spatial waves on the... - Page 69 intensity of the intensity drops that generate the spatial waves of the second effect channel is 10 and the intensity of the intensity drops that generate the spatial waves of the third effect channel is 10. shockwave_contrast Defines the contrast of the spatial waves of each effect channel that are created on the corresponding color component of the background effect.
- Page 70 shockwave_max_size Defines the maximum size of the intensity drops that generate the spatial waves of each effect channel. Example: shockwave_max_size=10,10,10 In this case, the maximum size of the intensity drops that generate the spatial waves of the first effect channel is 10, the maximum size of the intensity drops that generate the spatial waves of the second effect channel is 10 and the maximum size of the intensity drops that generate the...
-
Page 71: Responsive Lockup
Example: shockwave_speed=50,50,50 In this case, the spatial waves of the first effect channel have a speed of 50, the spatial waves of the second effect channel have a speed of 50 and the spatial waves of the third effect channel have a speed of 50. shockwave_min_del Defines the minimum delay between successive intensity drops that generate the spatial waves of each effect... -
Page 72: Responsive Drag
- lu_responsive=3: The position of the lockup is changed both by tilting the saber and by twisting it. - lu_tilt_speed=100: Defines the sensitvity of tilting the saber. - lu_twist_speed=100: Defines the sensitvity of twisting the saber. Responsive Drag The responsive drag allows for the size of the illuminated area of the tip to change by twisting the saber. -
Page 73: Battery Indicator
Color Wheel The Golden Harvest v3 features a color wheel that allows to change the color on the fly without needing to change any files on the SD card. Furthermore, you are not restricted to any preset color profiles as you can design your own color profiles on the fly when using the color wheel. - Page 74 LED5, LED6, LED7 and LED8 and the accent LED 5 in the accent fonts is mapped to the pad LED9 of the Golden Harvest v3. Let’s first have a look at the section for the accent LEDs 1 - 4 which is shown in the picture below.
- Page 75 a1_color1 This parameter is only active for Neopixel accent LEDs. It defines the color of the first of the up to 8 Neopixel accent LEDs. Example: a1_color1=255,0,0 In this case, the color of the first of the up to 8 Neopixel accent LEDs is red.
- Page 76 channels. They are the same parameters as in the effect fonts for in-hilt setups. You can find a detailed description in the effect fonts section. Now, let’s come to the section for the accent LEDs 5 - 8 which is shown in the picture below. All parameters that belong to this section have the prefix "a2_".
- Page 77 In this case, the color of the sixth of the up to 8 Neopixel accent LEDs is green. a2_color3 This parameter is only active for Neopixel accent LEDs. It defines the color of the seventh of the up to 8 Neopixel accent LEDs.
- Page 78 PARAMETER DESCRIPTION ac_sequence1 - ac_sequence16 These parameters define the actual sequence in which the accent LEDs 1 - 8 are turned on and off. Therefore, these parameters take 8 values each. A value of 1 means that the corresponding accent LED is turned on and a value of 0 means that the corresponding accent LED is turned off.
-
Page 79: Blade Folders
Blade Folders As mentioned before, the Golden Harvest v3 comes with a huge variety of presets both for in-hilt LEDs and for Neopixel that can be changed on the fly. In order to make cycling through the effect fonts as simple as possible, similar presets can be summarized to so-called blade folders. - Page 80 Now, let’s have a look at which files the blade folders contain for different LED setups. In the image below, you see an example of the files that are contained in a blade folder for an in-hilt setup. As you can see, there is an "accent.txt" file that describes the accent light effects. Therefore, you can put different accent fonts in different blade folders allowing you to change also the accent light effects on the fly.
-
Page 81: Sound Fonts
As you can see, there is an "accent.txt" file that describes the accent light effects. Therefore, you can put different accent fonts in different blade folders allowing you to change also the accent light effects on the fly. Furthermore, there is a "background.txt" file that describes the background effect of the blade. -
Page 82: Sound Font Settings File
added after "sound[number]" in the name of the folder (see image below). If you want to add a sound font to your saber, just create a new folder of the format mentioned above with a number that isn’t in use yet and put the sound files in there. Hereby, it is important that the enumeration of the sound folders is continuous. - Page 83 PARAMETER DESCRIPTION motion_theshold Defines the minimum rotation speed of the saber required to start the smooth swing algorithm. swing_sensitivity Defines the rotation speed of the saber at which the smooth swing sounds reach their maximum volume. swing_sharpness Defines how sharp the volume of the smooth swing sounds rises with the rotation speed of the saber.
- Page 84 first_transition_deg A full rotation of the saber covers an angle of 360°. As part smooth swing algorithm, sounds "lswing[number].wav" and "hswing[number].wav" are crossfaded with each other as the saber rotates. It is chosen randomly with which sound file to begin with. In a first transition, the crossfading occurs and in a second transition, the crossfading is reversed again.
-
Page 85: Default Sound Font Package
Default Sound Font Package Our Golden Harvest v3 comes with 15 default sound fonts that are already saved on the microSD card. The default sound fonts are listed below (in chronological order). Thanks to all of the sound font designers! Without you, this project wouldn't have been possible! Please make sure to explore more of their great work. -
Page 86: Sound File Requirements
4. "Guardian" by LDN Sabers: Check out more of the epic fonts by LDN Sabers on http://www.saberfont.com/LDN-Sabers_c_79.html. 5. "Cryo Carbon" by LINK: Check out more of the awesome fonts by LINK on http://repulsecustomsounds.com. 6. "Peace" by Kyberphonic Fonts: Check more mind-blowing fonts Kyberphonic... - Page 87 www.saberfont.com/Optimized-for-Plecter-CFX-Smooth-Swing-Compatible-by-Era-_c_92.html Nevertheless, we recommend to use our own naming system which is given in the following. If you want to design your own sound font, please make sure that the sound files have a sampling rate of 22,050 Hz or 44,100 Hz and a resolution of 16 bit. The following sound types are used by our Golden Harvest board: font.wav: identification sound of the font...
-
Page 88: Background Music
To add background music to your microSD card, please make sure that the music file you want the Golden Harvest v3 to play is a wave file with 16 bit and 22,050 Hz or 44,100 Hz sampling rate. Furthermore, rename the music file to "track[number].wav", whereby [number] enumerates your track files. -
Page 89: Installing Using The Seedling Module
USB file transfer. To enter the mass storage device mode, connect your Seedling Module via USB to your computer when your Golden Harvest v3 is in idle mode. That’s the state the saber is in after booting and before igniting the blade. If the board is in deep sleep, make sure to wake it up before. - Page 90 navigation to the wiring examples above. The first of the possible layouts contains a change of background and on top effects on-the-fly and is shown below. It can be selected by setting the parameter "button_mode=2" in the "general.txt" file on your microSD card. FUNCTION TRIGGERING WITH TWO BUTTONS POWER ON...
- Page 91 DRAG Hold auxiliary button while pointing the saber downwards ENTER MELT MODE Hold the power button, release it and then perform a stab LEAVE MELT MODE Tap the power button BLASTER BLOCK Tap the auxiliary button FORCE PUSH Double tap the auxiliary button ENTER COLOR WHEEL Hold the power button, release it and then twist the saber...
-
Page 92: Navigation Using Only One Momentary Button
ENTER COLOR WHEEL Hold the power button, release it and then twist the saber ∟ CHANGE COLOR ∟ Twist the saber ∟ GO TO NEXT SABER STATE ∟ Tap the power button SAVE AND LEAVE COLOR WHEEL Hold the power button ACTIVATE POWER SAVING Hold the power button while performing a stab DEACTIVATE POWER SAVING... - Page 93 LEAVE MELT MODE Tap the power button BLASTER BLOCK Tap the button FORCE PUSH Double tap the button ENTER COLOR WHEEL Hold the power button, release it and then twist the saber ∟ CHANGE COLOR ∟ Twist the saber ∟ GO TO NEXT SABER STATE ∟...
-
Page 94: Navigation Using One Momentary Button And One Latching Switch
DEACTIVATE POWER SAVING Hold the power button while performing a stab START BACKGROUND MUSIC Hold the button while twisting the saber before the saber is ignited ∟ SKIP TRACK ∟ Twist the saber STOP BACKGROUND MUSIC Hold the button while twisting the saber before the saber is ignited SHOW BATTERY INDICATOR Hold the power button while performing a stab before... -
Page 95: Important Notes
∟ GO TO NEXT SABER STATE ∟ Tap the auxiliary button SAVE AND LEAVE COLOR WHEEL Hold the auxiliary button ACTIVATE POWER SAVING Hold the auxiliary button while performing a stab DEACTIVATE POWER SAVING Hold the auxiliary button while performing a stab START BACKGROUND MUSIC Hold the auxiliary button while twisting the saber before the saber is ignited... - Page 96 Some sound files are not played or some sound fonts are not recognized. How can I fix that? Answer: Please check that your sound font folders and the sound file names are enumerated continuously and check the naming of the sound files. The Seedling Module is connected to my computer, but even after 10 minutes it does not recognize the microSD card as mass storage device.
Need help?
Do you have a question about the Golden Harvest v3 and is the answer not in the manual?
Questions and answers