Table of Contents
Advertisement
Quick Links
Advertisement
Table of Contents

Related Manuals for Kirstein Steinmayer DP 321


Summary of Contents for Kirstein Steinmayer DP 321
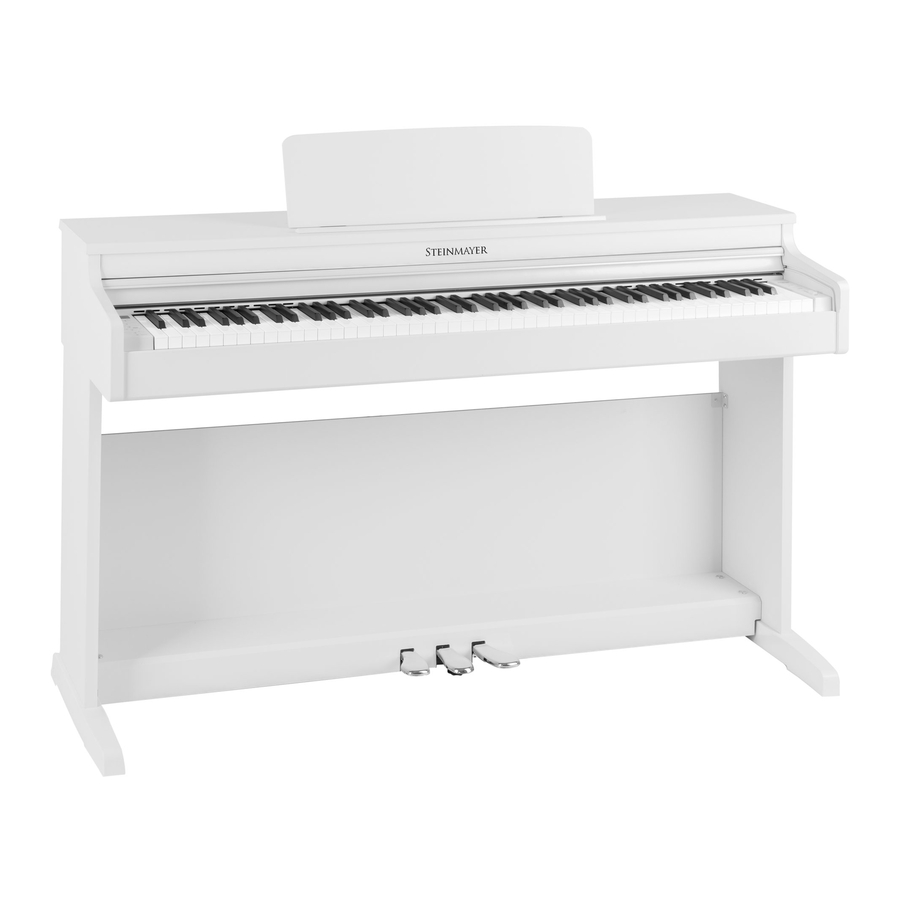
- Page 1 DP 321 Owner’s Manual Version: 11/2019...
-
Page 2: Table Of Contents
© 2019 This manual is protected by copyright. Any copying or reprint, even in excerpts, is only allowed with consent of Musikhaus Kirstein GmbH. The same applies to reproduction or copying of images, even in altered form. Contents Zusammenbau ....................... 1 Assembly of the pedal bar and side panels ............ - Page 3 Twin Piano ......................10 Metronome ......................10 Start / Stop ......................10 Metronome Tempo ....................11 Further Metronome Parameters ................11 “Piano Assist” Function ..................11 To start Piano Assist ...................11 Selection of the accompaniment rhythm ..............11 List of available drum rhythms ................12 Piano Assist Tempo ....................12 Piano Player ......................12 Select Accompanying Pattern ................12 To start the Piano Player Playing Help ..............13...
- Page 4 BrainCare ......................19 BrainCare Liste ....................21 Function-menu ..................... 21 F01 Tune ......................22 F02 Transpose ....................22 F03 Touch ......................22 F04 Touch fixed Volume ..................23 F05 Metronome Time-Signature ................23 F06 Metronome Volume ..................23 F07 Main Voice Volume ..................23 F08 Layer Voice Volume ..................23 F09 Split Voice Volume ..................23 F10 Split point .....................23 F11 Reverb Type ....................24...
- Page 5 F27 AUX-In Volume ....................26 F28 MIDI Local ....................26 F29 Auto Power Off .....................26 rSt Reset ......................26 MIDI Chart ......................27 GM-Voice ......................28 Percussion ......................29 Trouble Shooting ....................30 Product Specifications ..................31 WEEE Declaration ....................32...
- Page 6 Thank you for choosing this product. To ensure that you are fully satisfied with this product, carefully read and understand this manual before using this instrument. Keep this manual in a safe place. The operating instructions must be passed on to all subsequent users. Observe operating instructions! The WARNING signal word identifies hazards that, without precautions, could result in serious injury.
- Page 7 Caution Please observe the following basic information in order not to endanger yourself or others and to avoid damage to external devices. Warning Do not disassemble the instrument and do not modify it. This could result in electric shock. Entrust a specialist workshop with any necessary service and maintenance or contact your dealer.
-
Page 8: Zusammenbau
Zusammenbau Please unpack the instrument carefully and make sure all components listed below are in perfect condition. If any items are missing or damaged, please contact the manufacturer. Piano console Operating manual (possibly as download) Left / Right foot (a, b) Pedal unit (c) Back (d) Screws pedal box... -
Page 9: Assembly Of The Pedal Bar And Side Panels
Assembly of the pedal bar and side panels Attach the pedal bar (c) between the two side panels (a, b) using the screws (e) Unscrew the spacer screw under the pedal unit until it makes contact with the ground and the pedal unit can be supported against the pedal pressure towards the ground. -
Page 10: Fitting The Piano Console
Fitting the piano console Carefully place the piano console on the base. Set up the music stand and hold it Pay attention to your fingers. Connect the two at the desired angle with the metal components using the screws (h) base Connect the pedal cable and power cord Connect the pedal cable (this is already placed on the underside of the pedal bar) -
Page 11: Basic Operation
Basic operation Power switch Insert the jack plug of the power supply unit into the socket at the bottom of the console and then plug the power plug into the socket. Now press the power button to turn on the instrument. ►... -
Page 12: Connections
Connections Connection panel at the bottom of the piano console - (USB – B) USB to HOST The USB-to-HOST jack connects to the computer to transmit MIDI or audio data. The connection is made via a USB A to B cable (not included). To use the piano as a MIDI input device, start MIDI-capable software (not included) on your computer and select the piano as a MIDI device within the application. -
Page 13: Pedals
Pedals The instrument has three pedals. These simulate the pedals of a real concert piano. Connecting the pedal cable Disconnect the pedal cable which is fixed under the pedal box and connect it to the corresponding socket on the underside of the piano console. How to operate the pedals Sustain Pedal (right pedal) This pedal has the same function as the sustain pedal of an acoustic piano. -
Page 14: Operating Unit
Operating unit a LCD screen b DATA move down c DATA move up d PIANO page 9 e DUAL page 9 f REC / DEMO page15, 17 g Play-Stop / ENTER h TRACK 1 page 15 i TRACK 2 page15 j SETUP page 21 k PIANO / ASSIST... -
Page 15: Bedienung Operation
Bedienung Operation Adjusting the volume To adjust the overall volume, use the volume slider Choosing a Tone (Voice) Select the desired tone with the arrow keys DATA Voice-List Voice Voice Voice Voice G.P1 Grand Piano1 P.Or Pipe Organ Vocal Clarinet G,P2 Grand Piano2 E.O1... -
Page 16: Piano Mode
Piano Mode Press the PIANO button to enter Piano mode. The instrument changes to the tone Grand Piano1 (G.P1). Press DATA again to exit this mode. The dual function is not available in Piano mode. Dual Press the DUAL button to enter the Dual Mode. In this mode, you can combine multiple timbres in different ways. -
Page 17: Move The Split Point
Move the split point The split point defines the boundary between the left and right half of the keyboard. The split point can be chosen individually. See function-menu. The default value for the split point is F # 3 (the third Fis from the left). Twin Piano This function divides the keyboard into two equal parts. -
Page 18: Metronome Tempo
Metronome Tempo Use the DATA keys to change the metronome tempo. Hold the DATA keys to quickly change the tempo. Press both DATA keys simultaneously to get to the default value (120). Further Metronome Parameters The metronome volume and the tempo (3/4, 4/4, etc.) can be adjusted as further parameters. -
Page 19: List Of Available Drum Rhythms
List of available drum rhythms Press the ENTER / button to start the drum accompaniment. Press the ENTER button again to stop the drum accompaniment. The volume of the Piano Assist can be adjusted in the function-menu. Piano Assist Tempo Use the DATA keys to change the metronome tempo. -
Page 20: To Start The Piano Player Playing Help
To start the Piano Player Playing Help The piano player starts as soon as you specify a chord in the left part of the keyboard. The instrument now plays independently the associated chord break of the selected accompanying figure. Press the ENTER / button to stop the Piano Player. -
Page 21: Select The Method
Fingered method With the fingered method, it is possible to specify a chord by all chord tones involved. The advanced player can use this method to reproduce more complicated chords. Select the Method By default, the piano recognizes both input methods. If you only want to use the Fingered method, you can set this in the function-menu. -
Page 22: To Move The Split Point For The Chord Input
To Move the Split Point for the Chord Input The split point defines the limit up to which tone of the left hand chords for the piano player can be specified. The split point can be chosen individually. See function- menu. -
Page 23: Playback
If a recording is already stored on the TRACK1 storage location, it will be played back simultaneously when recording to TRACK2. If you do not want to hear TRACK1, you can mute it by pressing TRACK1 before recording (TRACK1 backlight goes off). -
Page 24: Selection Of A Memory Bank
Selection of a Memory Bank The piano has 3 memory banks (rE1-rE3) for 2 tracks each. To select a memory bank, in the recording mode, while the display is showing rE1, use the DATA buttons to switch to rE2 or rE3. Music Database The instrument contains various music data which can be used for practicing or simply for listening. -
Page 25: Adjusting The Tempo
If the respective TRACK button lights up, it is activated for playback. If the TRACK button does not light, it is muted. By repeatedly pressing the TRACK buttons their status (active / inactive) can be changed. Adjusting the Tempo Each piece is stored at an individual tempo. You can change the tempo by pressing the PIANO ASSIST button during playback. -
Page 26: Bluetooth-Midi
Bluetooth-MIDI With the PAIRING-ON status selected, you can also pair your piano with MIDI- enabled applications on your smart device. To do this, select "BLE" as the MIDI device in the MIDI-enabled application. If there are connection problems, check in the function-menu whether the pairing status is ON. - Page 27 Each row of the panel controls one level of the BrainCare categories. All three categories can be controlled independently. Only the timer function refers to the entire playback of BrainCare. Binaural Beat Press the DUAL button to start Binaural Beat. By repeatedly pressing DUAL, you can scroll through the different sounds of Binaural Beats.
-
Page 28: Braincare Liste
Volume adjustment It is possible to adjust the volume of each category of BrainCare individually. The individual categories can be mixed with simultaneous playback. To do this, use the buttons in the respective category to adjust the volume up or down. To return to standard mode and exit BrainCare mode, turn the instrument off and start it again by pressing the POWER button. -
Page 29: F01 Tune
Use the DATA buttons to navigate to the desired function-menu dialog. Press the ENTER / button to enter the function-menu dialog and change the value with the DATA buttons. By simultaneously pressing the two DATA buttons return to their default value. Confirm with the ENTER / button. -
Page 30: F04 Touch Fixed Volume
F04 Touch fixed Volume If F03 Touch Fixed is selected in the menu, the volume of the playback when the touch sensitivity is switched off can be set here. F05 Metronome Time-Signature Here the time-signature of the metronome can be set. The following possibilities are available: no sound 10/8... -
Page 31: F11 Reverb Type
F11 Reverb Type Here you can choose from 9 reverb types. Display Name Room Room Room Hall Hall Hall 3 Stage Stage Stage Reverb The default is r-3 F12 Reverb Volume Here you can adjust the volume of the Reverb up or down. F13 Effect Type Here you can choose from 4 effect types. -
Page 32: F17 Corpus Resonance
F17 Corpus Resonance In addition to damper and string resonance, an acoustic piano has a corpus resonance. With this function you can activate / deactivate the corpus resonance. Speaker resonances represent the resonances of the strings without damper (G6 C8) and the resonances delivered by the piano frame. When using REVERB, the corpus sound effect is not applied, so REVERB should be off. -
Page 33: F23 Music Playback
F23 Music Playback Here you can adjust the volume of the played demo music / etudes up or down. F24 Transpose Music Playback Here you can change the tuning of demo music and etudes in semitones up or down. This makes it easier to replay tracks in hard-to-play keys. F25 Bluetooth Here you can enable or disable the piano's Bluetooth features. -
Page 34: Midi Chart
MIDI Chart... -
Page 35: Gm-Voice
GM-Voice (only with MIDI connection) -
Page 36: Percussion
Percussion (If two different effects are specified, they will react depending on the strength of the touch) -
Page 37: Trouble Shooting
Trouble Shooting If a malfunction occurs, please check the following causes of error: Error Cause Solution The piano does not turn 1.The power cord is not 1.Plug in the power cord plugged in properly 2.The instrument is not 2.Turn on the instrument turned on 3.Use another outlet 3.The outlet has no power... -
Page 38: Product Specifications
Product Specifications Keyboard 88 touch-sensitive hammer keys Touch-sensitivity 10 levels (Soft 1/2/3, Normal 1/2/3, Hard 1/2/3, Fixed) Max. Polyphony Voices 34 + 1 Drum-Set + 1 SFX-Set Dual Layer, Split, TwinPiano 9 Reverb, 4 Effect Demo Piano Assist PianoPlayer 20, DrumPlayer 20 Record function 2 tracks in 3 banks (4500 Note/Track) Bluetooth... -
Page 39: Weee Declaration
Musikhaus Kirstein GmbH. SIMPLIFIED EU DECLARATION OF CONFORMITY Herewith Musikhaus Kirstein GmbH declares that the radio unit of Model is in compliance with the EU directive 2014/53/EU. You can download the full EU declaration of conformity for this item under download link: http://www.kirstein.de/docs/Konformitaetserklaerung/CE_Konformitaetserklaerung_00063251.pdf...