
Subscribe to Our Youtube Channel
Related Manuals for SMA PPM-10


Summary of Contents for SMA PPM-10
- Page 1 Installation Manual SMA POWER PLANT MANAGER ENGLISH PPM-10-IA-en-10 | 118987-00.01 | Version 1.0...
- Page 2 Legal Provisions The information contained in these documents is the property of SMA Solar Technology AG. No part of this document may be reproduced, stored in a retrieval system, or transmitted, in any form or by any means, be it electronic, mechanical, photographic, magnetic or otherwise, without the prior written permission of SMA Solar Technology AG.
-
Page 3: Table Of Contents
Table of Contents SMA Solar Technology AG Table of Contents Information on this Document..................... Validity ................................Target Group ..............................Levels of Warning Messages.......................... Symbols in the Document..........................Typographical Elements in the Document ...................... Designations in the Document ........................Explanation of Used Terms .......................... - Page 4 Table of Contents SMA Solar Technology AG Decommissioning the Product ..................... 49 10 Technical Data ..........................50 11 Contact ............................52 12 EU Declaration of Conformity ..................... 54 PPM-10-IA-en-10 Installation Manual...
-
Page 5: Information On This Document
1 Information on this Document Validity This document is valid for: • PPM-10 (Power Plant Manager) from production version A1 Target Group The tasks described in this document must only be performed by qualified persons. Qualified persons must have the following skills: •... -
Page 6: Typographical Elements In The Document
Explanation of Used Terms Term Explanation Genset Electric generator with combustion engine Hybrid system System for control of energy flows based on the SMA Hybrid Controller Additional Information Title and information content Type of information "Plant Communication in Large-Scale PV Power Plants" Technical Information "Use of Gensets in hybrid systems with SMA Hybrid Controller"... - Page 7 Title and information content Type of information "SMA HYBRID CONTROLLER Modbus® Interface" Technical Information Information on the commissioning and configuration of the SMA Modbus inter- face "SMA GRID GUARD 10.0 - Grid management services through SMA Inverter" Technical Information Additional information about ioLogik E1200 User manual at www.moxa.com...
-
Page 8: Safety
PV power plants with PV inverters, battery inverters and genset devices. System components and systems are integrated into the SMA infrastructure via the Power Plant Manager. This includes energy generators and loads, I/O systems and energy meters. The Power Plant Manager supports communication with up to 200 devices. - Page 9 Alterations to the SMA products, e.g., changes or modifications, are only permitted with the express written permission of SMA Solar Technology AG. Unauthorized alterations will void guarantee and warranty claims and in most cases terminate the operating license. SMA Solar Technology AG shall not be held liable for any damage caused by such changes.
-
Page 10: Important Safety Instructions
2 Safety SMA Solar Technology AG IMPORTANT SAFETY INSTRUCTIONS SAVE THESE INSTRUCTIONS This section contains safety information that must be observed at all times when working. The product has been designed and tested in accordance with international safety requirements. As with all electrical or electronical devices, there are residual risks despite careful construction. - Page 11 2 Safety SMA Solar Technology AG CAUTION Risk of injury due to weight of product Injuries may result if the product is lifted incorrectly or dropped while being transported or mounted. • Transport and lift the product carefully. Take the weight of the product into account.
- Page 12 NOTICE Manipulation of PV system data in networks You can connect the supported SMA products to the Internet. When connected to the Internet, there is a risk that unauthorized users can access and manipulate the data of your PV system.
-
Page 13: Scope Of Delivery
3 Scope of Delivery SMA Solar Technology AG 3 Scope of Delivery Check the scope of delivery for completeness and any externally visible damage. Contact your distributor if the scope of delivery is incomplete or damaged. The scope of delivery differs depending on the option ordered. -
Page 14: Product Overview
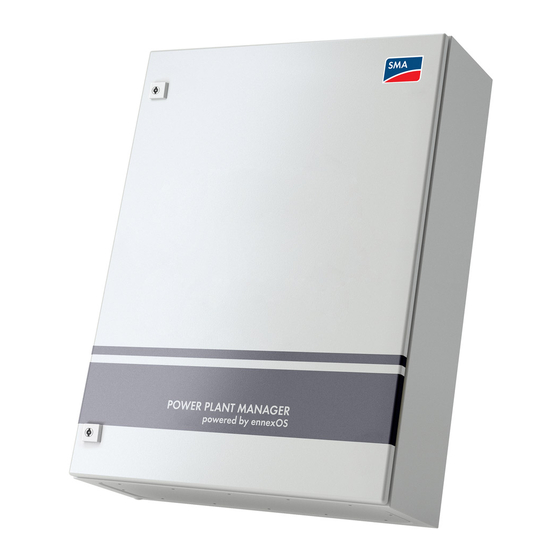
4 Product Overview SMA Solar Technology AG 4 Product Overview Product Description Figure 3: Design of the product Position Designation Switch cabinet lock Type label The type label clearly identifies the product. The type label must remain permanently at- tached to the product. You will find the following information on the type label: •... - Page 15 4 Product Overview SMA Solar Technology AG Symbol Explanation Observe the documentation Observe all documentation supplied with the product. Grounding conductor This symbol indicates the position for connecting a grounding conductor. Direct current WEEE designation Do not dispose of the product together with the household waste but in accordance with the disposal regulations for electronic waste applicable at the installation site.
-
Page 16: Mounting
5 Mounting SMA Solar Technology AG 5 Mounting Requirements for Mounting Requirements for the Mounting Location: WARNING Danger to life due to fire or explosion Despite careful construction, electrical devices can cause fires. This can result in death or serious injury. -
Page 17: Mounting The Product
5 Mounting SMA Solar Technology AG Dimensions for mounting: 854 (33.6) 830 (32.7) 800 (31.5) Ø10.2 (0.04) Ø10.2 (0.04) Figure 5: Position of the anchoring points(Dimensions in mm (in)) Mounting the product CAUTION Risk of injury due to weight of product Injuries may result if the product is lifted incorrectly or dropped while being transported or mounted. -
Page 18: Installing The Device In Customer Installation Location
5 Mounting SMA Solar Technology AG Procedure: 1. Attach the wall mounting bracket to the enclosure using fastening material, torque: 8 Nm (71 in-lb)). 2. Mark the position of the 4 drill holes and drill the holes. Use the recesses for the upper wall mounting brackets and the holes for the lower wall mounting brackets. - Page 19 5 Mounting SMA Solar Technology AG Requirements: ☐ The device must be approved for operation at the installation site. In Europe, there must be a valid EC declaration of conformity for the device for example. ☐ The circuit diagram of the product must be provided.
-
Page 20: Electrical Connection
6 Electrical Connection SMA Solar Technology AG 6 Electrical Connection Overview of the Connection Area 6.1.1 View from Below A standard connecting plate with knockouts for attaching cable glands is included in the scope of delivery. Another connecting plate without knockouts for attaching conduits can be purchased optionally. - Page 21 6 Electrical Connection SMA Solar Technology AG Position Quantity Designation Anchoring points for cable glands M20 Anchoring points for cable glands M12 Connecting plate for conduits (optional) Figure 8: Bottom view of product Position Designation Area for connection of communication and I/O systems...
-
Page 22: Interior View
6 Electrical Connection SMA Solar Technology AG 6.1.2 Interior View Power Plant Manager DATA MANAGER L Figure 9: Interior view of product Position Designation Description Programmable Logic Controller Terminal for the communication with the genset control system via CAN network K100 Digital I/O module K101 The terminal block X702 is intended for the connection of the inputs and outputs. - Page 23 For short-term bridging of failures of the external supply voltage for Buffer module T3 all 24 V supplied components Central communication unit for monitoring, management and grid- SMA Data Manager L A1 compliant power control Power source T1 230 V AC, 24 V DC, 5 V DC*...
-
Page 24: Assignment Of The Jumpers
6 Electrical Connection SMA Solar Technology AG 6.1.3 Assignment of the Jumpers The jumpers supplied are assigned to the terminal blocks mentioned in the following table. Color of the Assignment of Information on the use of the jumper jumper the jumper Terminal block Section 6.5.3, page 36... -
Page 25: Connecting The Contactors To The Switching Outputs
6 Electrical Connection SMA Solar Technology AG 3. Strip off the conductor insulation of the cable by 8 mm to 10 mm (0.31 in to 0.39 in). Ensure that no remaining pieces of the cable's insulation fall into the enclosure. 4. Connect the insulated conductors to the terminal block: •... - Page 26 6 Electrical Connection SMA Solar Technology AG Terminal assignment: Terminal Switching output Contact Designation X703:1 DO 1 Triggering signal after successful black start Change-over contact (optional) X703:2 Make contact X703:3 Break contact X703:4 DO 2 Alarm signal during an event message classi-...
-
Page 27: Connection Of Different Signal Generators To Switching Inputs
6 Electrical Connection SMA Solar Technology AG Connection of Different Signal Generators to Switching Inputs 6.4.1 Connecting of Circuit Breakers A DC voltage of 24 V is present at the switching inputs. This means that you can connect potential-free signal generators (e.g. circuit breaker) to the switching inputs without an additional voltage source. - Page 28 6 Electrical Connection SMA Solar Technology AG Terminal Switching input Contact X702:11 DI 6** Feedback from the circuit breaker of the genset 6* X702:12 X702:13 DI 7 Fast stop*** X702:14 X702:15 DI 8 Feedback from the circuit breaker of the utility grid**** X702:16 X702:17 DI 9**...
-
Page 29: Connecting The Ripple Control Receiver
6 Electrical Connection SMA Solar Technology AG 6.4.2 Connecting the Ripple Control Receiver A DC voltage of 24 V is present at the switching inputs. This means that you can connect potential-free signal generators (e.g. ripple control receiver) to the switching inputs without an additional voltage source. -
Page 30: Connection Of The Measuring System
The inputs for current and voltage measuring are designed for four-conductor utility grids with three line conductors and one neutral conductor as well as for three-conductor utility grids with three line conductors. If another grid type is used, the connection of the measuring device must be coordinated with SMA Solar Technology AG. PPM-10-IA-en-10... - Page 31 6 Electrical Connection SMA Solar Technology AG Block circuit diagram for 4-conductor utility grid with 3 line conductors and 1 neutral conductor Current measurement 1 Current measurement 2 11 12 * Remove jumper on the wired terminals of the connecting terminal plate X700.
- Page 32 6 Electrical Connection SMA Solar Technology AG Block circuit diagram for 3-conductor utility grid with 3 line conductors Current measurement 1 Current measurement 2 11 12 * Remove jumper on the wired terminals of the connecting terminal plate X700. Figure 15: Current measurement within the 3-conductor utility grid (example)
-
Page 33: Connecting The Current Transformer
6 Electrical Connection SMA Solar Technology AG Current measurement or voltage measure- Internal measuring mod- Connection see ment Current measurement 3 Measuring module 2 Section 6.5.2, page 33 Current measurement 4 Section 6.5.2, page 33 Voltage measurement 2 Section 6.5.3, page 36 Current measurement 5 Measuring module 3 Section 6.5.2, page 33... - Page 34 6 Electrical Connection SMA Solar Technology AG Terminal assignment: Measuring point Terminal Current measurement 1 Current transformer L1 X700:1 X700:2 Current transformer L2 X700:3 X700:4 Current transformer L3 X700:5 X700:6 Current measurement 2 Current transformer L1 X700:7 X700:8 Current transformer L2...
- Page 35 6 Electrical Connection SMA Solar Technology AG Measuring point Terminal Current measurement 5 Current transformer L1 X700:29 X700:30 Current transformer L2 X700:31 X700:32 Current transformer L3 X700:33 X700:34 Current measurement 6 Current transformer L1 X700:35 X700:36 Current transformer L2 X700:37...
-
Page 36: Connecting The Voltage Measurement
☐ Conductor cross-section: 1.5 mm² to 2.5 mm² (16 AWG to 14 AWG) ☐ Maximum cable length: 30 m (98 ft) SMA Solar Technology AG recommends using a 10-conductor cable with a conductor cross-section of 2.5 mm² (14 AWG) to connect the current- and voltage-measurement device of the product. - Page 37 ☐ The connected local utility grid must be a 4-conductor or a 3-conductor utility grid according to its grid type. If another grid type is used, the connection of the current transformers must be coordinated with SMA Solar Technology AG.
-
Page 38: Internal Communication Network
Requirements for the Internal Communication Network All devices of which the product directly requests data or which the product controls directly must be integrated in the internal communication network. These devices include the inverters, the gensets, the SMA communication devices and the optional Data Acquisition Module. -
Page 39: Connecting Network Cables And Optical Fibers
6 Electrical Connection SMA Solar Technology AG The following requirements for the internal communication network must be observed at all times. ☐ Only the product and devices of which the product directly requests data or which the product controls directly may be connected to the internal communication network. - Page 40 6 Electrical Connection SMA Solar Technology AG NOTICE Damage to optical fibers due to too tight bend radii Excessive bending or kinking will damage the optical fibers. • Observe the minimum permissible bend radii of the optical fibers. Procedure: 1. Loosen the cable gland of the module.
- Page 41 6 Electrical Connection SMA Solar Technology AG Insulated conductor Insulated conductor Contact-568A Contact-568B pair color white/orange orange white/green green white/brown brown • Shorten protruding conductors. • Insert the cable organizer in the enclosure. Ensure that the white arrow of the cable organizer is pointing towards the white arrow on the enclosure.
-
Page 42: Connecting The Communication With The Data Acquisition Module Via Optical Fibers
6 Electrical Connection SMA Solar Technology AG 2. Attach the modules on the front side using 2 screws each. 3. Connect the patch cables. Observe the send and receive direction of the optical fibers. 6.6.3 Connecting the Communication with the Data Acquisition Module via... -
Page 43: Connecting The Communication With The Genset Control System Via Can Network
6 Electrical Connection SMA Solar Technology AG Connecting the Communication with the Genset Control System via CAN Network You can connect the product to a CAN network using a D-sub connector. The product can communicate with the genset control units via the CAN network. -
Page 44: Connecting The I/O Module
6 Electrical Connection SMA Solar Technology AG Cable requirements: ☐ Cable type: cable with pair-twisted insulated conductors and shielding ☐ Conductor cross-section: at least 2 x 2 x 0.25 mm² (2 x 2 x 24 AWG) ☐ Plug type: D-sub 9 (female, with holes) ☐... - Page 45 6 Electrical Connection SMA Solar Technology AG 3. Strip the insulation of the cable's conductors (insulation stripping length: 9 mm to 11 mm (0.35 in to 0.43 in)). Ensure that no remaining pieces of the cable's insulation fall into the enclosure. 4. Connect the insulated connectors to the terminal block of the RS485 module A31 according to the following configuration.
-
Page 46: Periodic Actions
7 Periodic Actions SMA Solar Technology AG 7 Periodic Actions Inserting the Cables Depending on the connecting plate's design, you have 2 possibilities to insert the cables into the product: • Inserting the cables through the cable glands into the product •... -
Page 47: Connecting The Stranded Wire To The Spring-Cage Terminal
7 Periodic Actions SMA Solar Technology AG • Lead the cable through the swivel nut. • Insert the cable in the cable support sleeve. • Press the cable support sleeve into the cable gland. • Ensure that any unused cable openings are sealed with filler plugs. -
Page 48: Disconnect From Voltage Sources
8 Disconnect from voltage sources SMA Solar Technology AG 8 Disconnect from voltage sources 1. Disconnect the supply voltage via an external circuit breaker. 2. Disconnect the measurement inputs via an external circuit breaker. 3. Short-circuit the current transformer outputs using an external short circuit device. -
Page 49: Decommissioning The Product
9 Decommissioning the Product SMA Solar Technology AG 9 Decommissioning the Product DANGER Danger to life due to electric shock when live components or cables are touched High voltages are present in the conductive components or cables of the product. Touching live parts and cables results in death or lethal injuries due to electric shock. -
Page 50: Technical Data
10 Technical Data SMA Solar Technology AG 10 Technical Data Communication Number of supported devices max. 200 I/O systems and power analyzers Max. 10 devices, Ethernet, Modbus TCP Telecontrol protocols (optional) IEC 61850-7-4, IEC 60870-5-101 / -104, DNP3 Connections Serial interface... - Page 51 10 Technical Data SMA Solar Technology AG Equipment options Advanced open-loop and closed-loop control functions SMA Hybrid Controller (see manual or technical datasheet of product) Protocol converter WAGO controller PFC200 I/O systems Moxa ioLogik E1242 (4 AI, 4 DI, 4 DIO) Moxa ioLogik E1260 (6 RTD)
-
Page 52: Contact
11 Contact SMA Solar Technology AG 11 Contact If you have technical problems with our products, please contact the SMA Service Line. The following data is required in order to provide you with the necessary assistance: – Serial number – Detailed description of the problem... - Page 53 +66 20598220 +562 2820 2101 Chile smaservice@spe.co.th Perú Service Partner for Utility: South Africa SMA Solar Technology South Africa Tirathai E & S Co., Ltd Pty Ltd. 516/1 Moo 4, Bangpoo Industrial Es- tate Cape Town Sukhumvit Road, T. Praksa, A. Muang 08600SUNNY 10280 Samutprakarn, Thailand (08600 78669)
-
Page 54: Eu Declaration Of Conformity
2011) and 2015/863/EU (L 137/10, March 31, 2015) (RoHS) SMA Solar Technology AG confirms herewith that the products described in this document are in compliance with the fundamental requirements and other relevant provisions of the above-mentioned directives. The entire EU Declaration of Conformity can be found at www.SMA-Solar.com. - Page 56 www.SMA-Solar.com...
Need help?
Do you have a question about the PPM-10 and is the answer not in the manual?
Questions and answers