Table of Contents
Advertisement
Quick Links
Advertisement
Table of Contents

Summary of Contents for VANMASS Wireless Car Charger Mount
- Page 1 User Manual service vanmasslife.com Get 12-hour quick reply VMPI0053A...
-
Page 2: Table Of Contents
CATALOG Product overview ..........02 Compatibility............04 Align the phone to the coil position ....05 The tips of LED indicator........06 Assembly and installation steps ......07 Switch on power supply, wireless charging ..12 Instruction of clamp arms........13 Specifications ............ -
Page 3: Product Overview
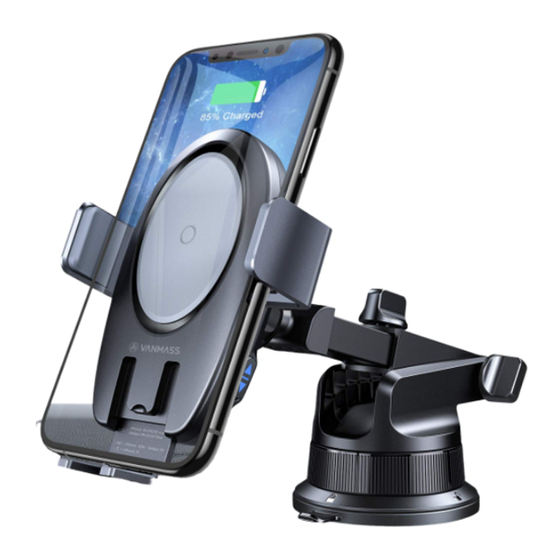
Product overview Twist-lock Air Vent Clip Screw Knob Hidden Pressure Switch (Close Button) Wireless Charging Ball Joint Sensing Area Clamp Arms 3-level Air Vent Clip Lever Silicone Pads Ball Joint 3-level Air Vent Clip Release Button USB-A Fast LED Indicator Charging Port Bottom Tray USB-C Charging Port... -
Page 4: Compatibility
2. Use a car charger to connect the wireless car charger mount in align to the circular wireless charging induction area on the car full charging process. -
Page 5: The Tips Of Led Indicator
The tips of LED indicator Assembly and installation steps Method 1 - Using with the 3-level Air Vent Clip Open Tighter Tight 2.5mm-3.5mm / 0.10inch-0.14inch Blue: Charging Red: Not Charging State of Charging LED Indicator Display indicator turns off after Power on 3 seconds. - Page 6 1. Unscrew the grip nut from the car mount and remove it. 3. Push the ball joint firmly into the groove on the back of the car mount, then tighten the grip nut. 4. Find a suitable place in your automobile outlet, insert the car mount.
- Page 7 Method 2 ‒ Using with the twist-lock air vent clip (Wide suitability, 3. Twist the screw knob to adjust the opening size of the clip to fit compatible with horizontal and vertical air vent blade) the air vent. 1. Unscrew the grip nut completely, let the ball joint through the grip nut (the thread must face the groove) and firmly push the ball joint into the groove in the back of the car mount.
-
Page 8: Switch On Power Supply, Wireless Charging
The indicator light will turn blue. Please use QC 3.0 car charger to connect with the wireless car charger mount. Tips: To realize the fast charging function, the charging cable USB-A connector must be plugged into the QC 3.0 fast charging... -
Page 9: Specifications
3A, 6.5-9V 9-12V 1.5A USB2: 5V 2.4A Release button Working Temperature 0°C-40°C/32℉-104℉ The parameters above are derived from the laboratory of VANMASS®. The actual parameters would be different because of products and other factors. The image shown here is indicative only. -
Page 10: Attentions
4. Please turn on car air-condition (fan) in hot day or using the wireless charger for a long time, it is helpful to cool down the wireless car charger mount and let the charging speed up. 5. Please connect the wireless car charger mount to power supply, at the same time, please warm up charger mount from hot air blowing out of the vent. - Page 11 6. The red light turns on and would not put out, which means the limits for a Class B digital device, pursuant to Part 15 of the FCC wireless car charger mount detects metal, foreign matter or Rules. These limits are designed to provide reasonable incompatible car charger.


Need help?
Do you have a question about the Wireless Car Charger Mount and is the answer not in the manual?
Questions and answers