Advertisement
Quick Links
Installation Instructions for
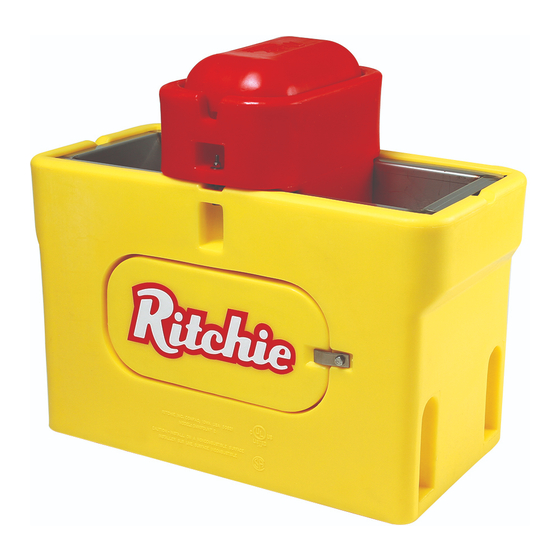
Congratulations, you have just purchased the finest watering
fountain on the market. This unit is built to give you excellent
service when properly installed and maintained. Please follow
instructions carefully. Read and understand all instructions
Ritchie Industries, Inc.
800-747-0222
www.ritchiefount.com
@RitchieWaterers
OmniFount
before installing
Part # 17835
January 1, 2020
Advertisement

Summary of Contents for Ritchie Fresh Water For Life OmniFount Series
- Page 1 This unit is built to give you excellent service when properly installed and maintained. Please follow instructions carefully. Read and understand all instructions before installing Ritchie Industries, Inc. 800-747-0222 Part # 17835 January 1, 2020 www.ritchiefount.com...
-
Page 2: Installation Instructions
For optimum water line protection, use Part # Description the 12” diameter insulated Ritchie Thermal Tube, part numbers and sizes are shown 18158 1’ Top Section to the right. Tube opening must be kept clear. - Page 3 OmniFount 5 & 10 have 6 molded hold-down pockets. The use of 3/8” x 5” stainless steel expansion anchor bolts (not included) is recommended. Anchor bolts are available from Ritchie in a two pack, part #16555. Large diameter fender washers are included and should be used with anchor bolt to prevent damage to the plastic casing.
- Page 4 J. Final Water Connection– Connect the top of the supplied hose to the valve, cut hose to proper length, and slip onto the barb fitting of the valve assembly. Clamps and fittings are furnished to secure the connection. Cable Heater – Uncoil cable heater and loop around the valve. Attach the remaining part of the cable heater to the water supply, as far down the riser tube as possible with the cable twist ties provided.
- Page 5 WARNING! – Check nameplate for your unit. Only connect 120VAC to a 120V Unit. WIRING DIAGRAM 120V SINGLE PHASE WARNING! – Check the nameplate for your unit. Only connect 230- 240VAC to a 240V Unit. WIRING DIAGRAM 240V SINGLE PHASE OmniFount Series Instruction Manual January 1, 2020...
- Page 6 Fenwal Thermostat – (Omni 3, Omni 5 & Omni 10) The adjustable range is from 0 . F (-18 C) to F (38 C). Thermostat is not preset at factory. Fill the trough to proper water level. Check the water temperature with a thermometer. The next morning, check the water temperature again. If the water is warmer than desired, turn the thermostat down.
- Page 7 Reinstall cover and you are done. Ritchie Valves Ritchie valves come in various sizes and pressure ratings as shown below - green for high supply line pressure, red for moderate supply pressure, and white for low-pressure applications. Differences in the size of trough also impacts valve choice.
- Page 8 13830 Cable Htr 120V 48W (1/pkg) 1 pkg 1 pkg 1 pkg 18266 Frame Bolt,nut&wshr SS(3/pkg) 16627 Omni 1 Accessory pkg 18655 Ritchie Decal 7.5" (1/pkg) 1 pkg 16523 Seal Foam 1/4"x3/4"x25' Roll 18628 Drain Plug (2/pkg) 1 pkg 14866 Seal Foam 1/2"x3/4"x10' Roll...
- Page 9 1 pkg 18684 Omni 2 SP Casing 18318 Bolt Down Washer (4/pkg) 1 pkg 16616 Omni 2 Trough 1 pkg 18653 Ritchie Decal 12" (1/pkg) 1 pkg 18633 Plug #3 - Water Channel (2/pkg) 1 pkg 16621 Access Panel 6"x14"...
- Page 10 13830 Cable Htr 120V 48W (1/pkg) 1 pkg 18266 Frame Bolt,nut&wshr SS(3/pkg) 1 pkg 16627 Omni 2 Accessory pkg 1 pkg 18653 Ritchie Decal 12" (1/pkg) 1 pkg 16523 Seal Foam 1/4"x3/4"x25' Roll 18628 Drain Plug (2/pkg) 1 pkg 14866 Seal Foam 1/2"x3/4"x10' Roll...
- Page 11 18313 H ardware for Float pkg 1 pkg 18342 Omni 3 Trough 1 pkg 18318 Bolt Down Washer (4/pkg) 2 pkgs 18653 Ritchie Decal 12" (1/pkg) 1 pkg 16562 Access Panel 10"x20" 18147 Access Panel Hardware pkg 1 pkg 18633 Plug #3 - Water Channel (2/pkg)
- Page 12 16561 Omni 5 Casing 18313 Hardware for Float pkg 16631 Omni 5 Trough 1 pkg 18318 Bolt Down Washer (4/pkg) 2 pkgs 18653 Ritchie Decal 12" (1/pkg) 1 pkg 16562 Access Panel 10"x20" 18147 Access Panel Hardware pkg 1 pkg...
- Page 13 18313 H ardware for Float pkg 1 pkg 18468 Omni 10 Trough 1 pkg 18318 Bolt Down Washer (4/pkg) 2 pkgs 18653 Ritchie Decal 12" (1/pkg) 1 pkg 16562 Access Panel 10"x20" 18147 Access Panel Hardware pkg 1 pkg 18633 Plug #3 - Water Channel (2/pkg)
-
Page 14: Troubleshooting
Trouble Shooting Problem Solution Adjust thermostat to lower temperature Water in Trough Too Warm Check to see if thermostat has failed by contacts burning closed Check fuses or circuit breakers Check all heating elements to make sure they are working and hot Adjust thermostat to higher temperature Ice in Trough Check for voltage from thermostat output... -
Page 15: Component Parts
Ritchie Limited Warranty E f f e c t i v e S e p t e m b e r 2 0 1 2 Poly Units Ritchie Industries, Inc. warrants its products to be free defective materials workmanship. Base, top and ball closures Defective part(s) will be repaired or replaced at the 10 year limited against manufacturing defect.

Need help?
Do you have a question about the Fresh Water For Life OmniFount Series and is the answer not in the manual?
Questions and answers