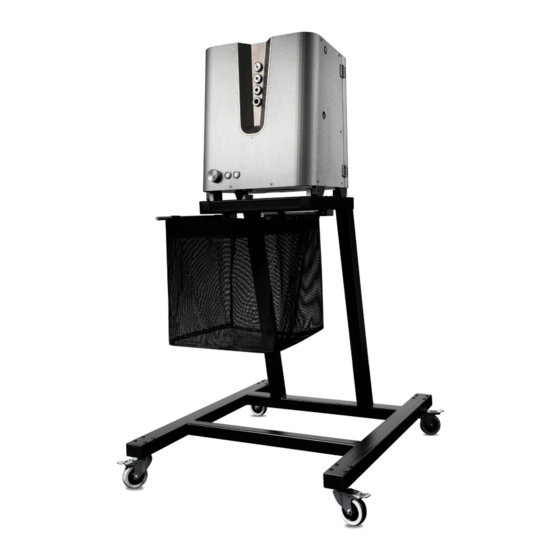
Summary of Contents for SUNFLOWER TRIMMER BUCKER-L
- Page 1 SUNFLOWER TRIMMER® TRIMMING IS EASY BUCKER - L USER MANUAL WARRANTY FORM www.sunfl ower-trimmer.com www.sunfl ower-trimmer.com...
- Page 2 USER MANUAL AND WARRANTY FORM BUCKER - L SUNFLOWER TRIMMER ®...
-
Page 3: Table Of Contents
1. Potential risks and safety warning 1.1 Protective equipment 1.2 Machine unpacking and installation 1.3 Other risks and recommendations 2. Machine basic description 2.1 General information 2.2 Range of use 2.3 Electrical connection 3. Operating and handling 3.1 Connection to power source 3.2 Leveling and start up 3.3 Cylinder adjustment 3.4 Stem insertion... -
Page 4: Machine Unpacking And Installation
1.2 MACHINE UNPACKING AND INSTALLATION When unpacking the machine out of the box please follow the instruction below: 1. Unpacking the Bucker SUNFLOWER TRIMMER ®... - Page 5 2. Installation of the machine on the table 3. Fixation of Bucker stand to the table (wing nuts) www.sunfl ower-trimmer.com...
- Page 6 4. Fixation of the bin 5. Disassembly SUNFLOWER TRIMMER ®...
-
Page 7: Other Risks And Recommendations
1.3 OTHER RISKS AND RECOMMENDATIONS Keep in mind your own safety at all times. Do not use the machine in a dusty or wet environment. Never open the back cover of the machine, when the motor and rotor is rotating. Never leave the machine in reach of children or persons under the age of 18 which are not familiar with the user manual. -
Page 8: Machine Basic Description
Mechanical gear ratio in gear-case is 1:5. Rotation speed range is adjustable by frequency converter and potentiometer. The rotors are made from material PolyTAN 44/80 and one cylinder is driven and the second cylinder is drifted. SUNFLOWER TRIMMER ®... -
Page 9: General Information
2.1 GENERAL INFORMATION • The machine is turned on by a backlit button on the front side. • The lightless button works as the rotation reverse. When holding the button the motor stops and the rotation changes. • On the right side of the machine you can adjust the pressure of drifted cylinder. More about rotor setup in chapter 3.3 Cylinder adjustment •... -
Page 10: Operating And Handling
Connect the end of the power cable into it and the other end into the wall socket. 3.2 LEVELING AND START UP Secure the wheels of the bottom frame. Make sure the back cover is closed. SUNFLOWER TRIMMER ®... - Page 11 The machine starts up by the right switch. Keep in mind all safety precautions stated above during power on of the trimmer! The left switch works as the rotation reverse. When holding the swith the motor stops and the rotors turn in the other direction. The round swith is for changing the speed of the rotation of the motor.
-
Page 12: Cylinder Adjustment
Take the provided imbus key and by moving it to the right tighten the screw. Warning: If the cylinders dont rotate after turning the machine on, immediately disconnect the machine from the electrical socket and adjust the pressure of cylinders again. SUNFLOWER TRIMMER ®... -
Page 13: Stem Insertion
3.4 STEM INSERTION The stems are inserted into the machine through the openings on the front side. Never insert any other material than described in chapter 2.2.Range of use. The machine could get damaged. In case something gets stuck between the cylinders use the rotation reverse. www.sunfl ower-trimmer.com... - Page 14 While changing orifi cess proceed with maximum caution and according to these instructions. 1. Insert the key into the orifi ce and unscrew to the left. 2. Exchange the orifi ce for a new one and screw it to the right. SUNFLOWER TRIMMER ®...
-
Page 15: Cleaning
4. CLEANING After every trimming we reccomend the following: • Clean all dirty spots of the machine using alcohol-based cleaner or other solvent. • Make sure that no cut pieces of the place get where they shouldn‘t • Clean the walls of the cylinders. For easier cleaning of the cylinders we recommend making them further apart using the adjustable screw. - Page 16 Store your machine in a clean and dry place. SUNFLOWER TRIMMER ®...
-
Page 17: Warranty
6. WARRANTY FORM In order to acquire a 5 year warranty according to our warranty conditions available on www.sunfl ower-trimmer.com it‘s necessary to complete the following: • 1. Fill out and keep the warranty form. • 2. Complete the warranty form with stamp of the seller and date of purchase. •... - Page 18 WWW.SUNFLOWER-TRIMMER.COM...


Need help?
Do you have a question about the BUCKER-L and is the answer not in the manual?
Questions and answers