Advertisement
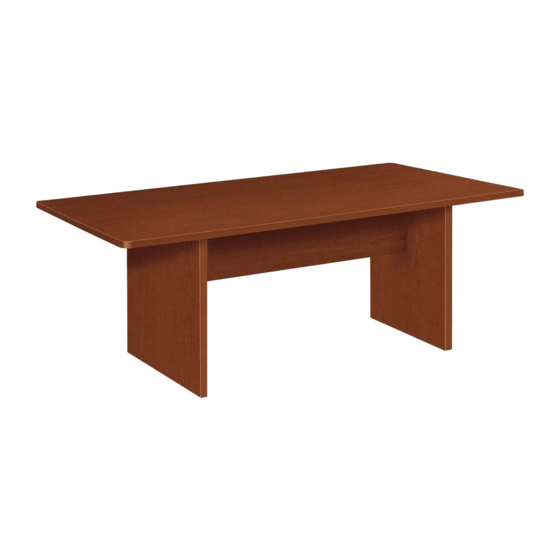
Illustration 1
End of stretcher
Slab base
panel
Stretcher
Top
Illustration 2
Slab base
panel
Top
CONFERENCE TABLE WITH SLAB BASE
Slab base panel
Glide
Glide insert
Read all instructions and review illustrations
before installing.
Rubber mallet
24" long level
Washer
/
" Allen wrench (provided)
3
1
/
" bolt
16
2
(1) Top
(2) Slab base panels
(8)
1
/
" bolt
2
(8)
/
" washer
3
8
(1)
/
" Allen wrench
3
16
(4) Glide insert
(4) Glide
To prevent the possibility of serious eye
injury, always wear eye protection when
using power tools.
Heavy panels can pinch or crush fingers.
Do not place fingers between or under pan-
els during assembly.
1. Refer to Illustration 1. Lay top, with stretchers
facing up, onto cardboard or a carpeted sur-
face.
2. Refer to Illustration 1. Position base panels
against stretchers and align pre-drilled holes
in base panel with holes in ends of each
stretcher.
3. Refer to Illustration 1. Place a washer (from
hardware pack) onto each
hardware pack)
Install a bolt (with washer) through each hole
in base panel (four per panel) and into ends
of stretcher. Use the
tighten bolts.
4. Refer to Illustration 2. Thread a glide (from
hardware pack) into each glide insert (from
hardware pack) by turning glide clockwise
until glide is flat against insert.
Locate two holes in bottom of each base
panel. Use the rubber mallet to install a
glide/glide insert assembly into each hole.
5. Use two or more people to set table upright
and to position table were desired.
Adjust glides until table is level from front-to-
rear and side-to-side. Use the 24" long level
to verify table is level.
WARNING
1
/
" bolt (from
2
/
" Allen wrench to fully
3
16
SIDE 1 OF 2 (2/07)
60181252B
Advertisement
Table of Contents

Summary of Contents for BASYX CONFERENCE TABLE WITH SLAB BASE
- Page 1 CONFERENCE TABLE WITH SLAB BASE Read all instructions and review illustrations Illustration 1 before installing. Slab base panel Tools required for assembly: Rubber mallet End of stretcher 24" long level Washer " Allen wrench (provided) " bolt This assembly includes:...
- Page 2 CONFERENCE TABLE WITH CURVED BASE Illustration 2 Read all instructions and review illustrations before installing. Curved base panel Tools required for assembly: Wedge washer " socket Rubber mallet Socket wrench 24" long level Washer End of stretcher " bolt This assembly includes: (1) Top (2) Curved base panels Curved base...
Need help?
Do you have a question about the CONFERENCE TABLE WITH SLAB BASE and is the answer not in the manual?
Questions and answers