Table of Contents
Advertisement
Quick Links
Advertisement
Table of Contents

Related Manuals for Tekron NTS 02-G

Summary of Contents for Tekron NTS 02-G
- Page 1 NTS 02-G USER MANUAL Third Edition Copyright©2020...
-
Page 2: Table Of Contents
© 2020 by Tekron International Limited. All Rights Reserved. All trademarks are the property of their respective holders. The information in this document is provided for informational use only and is subject to change. For further information or support, go to: ww.tekron.com. - Page 3 © 2020 by Tekron International Limited. All Rights Reserved. All trademarks are the property of their respective holders. The information in this document is provided for informational use only and is subject to change. For further information or support, go to: ww.tekron.com.
-
Page 4: Introduction
© 2020 by Tekron International Limited. All Rights Reserved. All trademarks are the property of their respective holders. The information in this document is provided for informational use only and is subject to change. For further information or support, go to: ww.tekron.com. - Page 5 © 2020 by Tekron International Limited. All Rights Reserved. All trademarks are the property of their respective holders. The information in this document is provided for informational use only and is subject to change. For further information or support, go to: ww.tekron.com.
-
Page 6: Front Panel
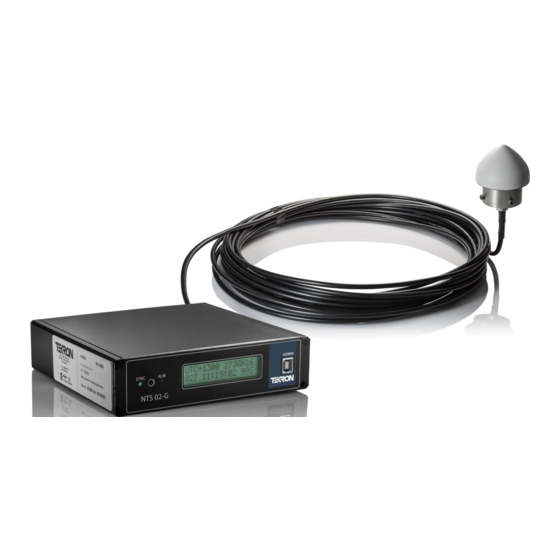
2. Front Panel Figure 2 NTS 02-G front panel The NTS 02-G features two LED indicators on the front panel (See figure 2), together with a USB port and a 2-line by 16-character backlit LCD display. SYNC LED: This LED shows the status of the current sync source. - Page 7 © 2020 by Tekron International Limited. All Rights Reserved. All trademarks are the property of their respective holders. The information in this document is provided for informational use only and is subject to change. For further information or support, go to: ww.tekron.com.
- Page 8 © 2020 by Tekron International Limited. All Rights Reserved. All trademarks are the property of their respective holders. The information in this document is provided for informational use only and is subject to change. For further information or support, go to: ww.tekron.com.
-
Page 9: Led Indicators
© 2020 by Tekron International Limited. All Rights Reserved. All trademarks are the property of their respective holders. The information in this document is provided for informational use only and is subject to change. For further information or support, go to: ww.tekron.com. -
Page 10: Usb Port
© 2020 by Tekron International Limited. All Rights Reserved. All trademarks are the property of their respective holders. The information in this document is provided for informational use only and is subject to change. For further information or support, go to: ww.tekron.com. -
Page 11: Back Panel
3. Back Panel Examples of the NTS 02-G back panel are shown (See figures 5 & 6). The unit appearance varies depending on the types of Ethernet modules fitted (orderable factory options). Figure 5 Rear panel of NTS 02-G with Copper Outputs P1 Power Input Power is applied to the NTS 02-G via P1, a 5.08 mm 3-pin connector. -
Page 12: Antenna And Lead-In Cable Considerations
© 2020 by Tekron International Limited. All Rights Reserved. All trademarks are the property of their respective holders. The information in this document is provided for informational use only and is subject to change. For further information or support, go to: ww.tekron.com. -
Page 13: P4: Alarm Relays (4-Pin 3.81 Mm Connector)
© 2020 by Tekron International Limited. All Rights Reserved. All trademarks are the property of their respective holders. The information in this document is provided for informational use only and is subject to change. For further information or support, go to: ww.tekron.com. -
Page 14: Eth 2 & Eth3 Ethernet Communication Ports (Rj45)
© 2020 by Tekron International Limited. All Rights Reserved. All trademarks are the property of their respective holders. The information in this document is provided for informational use only and is subject to change. For further information or support, go to: ww.tekron.com. -
Page 15: Software
4. Software Configuration Tool The NTS 02-G can be configured via USB or Ethernet. The configuration tool can be downloaded from the NTS 02-G product page on the Tekron website (www.tekron.com/nts-02-g). By default the unit is shipped with DHCP enabled for automatic IP address assignment, with a fall back to link local addressing (169.254.xxx.xxx) if no DHCP server is present. -
Page 16: Factory Hardware Options
Slave Only Option (Fiber input) The NTS 02-G can be ordered as a slave-only device in which case, the SMA Antenna Jack is removed, and an ST Fiber receiver port (multi-mode) is fitted instead. The unit will then synchronize to an incoming IRIG-... -
Page 17: Installation
© 2020 by Tekron International Limited. All Rights Reserved. All trademarks are the property of their respective holders. The information in this document is provided for informational use only and is subject to change. For further information or support, go to: ww.tekron.com. -
Page 18: Operation
To reset the unit, the power must be cycled. To cycle the power, it is recommended that the external power source switch that the device the NTS 02-G is connected to; is turned OFF, wait a full ten seconds, and then turned ON again. -
Page 19: Appendix
2. Appendix NTS 02-G Specifications Physical Specifications Width 160 mm Dimensions Depth 155 mm Height 40 mm Weight 800 g Operating Temperature Range -10 ~ + 65 Storage Temperature Range -40 ~ + 85 Operating Humidity 10 ~ 95 % non-condensing... - Page 20 © 2020 by Tekron International Limited. All Rights Reserved. All trademarks are the property of their respective holders. The information in this document is provided for informational use only and is subject to change. For further information or support, go to: ww.tekron.com.
Need help?
Do you have a question about the NTS 02-G and is the answer not in the manual?
Questions and answers