Advertisement
Quick Links
•
5216 Portside Dr, Medina, OH 44256 USA
tHis is tHe assembly iNstruCtioNs
For Cribs solD iN tHe uNiteD states
Directions for Maintenance, Cleaning, Storage and Use of your Crib/Toddler Bed are also included.
BEFORE STARTING THE ASSEMBLY PROCEDURE, READ ALL DIRECTIONS WITH CARE.
YOU WILL NEED THE FOLLOWING FOR THE ASSEMBLY OF YOUR CRIB/TODDLER BED:
A
(1) Allen Wrench
D
(6) Allenhead Bolts
F
(17) Allenhead Bolts
J
(16) Allenhead Bolts
Division of Foundations
•
PH: 877.716.2757 (U.S. Only) or 330.722.5033
•
www.childcraftbaby.com
a
D
ssembly
ireCtioNs aND
3Flat Tipped Screwdriver 3enclosed Allen Wrenches (A & B)
P
e
arts
B
(1) Allen Wrench
G
(2) Joint Connector Nuts
K
(2) Allenhead Bolts
®
Worldwide, Inc.
H
NCloseD iN
arDware
C
(12) Allenhead Bolts
H
(16) Joint Connector Nuts
C
'N'D
rib
t
to
oDDler
H
eaDboarD
•
FAX: 330.722.5037
P
l
arts
ist
b
ag
E
(4) Allenhead Bolts
1
b
C
ouble
eD
oNverts
b
F
s
eD or
ull
ize
& F
ootboarD
31001
I
(20) Connector Nuts
SI648E
Advertisement

Related Manuals for CHILDCRAFT Crib'N'Double 31001


Summary of Contents for CHILDCRAFT Crib'N'Double 31001
- Page 1 ‘N’D ouble oNverts oDDler eD or & F eaDboarD ootboarD 31001 Division of Foundations ® Worldwide, Inc. • • • 5216 Portside Dr, Medina, OH 44256 USA PH: 877.716.2757 (U.S. Only) or 330.722.5033 FAX: 330.722.5037 • www.childcraftbaby.com tHis is tHe assembly iNstruCtioNs For Cribs solD iN tHe uNiteD states ssembly ireCtioNs aND...
- Page 2 arts NCloseD iN artoN (1) Short Foot Assembly (1) Short Head Assembly (1) Long Foot Assembly (1) Short Foot Cap Rail (1) Short Head Cap Rail (1) Foot Post - Left (1) Foot Post - Right (1) Stationary Post - Left (1) Stationary Post - Right (1) Long Foot Cap (1) Spring...
- Page 3 reParatioN Carefully remove and lay out all hardware and parts. Check quantities and match the Hardware List and the Parts List. NOTE: During the assembly process whenever using screws or bolts, check each with the Hardware List by letter and size identification.
- Page 4 2 - D 2: a iagram ssemble ails to Hort eaD aND ssemblies Position Short Head Cap Rail P above Short Head Assembly N as shown. Insert dowel pins in top rail of Short Head Assembly N into receiving holes located in the bottom face of Short Head Cap Rail P. Then install two (2) Allenhead Bolts F into receiving holes in bottom edge of top rail on Short Head Assembly N and thread into metal inserts.
- Page 5 4 - D 4: a iagram ttaCHiNg Hort ssembly to tatioNary ssembly Attach Short Head Assembly N to Stationary Side Assembly from Step 1. Allenhead Bolts F will be installed through receiving holes in the end rail of Short Head Assembly N and threaded into the metal inserts installed in Stationary Post - Left S. A total of two (2) Allenhead Bolts F are required.
- Page 6 6 - D 6: a iagram ttaCHiNg Attach Long Foot Top Cap U to the crib assembly by lowering it down on top edge of Long Foot Assembly L. Allow the dowel pins in the top of posts Q and R to fit into the two receiving grooves. Also carefully align dowel pins in the top edge of Long Foot Assembly L to enter receiving holes in bottom face of Long Foot Top Cap U.
- Page 7 8 - D 8: F iagram illiNg mPty oles Insert Allenhead Bolts J and Connector Nut I into empty holes in posts. Also install Allenhead Bolts E with Connector Nuts I through edge of posts Q and R. Each allenhead bolt will be securely threaded into a Connector Nut I and tightened securely. Use Allen Wrenches A and B to securely threaded these items together.
- Page 8 9 - D 9: C “C ” “t ” iagram oNvert to a oDDler When use as a crib has been completed, you have the option to convert to a Toddler Bed for years of additional use in your child’s room. Remove mattress.
- Page 9 10 - D 10: a iagram ttaCH aPs to osts Align dowel pins in top of posts Q and R with holes in Post Caps X and press Post Caps X down over dowel pins. Insert Allenhead Bolts K through hole in Post Caps X and tighten securely into threaded insert in top of posts Q and R using Allen Wrench A. Post Cap X shown installed here.
- Page 10 NstalliNg uarD A Guard Rail can be purchased for added security. Follow the directions on the instruction sheet included with the Guard Rail. You will need (2) Guard Rail Extenders Y and (4) of Allenhead Bolts D from this crib. Fill all empty holes in Foot Posts Q and R as directed in Step 11.
- Page 11 Bed rails option can be purchased separately from ChildCraft. Assemble the components shown in diagram using the bolts and connectors indicated in the crib assembly section. Attach bed rails purchased separately using Allenhead Bolts C and Joint Connector Nuts H.
- Page 12 MAINTENANCE OF YOUR CRIB/TODDLER BED/FULL SIZE HEADBOARD & FOOTBOARD: Upon completion of the assembly, check to ensure that all screws, bolts and fastening devices have been tightened securely. There should be a frequent check of this product for damaged hardware, loose joints, missing parts or sharp edges before and after assembly and frequently during use. DO NOT use crib if any parts are missing or broken.
- Page 13 WARNING • FAILURE TO FOLLOW THESE WARNINGS AND THE ASSEMBLY INSTRUCTIONS COULD RESULT IN SERIOUS INJURY OR DEATH. WARNING : Infants can suffocate on soft bedding. NEVER add a pillow or comforter. NEVER place additional padding under an infant. •...
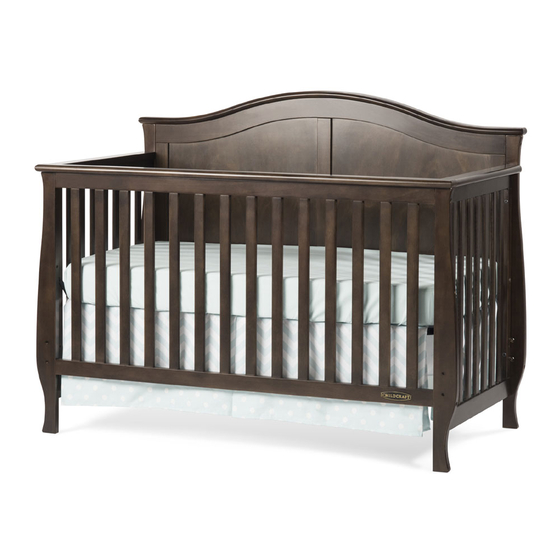
- Page 14 SSemBled wITh ATTreSS SSemBled oddler wITh ATTreSS...
Need help?
Do you have a question about the Crib'N'Double 31001 and is the answer not in the manual?
Questions and answers