Advertisement
ONBOARD AIR HOOKUP KIT
PART NO. 20052 (30 amp - 110PSI on, 150PSI off)
PART NO. 20053 (30 amp - 85PSI on, 105 PSI off)
PART NO. 20055 (30 amp - 90 PSI on, 120 PSI off)
IMPORTANT:
It is essential that you and any other operator of this
product read and understand the contents of this manual
before installing and using this product.
SAVE THIS MANUAL FOR FUTURE REFERENCE
USER MANUAL
Advertisement
Table of Contents

Related Manuals for VIAIR 20052


Summary of Contents for VIAIR 20052
- Page 1 ONBOARD AIR HOOKUP KIT PART NO. 20052 (30 amp - 110PSI on, 150PSI off) PART NO. 20053 (30 amp - 85PSI on, 105 PSI off) PART NO. 20055 (30 amp - 90 PSI on, 120 PSI off) IMPORTANT: It is essential that you and any other operator of this product read and understand the contents of this manual before installing and using this product.
-
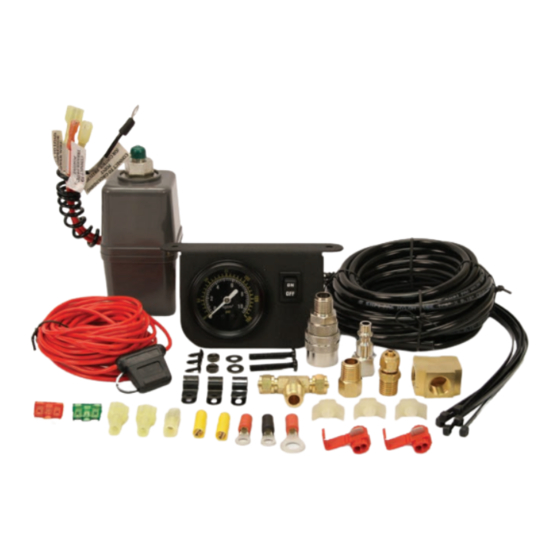
Page 2: Parts List
ONBOARD AIR HOOKUP KIT Please read this instruction manual carefully prior to operating this product. Pay attention to the CAUTION and WARNING statements in this manual. Failure to comply with these instructions could result in personal injury or property damage. Retain these instructions for future reference. -
Page 3: Installation Instructions
200, 300, and 400 series compressors. Please make sure that you have the correct kit for use with your specific model compressor. For Onboard Air Hookup to compressors or systems other than VIAIR components, refer to following chart:... - Page 4 ONBOARD AIR HOOKUP KIT STEP BY STEP INSTALLATION: Select a mounting location with a rigid mounting surface such as the bottom edge of the dashboard, on either side of the steering wheel column. Use the gauge mounting panel as a template;...
- Page 5 ONBOARD AIR HOOKUP KIT Route air line to the male tee, measure and cut to appropriate length. Connect air line to one leg of the male tee as shown. (See Figs. 3 & 4) To connect air line to tee, remove collar of the male tee fitting, push airline onto the tee fitting until the air line completely covers the barb, and then tighten collar.
- Page 6 ONBOARD AIR HOOKUP KIT 13. Connect to air compressor is simple and easy with the Quick Connect Coupler by applying the 1/4” (NPT) Female Quick Connect Stud at the end of the compressor’s leader hose. FYI: This quick connect setting is designed to have the option to air up tires directly from air compressor by connecting an air hose with Quick Connect Coupler to the applied Quick Connect Stud on compressor’s leader hose.
-
Page 7: Troubleshooting Guide
TROUBLESHOOTING GUIDE: PROBLEM POSSIBLE CAUSE(S) CORRECTIVE ACTION Air Fittings Leak 1. Loose fitting connections 1. Check connections with soap 2. Air line tubing not published & water solution. Reapply all the way or cut squarely sealant to fitting, reassemble. Do not over-tighten. (Make sure system pressure is released before making repairs). - Page 8 ONBOARD AIR HOOKUP KIT Fig. 1 Dash Panel Gauge Air Line Compression Compression Fitting Body Fitting Collar Fig. 2 Quick Splice Quick Splice Connector Connector (Open) (Closed) Wire From Lightbulb Connecting Wire USER MANUAL...
- Page 9 ONBOARD AIR HOOKUP KIT Fig. 3 Air Tank Compression Fitting Drain Cock Line Pressure Switch w/ built in relay white wire - to compressor Line Compressor (+) Lead Thick Compressor red wire Relay black wire Thin red wire To Ground To Fused 12-Volt Extension...
-
Page 10: Limited Warranty
Returns should be made within one year of the date of purchase, after a Return Goods Authorization (RGA) number has been assigned by VIAIR Corporation. To obtain RGA, fax a copy of your receipt to (949) 585-0188. For complete warranty details, please visit: www.viaircorp.com/warranty PLEASE NOTE: THIS WARRANTY COVERS PRODUCT DEFECTS ONLY;...
Need help?
Do you have a question about the 20052 and is the answer not in the manual?
Questions and answers