Subscribe to Our Youtube Channel
Summary of Contents for Taoglas EDGE Connect
- Page 1 User Guide EDGE Connect ™ Next-generation IoT device and software platform Taoglas EDGE Connect next-generation IoT device and software platform set up instructions ™ IG-20-08-003-A www.taoglas.com...
-
Page 2: Table Of Contents
1.1 What’s in the Box? 1.2 Support Set Up 2.1 Device Startup: 2.2 Account Setup 2.3 Activating your Device Using the EDGE Connect 3.1 Device Overview Using EDGE Insights 4.1 Insights Navigation 4.2 Device Management 4.3 Dashboard 4.4 Sensor Notification Rules 4.5 Add New Users... -
Page 3: Introduction
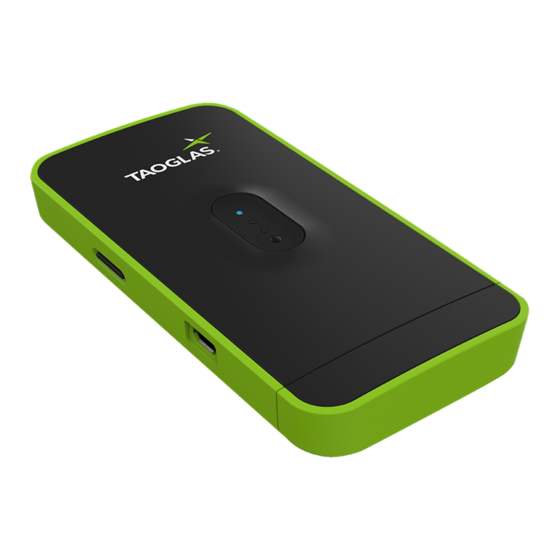
Introduction The Taoglas EDGE Connect™ enables real time insights and intelligence to help your enterprise save costs, increase revenue and enhance compliance. It is a next-generation IoT device with cellular, Bluetooth, and on-board sensor capabilities with a cloud based connectivity and device management platform. -
Page 4: Set Up
2.2 Account Setup 1. To create an EDGE Insights account for your EDGE Connect devices, navigate to connect.taoglas.com and click on ‘Sign Up’. 2. Create a username and enter your details. -
Page 5: Activating Your Device
1. Using the details registered in the sign up process, you will be required to login to the EDGE Insights platform in order to register your EDGE Connect. 2. The first time you log in, you will receive a popup message notifying you that you have not activated any devices. - Page 6 3. To activate your EDGE Connect, click ‘Activate New Device’ at the bottom of the page, a popup window will request your EDGE Connect S/N and Activation Code. After entering these, click ‘Submit’ to finish the activation process. The EDGE Connect S/N and Activation Code can be found on the card included in the box.
-
Page 7: Using The Edge Connect
User LED will flash white 3 times in quick succession. • To power off the EDGE Connect, hold the Power Button, while the EDGE Connect is powering down the User LED will blink red continuously. The User LED will stop blinking when the EDGE Connect has completely powered off. -
Page 8: Using Edge Insights
1. When you login to your account, you will land on the Dashboard page. For instructions on activating an EDGE Connect on your account, please refer to the Activating your Device section. 2. You can use the links on the top of EDGE Insights interface to navigate between your dashboard, device list page and account management pages. -
Page 9: Device Management
Upload Interval, this is the rate at which the EDGE Connect will upload recorded sensor samples to EDGE Insights. d. Upload Retries, in the event where the EDGE Connect fails to upload samples, this is the number of times it will attempt to upload before backing off. -
Page 10: Dashboard
3. Depending on your device type and the sensors associated with it you will be able to set the individual sensor sampling intervals in the Device Parameters section. a. Simply enter the sampling interval in the format HH:MM:SS into the text box next to the sensor name. b. -
Page 11: Sensor Notification Rules
2. Realtime and historic sensor data for each of your devices can be viewed on the dashboard tab of EDGE Insights. 3. The sensor data view of the dashboard allows you to: a. View the latest sensor samples uploaded from your EDGE Connect (Green panels at the top). b. View plots of sensor data over a period of time. - Page 12 4. On the next screen, enter the name and email address of the contact you want to notify, then click ‘Submit’. 5. Repeat steps 3 and 4 multiple times to add multiple contacts, regardless of whether or not they are EDGE Insights users.
- Page 13 c. Select the max frequency you wish to notify the group, for example selecting ‘Once a day’, will only notify the group once in a 24 hour period, regardless of the number of times the rule associated with the notification is triggered.
- Page 14 The above screenshot will trigger the notification if a temperature sample with a value less than 10°C is uploaded to EDGE Insights. 11. Once all the information has been completed, click ‘Submit’. 12. The rule is now available to apply to the devices associated with your account. 13.
-
Page 15: Add New Users
4.5 Add New Users 1. To add a new user so that they can view the devices you have activated on your account, click ‘Settings’ followed by ‘Users’. 2. The users list page will appear, click ‘Add New User’ , which will bring you to a page which allows you to add a new user. -
Page 16: Support
4.6 Support 1. To access Product Support, click ‘Support’ followed by ‘Product Support’ which will bring you to an online Product support page. 2. To access the User Guide click ‘User Guide’ , which will bring you to an online user guide. IG-20-08-003-A... -
Page 17: Appendix
2. Authentication of the device by the EDGE Insights Platform, with the unique and individual private key held securely in a cryptographic coprocessor. 3. Whitelisting of the domains to which the EDGE Connect APN can connect – EDGE Insights and EDGE Insights Platform and NTP servers only. - Page 18 Federal Communication Commission Interference Statement This device complies with part 15 of the FCC Rules. Operation is subject to the following two conditions: (1) This device may not cause harmful interference, and (2) this device must accept any interference received, including interference that may cause undesired operation. This device has been tested and found to comply with the limits for a Class B digital device, pursuant to Part 15 of the FCC Rules.
- Page 19 All copyrights, trademarks and any other intellectual property rights related are owned by Taoglas Group Holdings Limited.


Need help?
Do you have a question about the EDGE Connect and is the answer not in the manual?
Questions and answers