Table of Contents
Advertisement
Quick Links
Advertisement
Table of Contents

Subscribe to Our Youtube Channel
Related Manuals for Inovonics AM SiteStreamer+ SOFIA 567


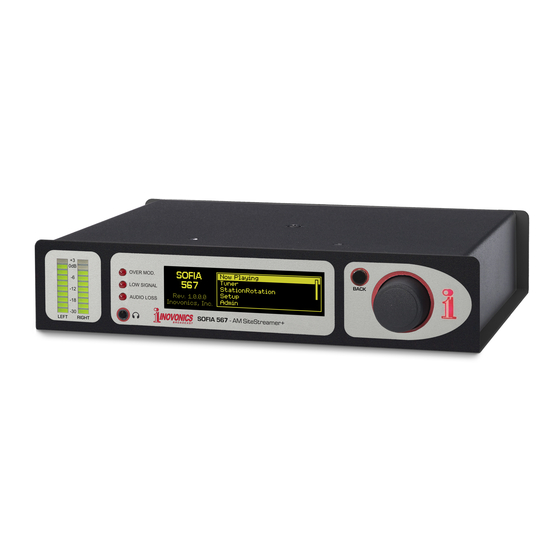
Summary of Contents for Inovonics AM SiteStreamer+ SOFIA 567
- Page 1 SOFIA 567...
- Page 3 SOFIA 567...
- Page 4 — 2 —...
-
Page 5: Table Of Contents
TABLE OF CONTENTS Section I – INTRODUCTION SOFIA 567 PRODUCT DESCRIPTION ‘SiteStreamers’ Defined ................6 Product Features ..................6 SOFIA 567 TECHNICAL SPECIFICATIONS Specifications.................... 7 Block Diagram ................... 8 Section II – INSTALLATION GENERAL Unpacking and Inspection ................ 9 MOUNTING, POWER AND ENVIRONMENT Rack Requirement.................. - Page 6 THE FRONT-PANEL MENU TREE Menu Tree ....................13 GETTING UP AND RUNNING The Main Menu ..................15 Finding the SOFIA 567’s IP Address ............15 Assigning a Fixed IP Address ..............15 Connecting to the SOFIA 567 ..............15 NOW PLAYING Remote Listening ..................
- Page 7 Security and Passwords ................. 31 Signing In ....................31 Lost Password (Hard Reset) ..............32 The Hardware Profile ................32 Reboot ..................... 33 Updating Firmware .................. 33 ‘About’ Info ....................33 INOVONICS WARRANTY .......... (INSIDE BACK COVER) — 5 —...
-
Page 8: Section I - Introduction
The elite SiteStreamer+™ (‘plus’) series includes additional fea- tures. The SOFIA 567 has AoIP connectivity and can provide a signal metrics history of an entire broadcast day. Leading features of the Inovonics SOFIA 567 include: Product Features All-digital “SDR” (Software-Defined Radio) off-air re- ception of medium-wave analog-AM stations. -
Page 9: Sofia 567 Technical Specifications
SOFIA 567 TECHNICAL SPECIFICATIONS Tuning Range: 520kHz-1710kHz with either Alarms: 10kHz (American) or 9kHz (European) Audio Loss: ‘Silence Sensor’ Alarm has channel spacings. programmable On/Off thresholds and Time On/Off intervals. Antenna Input: 50-ohm (BNC); accepts pas- Low Signal: Alarm and reset trigger levels sive loop or random-wire antenna. -
Page 10: Block Diagram
BLOCK DIAGRAM The SOFIA 567 is a Software-Defined Radio (SDR) receiver. Other factors in its design make the product almost entirely DSP-based, with virtually all functionality provided through firmware coding. The Block Diagram pre- sented here illustrates product basics in an easily-understood form, alt- hough actual signal paths and logical functions may deviate appreciably from the circuit shown here. -
Page 11: Section Ii - Installation
MOUNTING, POWER AND ENVIRONMENT The optional 1U rack-mount chassis will accommodate either Rack one or two half-rack Inovonics modules, or one half-rack and Requirement one one-third-rack size in the INOmini™ series. Appropriate blanking panels are provided with the rack-mount kit. -
Page 12: Ac Mains Power
The Inovonics PA-00 is an indoor/outdoor loop spe- cifically designed for the SOFIA 567. Male XLR left- and right-channel ANALOG OUTPUTS on the rear... -
Page 13: Unbalanced Operation
If the analog line outputs of the SOFIA 567 are connected to Unbalanced low-level, unbalanced inputs of consumer-grade equipment, Operation connect the center conductor of the shielded output lead to Pin 2 of the XLR connector and the shield to Pin 1. Leave Pin 3 un- connected. -
Page 14: Section Iii - Setup And Operation
Section III SETUP AND OPERATION PRELIMINARY INFORMATION ‘Boot’ (startup) time of SOFIA 567 is about five seconds. When Quick Boot power is first applied, or following a power interruption, the unit is back in full operation very quickly. Setup and reception parameters in use prior to the power cycle are reloaded instant- ly from non-volatile memory into the processing core. -
Page 15: The Back Button
If you dawdle or simply walk away, after 30 seconds of no fur- ther knob activity the SOFIA 567 will enter a selection you have made into memory automatically, or simply ‘deselect’ the high- lighted item with no changes if the setting has not been altered. BACK button B will always return you to the previous menu The BACK screen. -
Page 16: Now Playing
Menu items are tagged here to show whether the item is a readout (display) of some parameter, or if it accepts some form of user entry (data entry). (set) signifies an on/off or enable/disable function, and (select) denotes user control over multiple-choice selections, or for adjusting some value incrementally. -
Page 17: The Main Menu
GETTING UP AND RUNNING Push the BACK button until The Main Menu you see the Main Menu on the OLED display. This is the ‘gateway’ for setup and operation. With the SOFIA 567 connected to your local network (LAN), use the jog wheel to navigate from the Main Menu to: Setup / Network / IP Settings. -
Page 18: Remote Listening
SOFIA 567 Webpages feature the unabridged Main Menu on the left-hand side of the screen. This columnar list appears on eve- ry Web interface screen. It is a substantial expansion of the front-panel Main Menu and a testament to the many features and their setup options that can only be addressed using the Web interface. -
Page 19: Vu' Meter
SOFIA 567 audio level metering ‘VU’ Meter is peak-responding, and the Web interface level display at the top of each Web interface page follows the 10-segment front-panel LED bar readout. Metering with greater resolution can be found on the Graphs & Metering Web interface page and is discussed and qualified in detail on Page 18. -
Page 20: Stationrotation
To add a station to the Preset Stations list, tune to the station you wish to save and click on the Save as New bar. You’ll be prompted to add descriptive info if you like. When you click on these presets to tune the radio, the selected station will display in yellow, per the example. -
Page 21: Histograms
Because all SOFIA 567 level metering is peak- rather than aver- age- or VU-responding, you’ll find that these level readouts will generally hang near the top of the scale during most music programming, which sadly nowadays has an egregiously-limited dynamic range. The next section on this Histograms Web interface page pre-... -
Page 22: The Bandscanner™ Utility
Obviously, the histograms represent only the station being re- ceived at the moment. If you change frequency to check on other stations in the market, the histograms will reflect param- eters of those stations during your surfing expedition. might want to jot-down the time away from the primary station target if the histograms will be analyzed after the fact. -
Page 23: Alarm Status
You may mouse-over the BandScanner display screen and click on any vertical bar. The radio will tune to that station and bring up the Now Playing page. ALARMS Signal-related alarms light front-panel LEDs and give flashing Alarm Status notifications on the front-panel OLED screen. The front-panel LEDs are also reflected on the Now Playing page and in the Alarm Status area of this Web interface page as shown... -
Page 24: Low Signal
Threshold On (dB): is the set point that the program must drop below to trigger an alarm. Moreover, the program level must remain below this set point for the number of seconds selected with the Time On (Sec): slider. Even a quick burst of noise, or a transient click will start the timing period to begin afresh. -
Page 25: Radio Settings
is active), the Time and Date received, and the Duration of the alarm. You can View Alarm Log on your screen and even filter results overtyping Filter alarms… with a search term from the appropriate column. You may also download the Alarm Logs for Daily, Weekly, Monthly or Com- plete (all logged alarms) - Page 26 ephone lines and ‘repeat coils,’ and the notion of audio signal impedance matching is nowadays generally regarded as “old school” and passé. Also with regard to the analog output level, the dBu notations beside the slider actually refer to the r.m.s. average level of a sine-wave tone with a peak value corresponding to 100% modu- lation of the AM carrier.
-
Page 27: General Purpose Outputs
authorized listeners. The Max Listeners: slider can be set be- tween 0 and 10. Once changed, Stream settings must be saved by clicking on the Save bar. Note that this does reset the utility, disconnecting any current listeners, who then must log back on. The rear-panel GPOs serve as ‘tally’... -
Page 28: Http Port
newly-programmed Hostname will be seen at the top of all Web in- terface pages. The default HTTP Port: 80 is commonly used when accessing HTTP Port networked equipment like the SOFIA 567 on a local network (LAN). Provision is included to change this to another port number as may be required under certain circumstances. -
Page 29: Dante
entrust to your IT department, though explanations and in- structions are available from multiple Web resources. ® DANTE The term Dante® refers to networking technology developed by the Australian firm, Audinate Pty. Ltd. It enables simple con- nection with other Dante-equipped devices and gives AES67 AoIP (Audio over Internet Protocol) compliance and interopera- bility among a wide range of pro-AV products. -
Page 30: The Dante Controller
The Dante Controller is a free software utility available from The Dante Dante’s developer, Audinate. It is an essential software means Controller of finding, setting-up and controlling Dante-enabled devices on your network. It may be downloaded for operation under ei- ther Windows or Macintosh operating systems using this link: https://www.audinate.com/products/software/dante-controller SNMP OPERATION... -
Page 31: The Mib File
The MIB File is a small text file required by the SNMP Manager. The MIB File Click: Download MIB to save this file using the usual Windows methods. The MIB file is in plain text with a .mib extension, and may be read with Windows Notepad. NOTE: This is an abbreviated discussion of SNMP operation. -
Page 32: Notifications (Send What)
you can check with the wireless carrier to confirm the proper addressing style for Internet texting delivery. When all recipients have been entered, click Save. You may al- so click Send Test Email, which will memo-message all recipients to confirm proper communications setup. You can assign any or all alarms to any or all email or text ad- Notifications, dresses in the Notifications section. -
Page 33: Rtc Battery
The Real Time Clock has a backup battery located on the rear RTC Battery of the front-panel board. This is a 3V CR2032 flat ‘coincell’ battery with the + side facing out. Replace the battery when RTC Battery: voltage drops to 2V. We have provided a reliable default time server, which is Time Server If you must change the server be-... -
Page 34: Lost Password (Hard Reset)
The Web interface pass- word must be entered on any connecting device. When this image appears on your screen, ignore User Name: and enter the password into the Password: field, then click OK. NOTE: A ‘hard reset’ is required to bypass a local or a Web in- Lost Password terface password. -
Page 35: Reboot
Profile download first might be a good idea. SOFIA 567 firmware includes the Web interface pages, and up- Updating dates are easily uploaded to the unit when issued by Inovonics. Firmware NOTE: We recommend saving a fresh Hardware Profile, as a firmware update may affect user settings. - Page 36 — 34 —...
-
Page 37: Inovonics Warranty
INOVONICS WARRANTY TERMS OF SALE: Inovonics products are sold with an understand- ing of “full satisfaction”; that is, full credit or refund will be issued for products sold as new if returned to the point of purchase within 30 days following their receipt, provided that they are returned complete and in an “as received”...
Need help?
Do you have a question about the AM SiteStreamer+ SOFIA 567 and is the answer not in the manual?
Questions and answers