Table of Contents
Advertisement
Quick Links
Advertisement
Table of Contents

Related Manuals for Janszen Valentina A8

Summary of Contents for Janszen Valentina A8
- Page 1 Valentina A8 Active Electrostatic Hybrid Loudspeaker ’ WNER ANUAL 2/11/2020...
- Page 2 Valentina A8 Owner’s Manual 2020 Janszen Loudspeaker, Ltd. 480 Trade Road Columbus, Ohio 43204 USA Phone +1 614-448-1811 email support@janszenloudspeaker.com This Owner’s Guide is available in printed form upon request.
-
Page 3: Table Of Contents
S A F E T Y I N F O R M A T I O N T able of Contents SAFETY INFORMATION WELCOME UNPACKING MOVING CLEANING QUICK START REMOTE CONTROL SETUP CONNECTING AND POWERING AIRLAYER BACKWARD TILT SETUP DETAILS FUSE REPLACEMENT SPECIFICATIONS AND FEATURES FREQUENTLY ASKED QUESTIONS... -
Page 4: Safety Information
INVALIDATE REGULATORY COMPLIANCE AND THUS RENDER THE SPEAKERS UNSUITABLE FOR HOME USE. THIS INCLUDES KEEPING THE GRILLS INTACT. WARNING: JANSZEN SHALL NOT BE RESPONSIBLE FOR ANY PHYSICAL DAMAGES OR INJURY THAT OCCURS AS A RESULT OF MISUSE, DISASSEMBLY, OR UNAUTHORIZED CHANGES OR MODIFICATIONS MADE TO THESE SPEAKERS. - Page 5 S A F E T Y I N F O R M A T I O N Caution: 1. Read these instructions – All safety and operating instructions should be read before the speakers are operated. 2. Save these instructions – keep the safety and operating instructions for future reference.
- Page 6 You can measure loudness with a simple sound level meter. If you wish to check your exposure, JansZen can supply a good quality sound level meter such as we use ourselves at modest cost. There are also apps for smart phones that...
- Page 7 S A F E T Y I N F O R M A T I O N work as sound level meters and spectrum analyzers, although they will probably miss the high frequency extremes due to microphone quality. Follow the instructions for the device or app to make sure your readings are valid.
-
Page 8: Welcome
W E L C O M E Welcome ou have chosen JansZen loudspeakers! Your Valentinas will bring you the utmost in music listening enjoyment through their exceptional purity and naturalness in sound reproduction. While these speakers include esoteric technology, you can rest assured that they are designed and built with the best of advanced materials and techniques, and are ready to bring you consistent, unwavering performance for decades to come. -
Page 9: Unpacking
U N P A C K I N G Unpacking o not allow the delivery person to leave until you are satisfied that there has been no shipping damage. If there is damage, please refuse the shipment, and it will automatically come back to us for repair/replacement. - Page 10 U N P A C K I N G 7) Lift the blue foam insert away from the speaker. 8) Grasp the top end of the speaker, pressing the remaining blue foam insert against the speaker so that the two do not separate. 9) Gently tilt the speaker up onto its top until it is vertical, then further until the free feet touch the floor.
-
Page 11: Moving
M O V I N G Moving he speakers weigh about 28 kg [62 pounds], so they can be hard to move for someone working alone. If you are unpacking these alone, here are a few suggestions. Large movements The easiest way to pick one up is: 1) Ensure that your clothing presents no exposed hardware, such as a belt buckle, snaps, rivets, buttons, etc., that could come into contact with the speaker and scratch the paint or wood. -
Page 12: Cleaning
C L E A N I N G Cleaning Wooden baffles The final wood finish coat is wax, which will be removed by most cleaners. Wipe only with a soft, damp cloth. Painted and metal surfaces These surfaces can withstand strong cleaners as well as alcohol, but do not spray anything directly onto the speakers. -
Page 13: Quick Start
Q U I C K S T A R T Quick Start he interesting things about this model are its built in biamplification and signal processing, and the low mass woofers. The amplifier unit is mounted to the inside of the black heat sinking plate at the back of the speaker enclosure. The inputs and signal processing circuitry are mounted to the input/output panel below the amplifier plate. - Page 14 Q U I C K S T A R T To get started as quickly as possible: • Place the speakers so their upper rear corners are about two feet [60 cm] from the front wall. • Toe them in so their axes cross a foot or two [30 – 60 cm] behind your seat. •...
-
Page 15: Remote Control
R E M O T E C O N T R O L Remote Control he remote control is an IR type (infrared). As such, it generally requires a direct line of sight to the right speaker to operate. In some cases, walls can be optically reflective/dispersive enough to allow operation at odd angles, but normally the remote has to be aimed right at the upper inboard side of the right speaker baffle to function reliably. - Page 16 R E M O T E C O N T R O L On/standby Volume up Volume down Previous input Next input Mute Preset 1 Preset 2 Preset 3 10 Currently unassigned, but hopefully a future firmware update will make this button *Set auto-detect* 11 Superfluous –...
- Page 17 R E M O T E C O N T R O L Indicator LED and IR sensor on a left master speaker. Status indicator. There’s an LED indicator near the top of the right speaker. It serves the following functions: Green Unit is on Green, flashes once...
-
Page 18: Setup
Setup Connections The Valentina A8 is equipped with a variety of inputs, both analog and digital. The speakers are factory programmed to scan the inputs and automatically detect which one is receiving a signal. The remote can be used to manually select the input, which will override auto-detection. - Page 19 After that, however, playback will be immediate. The Valentina A8 can accept both analog and digital inputs. There’s also a USB jack for field programming the DSP.
- Page 20 S E T U P Digital inputs. There are three types of digital input jacks: XLR, RCA, and optical. They’re effectively equivalent, although some people have a personal preference. Each is for one or another flavor of S/PDIF. Notes: 1) For the purpose of operating the remote and for operation with the digital inputs, there is a designated master and follower speaker.
- Page 21 S E T U P Optical (TOSLINK S/PDIF). This may be the best way for a home setup to get a digital signal from a source to the master speaker, because light can’t be affected by interference. If you have more than one digital source, however, it’s handy to be able to use the other digital inputs along with auto-selection or the remote control to switch between them, instead of requiring an external multiplexer.
- Page 22 S E T U P Indicator lights On the rear panel, there are three green LEDs that signify which signal processing preset is active. This LED will blink slowly when there is no signal detected. There’s also a red LED that indicates clipping or fault conditions, as follows: LED Behavior Meaning Random blinking...
- Page 23 S E T U P Input selection The speakers are shipped with all three presets configured to automatically detect which input has a signal. You are also able to select inputs manually using the remote control by pressing the right or left arrow buttons. It’s important to avoid manually selecting an input inadvertently, because this will disable auto-detection, and it’s not always obvious how to get back into that mode.
- Page 24 S E T U P If you’re not sure which one was pressed, or how many times, the procedure is still fairly simple. There will be two selections that let sound come out: one sets a manual selection of the current input, and the other sets auto-detection. Here’s how to tell which is which: After pressing the arrow button until there is sound, auto-detection will be the one that takes a little more time before the green indicator comes back on after blinking...
- Page 25 S E T U P Also, changes to the distance from the walls can be used to decrease excitation of a problematic room mode. • Position each a different distance from the side walls as from the front wall, to prevent overlap of the reinforcement spectra.
- Page 26 S E T U P o Add absorption or diffusion at the side wall first reflection points. o Make the side wall distances equal. • Upper treble response can be rolled off to taste by reducing toe-in. • Experimenting with the back-tilt can also tailor the response, but will produce changes that are more radical than from changing the toe-in;...
-
Page 27: Connecting And Powering
C O N N E C T I N G A N D P O W E R I N G Connecting and Powering Cables Analog XLR vs. RCA. Balanced cables are inherently transparent and immune to the effects of cable length and noise pickup. This is why they’re used in practically every studio that records and engineers musical recordings, and are also used in live performance venues where cable runs can be hundreds of feet long. - Page 28 C O N N E C T I N G A N D P O W E R I N G Power The power cords carry current for the amplifiers as well as the bias supplies that charge the electrostatic panel membranes. The amplifiers draw substantial current on major transients, such as hard bass drum hits when the volume is way up.
-
Page 29: Airlayer
A I R L A Y E R airLayer Description The Valentina/zA2.1A speakers are very directive in the vertical, and rather directive in the horizontal. This serves to minimize the involvement of the room, thereby making setup easier, and maximally conserving the recorded ambiance and the precision of the image. - Page 30 A I R L A Y E R Fig. 2 airLayer level control Note that the bezel is marked in minus dB, from minus infinity, namely off, to 0 dB, namely all the way up. In a typical room, a setting of -12 dB to -10 dB is generally appropriate. In the usual setup, with the side walls a few feet away, a setting of -10 dB is a good place to start.
-
Page 31: Backward Tilt
T I L T Backward Tilt Valentina A8 speakers are very directive in the vertical. There is thus about a 9” [22 cm] range of ear height that will experience nearly full spectrum sound, e.g., ±3 dB to 15 kHz. - Page 32 T I L T Back tilt details There are two electrostatic transducer panels behind the central, rectangular grill. Each is 7” wide x 8” tall. They’re mounted one above the other. They are canted relative to one another, meeting at a 6° angle, that is, one is tilted 3° upward compared to the face of the baffle, and the other 3°...
- Page 33 T I L T Not enough tilt The first diagram illustrates the situation when the speaker is aimed exactly at the ears. In this case, each panel is aimed 3° above or below straight at the ears. This causes some response droop in the top octave, but otherwise the curve is pretty flat.
- Page 34 T I L T The next diagram illustrates the ideal tilt angle for the 38" [97 cm] ear height at 9' [275 cm] distance shown. This is where the aim is midway between having either the central axis or the lower panel aimed directly at the ears, which is how the speakers are shipped. The gentle roll-off in the treble response is a deliberate feature of the active version's equalization.
- Page 35 T I L T Of course, these deviations are still well within what is generally accepted as an adequate ±3 dB response flatness, and the narrow bandwidth smoothness remains impeccable (no peakiness). While the effect of this degree of tilt will be undetectable to most people, just possibly making the speakers sound slightly dark, I consider it worth avoiding, nonetheless.
-
Page 36: Setup Details
S E T U P D E T A I L S Setup Details Stereo Image The stereo image will be usually best when an equilateral triangle is created by the speakers and the listening position. On the other hand, there is a strong argument that this angle was simply made up for no good reason other than memorability, and everyone should use whatever they want. - Page 37 S E T U P D E T A I L S this is to leave the speaker turned off for 15 minutes or so, turn the control all the way down, then increase the level until you are satisfied. Exaggerated Bass If you find that it is necessary to place the speakers very near walls or into corners, the bass will be reinforced by the nearby surfaces.
- Page 38 S E T U P D E T A I L S Here’s the procedure: • Set one speaker into a corner of the room. If your main speakers are too hard to move around, this could be any speaker, as long as its woofer(s) are about the same height as the one(s) in your main speakers.
-
Page 39: Fuse Replacement
F U S E Fuse replacement The fuse is accessed by liberating the fuse drawer located beneath the power inlet. There are two tabs that can be easily piched and pulled outward. There’s a spare fuse at the front of the drawer, along with the working fuse at the back. Fuse drawer closed Fuse drawer open... -
Page 40: Specifications And Features
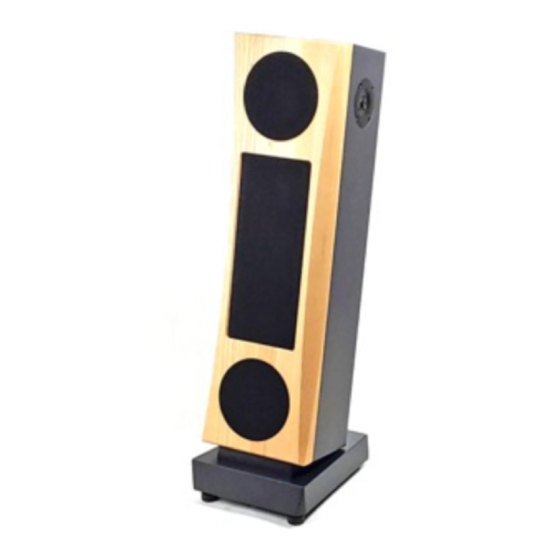
S P E C I F I C A T I O N S A N D F E A T U R E S Specifications and Features Frequency response, on axis, ±3 dB • 30 Hz - 20 kHz in medium to large rooms 20 Hz - 20 kHz in small rooms Maximum continuous SPL from pair at sweet spot •... - Page 41 S P E C I F I C A T I O N S A N D F E A T U R E S Inputs • Analog Balanced XLR in and through Single ended RCA in and through Digital AES (balanced XLR) Optical S/PDIF (TOSLINK) Coax RCA S/PDIF...
- Page 42 S P E C I F I C A T I O N S A N D F E A T U R E S Driver configuration • 2.5 way, WTW (Woofer - Tweeter - Woofer) quasi-line Woofer radiation pattern mates well to electrostatic array Reduces room mode coupling, eases placement Excellent phase alignment for image focus Vertical image stability...
- Page 43 S P E C I F I C A T I O N S A N D F E A T U R E S Sealed --fast woofer transient response, low group delay, tight integration with electrostatics Walls high mass, 1” thick [25 mm], well damped, well braced; negligible vibration 2.5”...
- Page 44 S P E C I F I C A T I O N S A N D F E A T U R E S Dimensions • Speaker enclosure: 36" tall x 10.2" wide x 8.9" deep [91 cm tall x 26 cm wide x 23 cm deep] Plinth: 12"...
-
Page 45: Frequently Asked Questions
Hypex Filter Designer. In addition to creating presets, you can control many functional aspects of the amplifier with this software. WARNING: JansZen will not be held responsible for, and the warranty will not cover damage to the amplifiers, signal circuitry, or drivers that may have been the result of parameter changes made by way of HFD. - Page 46 Since the Valentina A8 can be connected by several types of cable, here are some general notes about each of those: Digital cables Digital RCA (coaxial S/PDIF).
- Page 47 F A Q Analog cables RCA (single-ended, sometimes called unbalanced). These are appropriate in general for runs of less than 15 feet found in most home systems. In general, the shorter the run, the better. Very long runs can be problematic, because with some sources, the aggregate cable capacitance can roll off the highs, and noise pickup can become a problem, since noise immunity relies only on shielding, which can’t be perfect.
- Page 48 F A Q XLR (balanced). If you have runs longer than about 15 feet, balanced cables offer superior noise immunity, while the usually higher current available from a balanced output prevents cable loading from affecting frequency response. They also will not form ground loops.
- Page 49 F A Q by relying on the DAC’s volume control, after turning the speakers’ volume up to maximum. The difference will most probably not be perceptible, but may be of interest to you, nonetheless. Q: Is there any point in using a line conditioner or regenerator with these speakers? A: No.
-
Page 50: Troubleshooting
T R O U B L E S H O O T I N G Troubleshooting Problem: One speaker is not making sound. Causes: There are four scenarios where this can happen. 1) If a power interruption has occurred, and possibly under other conditions, the left speaker can come up with its volume set to -96 dB, which mutes it. - Page 51 T R O U B L E S H O O T I N G 4) The quiet speaker’s fuse has blown. In this case, please refer to the section on page 36 about fuses. Problem: There’s a delay when I start playback before sound comes out of the speakers. Solution: Please refer to the section starting on page 20 about input selection.
-
Page 52: Warranty
3. Systems or components in need of repair or replacement during these periods will be repaired or replaced at no cost to the owner, or the purchase price refunded. JansZen will be the sole determiner of which action is taken. - Page 53 IV. Satisfaction warranty. If the buyer wishes to return the speakers within 30 days of acceptance for any reason, they may be shipped to JansZen at the buyer's cost in their original condition and packing materials. If there is no damage traceable to the owner, the refund will be in full.
Need help?
Do you have a question about the Valentina A8 and is the answer not in the manual?
Questions and answers