Table of Contents
Advertisement
Quick Links
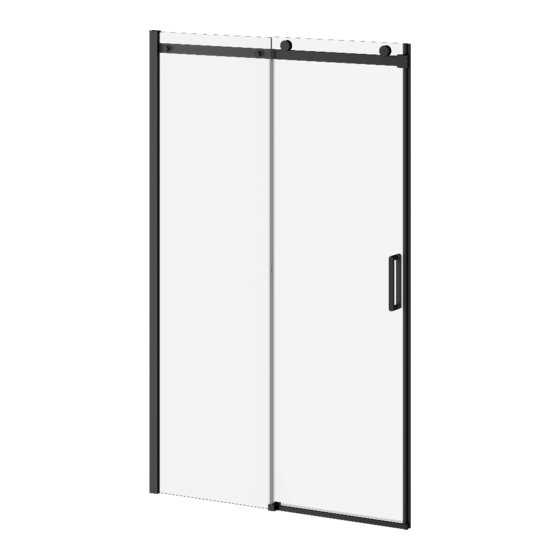
KONCEPT-II
MC/TM
(Réversible / Reversible)
Installation en alcôve/
Alcove Installation
Porte de douche coulissante en alcôve
avec panneau fixe et panneau mobile (48'' ou 60'')
Alcove sliding shower door with fixed panel
and mobile panel (48'' or 60'')
Porte de douche coulissante en alcôve avec panneau
fixe et panneau mobile (48'' ou 60'')
avec barre à serviette
Alcove sliding shower door with fixed panel and mobile
panel (48'' or 60'') with towel bar
www.KaliaStyle.com
Instructions d'installation - Garantie
Installation Instructions - Warranty
Numéro de série/Serial number
Conserver ce guide après l'installation car il contient des informations utiles pour le service et la garantie.
Keep these instructions after you have finished the installation, it contains useful information regarding service and warranty.
05/20
104940_RevC
Advertisement
Table of Contents

Subscribe to Our Youtube Channel
Related Manuals for Kalia KONCEPT-II DR1735 Series


Summary of Contents for Kalia KONCEPT-II DR1735 Series
- Page 1 KONCEPT-II MC/TM (Réversible / Reversible) Installation en alcôve/ Alcove Installation Porte de douche coulissante en alcôve avec panneau fixe et panneau mobile (48’’ ou 60’’) Alcove sliding shower door with fixed panel and mobile panel (48’’ or 60’’) Porte de douche coulissante en alcôve avec panneau fixe et panneau mobile (48’’...
- Page 2 Merci d’avoir choisi Kalia ! Thank you for choosing Kalia! Merci d’avoir choisi un produit Kalia et de faire confiance à Thank you for choosing a Kalia product and for placing your notre entreprise. trust in our company. Kalia a une philosophie d’affaires basée sur des valeurs Kalia has a business philosophy based on solid core values fondamentales dont l’innovation et l’excellence ainsi qu’un...
-
Page 3: Renseignements Importants
2” x 4” vis-à-vis les montants muraux de la porte ou utiliser Kalia reserves the right to make any changes to the design of des ancrages appropriés au type de revêtement mural. the product, without notice. Use the installation instruction supplied with the product. -
Page 4: Schéma Des Pièces
INSTALLATION EN ALCÔVE / ALCOVE INSTALLATION 48’’ & 60’’ DR1735-XXX-XXX (48’’) / DR1736-XXX-XXX (60’’) Schéma des pièces Parts Diagram Ouverture Ouverture à gauche/ à droite/ Left opening Right opening 3C 3D Barre à serviette/Towel bar DR1735/DR1736-XXX-XXX-001 Outils fournis/Provided tools IMPORTANT Ne pas s’appuyer sur la barre à... -
Page 5: Liste Des Pièces
page INSTALLATION EN ALCÔVE / ALCOVE INSTALLATION DR1735-XXX-XXX (48’’) / DR1736-XXX-XXX (60’’) Liste des pièces Parts List Numéro de pièce Sous-Assemblage Qté totale Description Part Number Sub-assembly Total qty COMPOSANTES COMMUNES / UNIVERSAL COMPONENTS 104817-XXX Montant mural 1957mm (77'') / Wall jamb 1957mm (77'') 104818 Joint de serrage en PVC / PVC spline 1953mm (76-7/8'') Déflecteur vertical d'eau à... - Page 6 104872-XXX Roulettes en nylon et roulement à billes / Nylon roller and bearing 104870-XXX 104873-XXX Capuchon intérieur rond de la roulette / Round roller interior decorative cap 104874 Tampon de protection en PVC avec trou / PVC protective pad with hole through 104875-XXX Bague à...
- Page 7 Outils et matériaux nécessaires/Necessary Tools and Materials Mèches 6 mm (1/4’’) et/ou Lime à métal/File 3 mm (1/8’’)/ 6 mm (1/4”) or 3 mm (1/8”) drill bits Perceuse électrique/ Electric drill Couteau utilitaire/ Scie à métal/Metal saw Utility knife Boîte à onglet/Miter box Calfeutrant clair Tournevis/Screwdriver au silicone/Clear...
- Page 8 INSTALLATION EN ALCÔVE / ALCOVE INSTALLATION Valider la conformité de l’emplacement Installation du montant mural/ (Installateur qualifié, recommandé)/ Validate the installation conformity of the base Wall jamb installation (Qualified installer is recommanded) Installation à droite/ Right installation IMPORTANT Afin de faciliter l’installation de capuchon, insérer et retirer les vis #59./...
- Page 9 INSTALLATION EN ALCÔVE / ALCOVE INSTALLATION Installation du panneau fixe/ Préparation du rail/ Fixed panel installation Rail preparation IMPORTANT Déposer le panneau mobile sur un carton./ Place mobile panel on cardboard. 3B 3C 3D Installation du capuchon et du joint de serrage en PVC/ Cap and PVC spline installation Clé...
-
Page 10: Rail Installation
INSTALLATION EN ALCÔVE / ALCOVE INSTALLATION Installation du rail/ Rail installation Clé Allen 4 mm Ø 6 mm Allen Key 4 mm 1/4’’ Clé Allen 4 mm Clé Allen 3 mm Allen Key 4 mm Allen Key 3 mm IMPORTANT S’assurer que le panneau fixe est parallèle à... - Page 11 INSTALLATION EN ALCÔVE / ALCOVE INSTALLATION Installation du guide du bas Installation de la barre à serviette (en option)/Towel bar installation (optional) Bottom guide installation IMPORTANT S’assurer que le panneau fixe est parallèle à la base./ Fixed panel must be parallel to the edge of the base.
- Page 12 INSTALLATION EN ALCÔVE / ALCOVE INSTALLATION Assemblage du panneau mobile/ Installation du panneau mobile/ Mobile panel installation Mobile panel assembly Poignée extérieure/ Exterior handle Poignée intérieure/ Interior handle Ajustement du panneau mobile/ Mobile panel adjustment Clé Allen 2.5 mm Allen Key 2.5 mm Clé...
- Page 13 INSTALLATION EN ALCÔVE / ALCOVE INSTALLATION Installation du seuil / Sécurisation du panneau mobile/ Sill installation Securing the mobile panel Clé Allen 4 mm Allen Key 4 mm Clé Allen 2 mm Allen Key 2 mm Compléter l’installation du guide du bas/ Complete installation of the bottom guide 5 mm (3/16”)
- Page 14 INSTALLATION EN ALCÔVE / ALCOVE INSTALLATION Installation des scellants Installation des déflecteurs verticaux/ verticaux avec aimant/PVC vertical seals Vertical deflectors installation with magnet installation Mur/Wall IMPORTANT Aligner avec le bas des panneaux./Align with the bottom panels. IMPORTANT Aligner l’aimant autocollant (#9) en haut avec le PVC aimanté (#8).Retirer le ruban double face.
-
Page 15: Entretien Et Nettoyage
Pour éviter les bris et vous assurer d’un fonctionnement Caulking optimal, il est nécessaire de suivre ces recommandations lors de l’entretien de votre produit Kalia. Les dommages par un traitement inapproprié ne sont pas couverts par la garantie Kalia. - Rincer à l’eau propre et essuyer avec un chiffon de coton doux, une éponge ou une raclette après chaque utilisation. -
Page 16: Garantie
Dans tous les cas, Kalia inc., ne peut être tenue responsable de tout montant excédant le prix d’achat du produit qui a été déboursé... - Page 17 (1) year from the initial date of purchase by the owner/ end-user, contractor or builder from an authorized dealer. If the product is sold by Kalia Inc. as a display item, a one (1) year warranty applies.
- Page 18 INSTALLATION EN ALCÔVE / ALCOVE INSTALLATION Notes 104940_RevC...
- Page 19 INSTALLATION EN ALCÔVE / ALCOVE INSTALLATION Notes 104940_RevC...
- Page 20 Imprimé en Chine/Printed in China 104940_RevC...
Need help?
Do you have a question about the KONCEPT-II DR1735 Series and is the answer not in the manual?
Questions and answers