Advertisement
Quick Links
구성품 · Component
Bolt A X 14EA
Bolt B X 16EA
Stand-Off X 16EA
PCI Slot X 1
Cable tie X 2EA
HDD Guide X 2Set
VGA card 장착 · VGA card installation
VGA card를 장착하여 볼트로 고정합니다.
Install the VGA card and fix with the bolt.
2.5" SSD/HDD 장착 · 2.5" SSD/HDD installation
그림과같이 2.5" SSD/HDD를 장착할 수 있습니다.
2.5" SSD/HDD can be installed as depicted in the picture.
Power Supply 장착 · Power Supply installation
Power Supply를 장착하여 볼트A로 고정합니다.
Install the Power Supply and fix with bolt A
Bolt A
Manual
ODD 설치방법 · ODD installation
전면 커버를 분리하고 ODD를 장착하여 볼트B로 고정합니다.
볼트 고정이 끝나면 전면 커버를 다시 조립합니다.
Remove the frontal cover and install ODD and fix it with bolt B.
After fixing, reinstall the frontal cover
VGA Card
품질보증및 A/S 안내
1. 제품 보증기간: 제품 구입일로부터 1년(단, 구입 영수증이 있을 때)
2. 무상A/S : 품질 보증기간 내에 제품 자체 성능상의 하자 및 불량 발생시
3. 유상A/S : 품질 보증기간 이후에 제품 사용상의 문제 발생시. 단, 아래와 같은 사항에 대해서는
품질 보증기간 이내라도 무상A/S 처리가 되지 않으며 소비자 부담으로 처리됩니다.
☞ 본 사용 설명서에 명시된 설치 전 주의사항 및 유의사항을 지키지 않은 경우
☞ 사용자의 고의나 과실 및 부주의로 인하여 변형/파손/파괴된 경우
☞ 사용자의 임의 개조에 의한 변형 및 고장이 발생된 경우
4. 교환 및 환불
1) 교환 : 제품 구입일로부터 1개월 이내에 제품 자체 성능상의 하자 또는 불량 발생시
동일 제품으로 교환하여 드립니다.
2) 환불 : 제품 구입 후 10일 이내에 제품 및 포장의 훼손이 없는 경우에만 구입처를 통해 환불
받으실 수 있습니다.
(단, 제품 구입시 발급해 드린 영수증을 제시하셔야 환불 가능합니다)
5. A/S
1) 운영시간 : 평일 09:00~18:00 (공휴일, 토·일요일 휴무)
2) 접수 방법
① 방문 접수 : 직접 방문할 경우 사전 연락 후 방문해 주시기 바랍니다.
② 택배 접수 : 택배(우편)를 이용하실 경우 아래의 주소로 성함, 주소, 연락처 및 불량 상태를
적은 메모지를 넣어서 보내주십시오.
3) 접수처
◆ 총판 (아이구주): 서울시 용산구 한강로2가 16-1선인상가 21동 3층 126-128호
6. 제품 운송비용
1) 무상A/S의 경우 : 전액 당사가 부담합니다.
2) 유상A/S의 경우 : 당사로 보내시는 비용은 고객이 부담하시고, A/S처리 후 발송하는 비용은
3) 보증기간 이후 : 전액 고객 부담입니다.
Bolt A
ODD
Bolt B
☏070-8250-1428
당사가 부담합니다.
마더보드 설치 · Motherboard installation
Stand off를 케이스에 고정한 후 마더보드를
장착하여 볼트B로 고정합니다.
Fix Stand off onto the case and install the Motherboard.
Afterwards, fix it with bolt B.
전원 및 I/O Port 케이블은 마더보드 매뉴얼을 참고하여 연결하십시오.
Refer to the Motherboard manual when connecti n g the Power and I/O Port cabl e .
Power Button
I/O Port
3.5"HDD 장착 · 3.5" HDD installation
3.5" HDD를 장착할 경우 그림과 같이 HDD Guide를 사용하십시오.
When installing 3.5 HDD, use the HDD Guide just like in the picture.
Bolt A
C
조립 및 사용 중에 시스템 이동 시 반드시 C위치를 볼트A로 고정해 주십시오.
When moving the system while usage or installation, fix the location of the C with bolt A.
A1
USER MANUAL
* 본제품을 사용하시기 전에 사용자설명서를 주의 깊게 읽어주십시오.
* 제품의 이관 디자인및 규격은 제품의 품질 향상을 위하여 소비자에게 예고없이 변경될 수 있습니다 .
* To ensure safe and easy installation, please read the following precaution.
* Product design and specifications may be revised to improve quality and performance.
Bolt B
HDD Guide
3.5"HDD
Ver. 140807
Advertisement

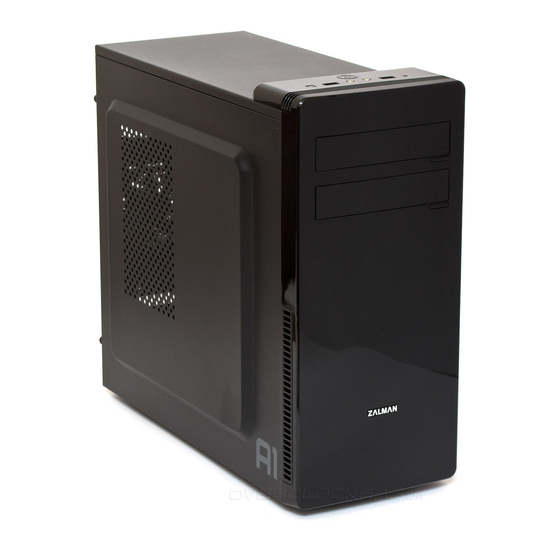
Summary of Contents for ZALMAN A1
- Page 1 구성품 · Component Power Supply 장착 · Power Supply installation 마더보드 설치 · Motherboard installation Power Supply를 장착하여 볼트A로 고정합니다. Stand off를 케이스에 고정한 후 마더보드를 장착하여 볼트B로 고정합니다. Install the Power Supply and fix with bolt A Fix Stand off onto the case and install the Motherboard. Afterwards, fix it with bolt B.
- Page 2 Composants · Componentes · Componente Montage d’alimentation · Instalación de fuente de potencia Installation de carte mère · Instalación de tablero · Instalação do fornecimento de energia · Instalação da Motherboard. Placer l’alimentation et la fixer avec les boulons A. Après avoir fixé...


Need help?
Do you have a question about the A1 and is the answer not in the manual?
Questions and answers