Table of Contents
Advertisement
Advertisement
Table of Contents

Related Manuals for Rivera Sedona


Summary of Contents for Rivera Sedona
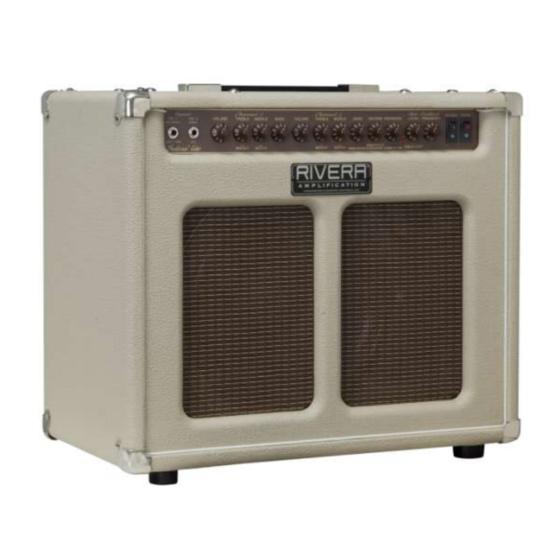
- Page 1 O W N E R’S M A N U A L NEW SEDONA LITE...
-
Page 2: Packing Materials
It’s as simple as that. And it’s exactly why you bought your RIVERA amp. For that, we thank you, and we’re confident that you’ll enjoy your amp for years to come. -
Page 3: Warranty
1. This warranty will be honored only on the presentation of the original proof of purchase. 2. Transportation of the product to the service station or RIVERA factory is the responsibility of the user unless specifically stated otherwise in this warranty. RIVERA will pay for return shipping charges if the repairs are covered by the warranty. -
Page 4: Before You Plug In
Turn on the Standby switch. Now it’s time to rock. After you’ve played with your Sedona for a while, check out the rest of the manual for some good tips on getting the most out of your amp. - Page 5 “Clean Electric” Plug into input 2 for C HANNEL If using a Taylor T5 (T5’s have a balanced output) use input 1 for Channel 1 with a TRS to TRS cable. “Clean Acoustic” Turn on Tweeter (switch is located on the rear panel next to the tweeter jack). (If using a Taylor with the Expression system plug into Input 1 for Channel with TRS to TRS cable) R O N T A N E L...
- Page 6 Channel 2-Unbal input This is a normal non-balanced input for unbalanced instruments. Most electric and acoustic guitars have a non-balanced output. Channel 1 Channel 1 Both channels can be used simoultaneously. This can allows you to have separate EQ for you Mic and your Guitar in Channel 2. Channel 1 should be used for your Mic or Taylor ES-equipped guitars for maximum volume and tone when balanced.
- Page 7 Reverb In the tradition of classic amps, your Sedona Lite is equipped with a spring reverb. Its single-knob operation controls its effect on the signal coming from both preamp channels. Specially buffered circuitry drives the reverb, keeping your tone intact...
- Page 8 Anti-Feedback Equalizer This works with both channels simultaneously The Sedona Lite is provided with a special circuit that can reduce the tendency or amount of resonant feedback that commonly occurs when amplifying acoustic instruments. This is possible by enabling a dip or cut in the frequencies that are amplified, with the frequency and amplitude of the dip continuously variable (like a parametric equalizer).
-
Page 9: Rear Panel
These outlets have a grounding pin in addition to the normal line and neutral pin. The power cord supplied with your Sedona has a 3-pin plug. Do not cut off or damage the ground pin. If the available electrical outlet is of the older 2-pin type, use a suitable ground-lift adapter. -
Page 10: Speaker Outputs
Always use the correct fuse value when replacing the HT Fuse. If the Mains Fuse or the HT Fuse repeatedly blows, refer your amp to your local RIVERA dealer or contact us at (818) 767-4600 or support@rivera.com for further service assistance. -
Page 11: Setting Effects Loop Levels
Your Sedona’s Effects Loop is designed to give you the best match between the amp and the processor by allowing you to set the level of the signal going to the effect, as well as the one coming back. -
Page 12: Speaker System
Using a Y cord, connect the Speaker 1 with the internal jack and speaker cable into the Full range input of the Sedona extension cabinet. Then using a Y cord, connect the Tweeter output of the amp with the internal Jack and speaker cable to the Tweeter input of the Sedona cxtension cabinet. This will allow you to turn the tweeter on or off in both in the combo and the extension cabinet. -
Page 13: Slaving A Second Amp Or Power Amp
Connect a shielded cord from your Sedona’s Effects Loop Send to the power amp input or Effects Loop Return on a second amp. All volume and tone changes made on the Sedona will affect what comes out of the second amp. -
Page 14: Troubleshooting
In addition, set your effects/dry signal blend in the signal processor. If you want to use a volume pedal, the line between the first Sedona’s Effects Loop Send and the signal processor’s input is an excellent location. Always use high-quality shielded cables for these connections. - Page 15 If you don’t have a flight case for travel, use the box it came in, or wrap it in something thick, soft, and protective. RIVERA amps are built to take a lot, but why push it? If you treat your amp well, it will treat you (and your guitar’s tone) well.
-
Page 16: B I A S A D J U S T M E N T
Sedona Chassis from its cabinet, as high-voltage shock hazard exists inside this chassis. Internal to the Sedona and located on the main PC board is a potentiometer for adjusting the bias. The DC idle current can be measured between Pin 8 of the EL-34 tubes and the chassis ground. The cathodes of the EL-34s are wired together and are switched by an isolated standby switch located in the #1 speaker jack labeled “Speakers.”... -
Page 17: Checking For Microphonic Tubes
Location Type Preamp tubes V1 12AX7 V2 12AX7 Power Tubes V3 EL-34 V4 EL-34 Here’s a brief description of what each tube does: V1 Input buffer and tone control driver for Channel 1 & 2 V2 Phase inverter driver tube for the power amp section V3 &... -
Page 18: Power Amp Tube First Aid
Power amp tube first aid Like preamp tubes, power amp tubes can go bad or wear out. Your Sedona Lite has two power amp tubes, and if one goes bad, they should both be replaced. This assures optimum output and tone. - Page 19 Coupling the extension cable with the FS-7 footswitch’s 5-meter-long cable provides for a 15- meter total length. Up to two extensions may be used end to end between the Sedona and the FS-7. P E C I F I C AT I O N S...
Need help?
Do you have a question about the Sedona and is the answer not in the manual?
Questions and answers