Behmor 1600 Plus Replacement Manual
Front panel replacement-
Hide thumbs
Also See for 1600 Plus:
- Operation manual (17 pages) ,
- Cheat sheet (2 pages) ,
- Cheat sheet (2 pages)

Related Manuals for Behmor 1600 Plus


Summary of Contents for Behmor 1600 Plus
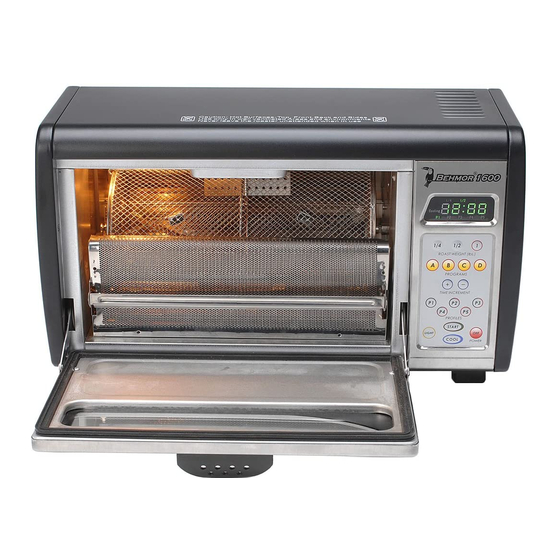
- Page 1 Front Panel Replacement- 1600 Plus Step 1- UNPLUG THE ROASTER 120 Country Club Dr. Suite 22-L Incline Village, NV 89451 www.behmor .com...
- Page 2 120 Country Club Dr. Suite 22-L Incline Village, NV 89451 www.behmor .com...
- Page 3 Before removing the front panel, take a moment and look at the front of the roaster specifically the gap between door and panel. You’ll refer back to this mental note later. Start with the three screws that go along the side of the roaster. 120 Country Club Dr. Suite 22-L Incline Village, NV 89451 www.behmor .com...
- Page 4 Recheck your two connections. Make sure everything is properly re-inserted. Plug in the roaster and retry. If you are without a display, unplug the roaster and contact us immediately at tech@behmor.com Subject: front panel replacement 120 Country Club Dr. Suite 22-L Incline Village, NV 89451 www.behmor .com...
- Page 5 Left panel first (remember the small screw inside), then right side panel. Make sure in each instance you have all of the front and side guides going into their respective holes/openings. Don’t forget to reattach the side panel DC Fan. 120 Country Club Dr. Suite 22-L Incline Village, NV 89451 www.behmor .com...
Need help?
Do you have a question about the 1600 Plus and is the answer not in the manual?
Questions and answers