
Subscribe to Our Youtube Channel
Related Manuals for E.T. Systems Drive 300


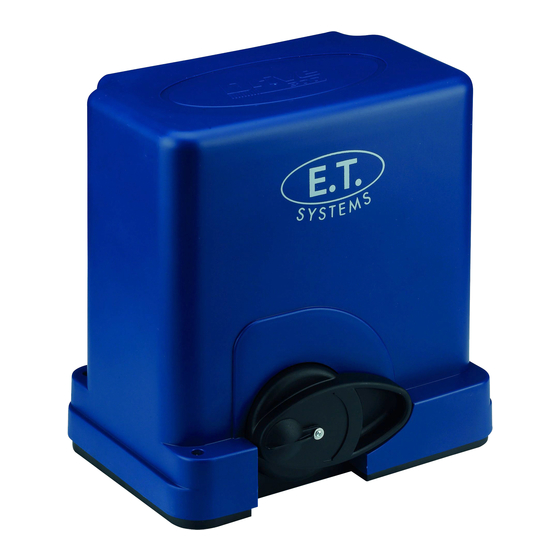
Summary of Contents for E.T. Systems Drive 300
- Page 1 ET DRIVE300 INSTALLER 2016.001.001 Installer Instructions Low traffic 300kg Slide Gate Operator www.et.co.za...
- Page 2 Introduction. Page 3 Be Safe! Instructions, warnings and obligations. Page 4 Technical specifications. Page 5 Component identification and operator dimensions. Site preparation. Page 6 Gate preparation and mechanical requirements. Page 7 Duty cycle. Page 7 Motor positioning. Page 8 Cabling requirements. Hardware installation - Mechanical.
- Page 3 Be Safe! WARNING!! These are the general safety obligations for the installers and users of ET Systems automation equipment. A copy of this document also appears in the user instructions. Those instructions must be issued to the responsible end user during the handover and instruction meeting.
- Page 4 5. It is highly recommended that a set of safety infra-red beams be used in conjunction with this product. The safety beams must be installed in such a way that the product is prevented from running when anything is in the path of the door or gate. 6.
- Page 5 Component identification and descriptions. Diagram Diagram Description Description number number Control card Baseplate Dashboard 220V connector Plug-in terminal connectors Manual release Manual release monitoring reed switch Manual release lock Battery Electric motor Transformer housing Electric motor brush ports Mounting bolts Revolution counter ring magnet Gearbox Ends of travel limits, reed switch...
- Page 6 Gate preparation and mechanical requirements. BEFORE ATTEMPTING TO INSTALL A SLIDE GATE OPERATOR, PLEASE BE CERTAIN YOU HAVE READ AND UNDERSTOOD THE FOLLOWING TO ENSURE CONTINUED SATISFACTORY SAFE SERVICE FROM THIS PRODUCT: The following are points to note before installing your new slide gate operator: Gate mechanics.
- Page 7 Duty cycle capabilities guideline of the ET Drive series motor models: Model Gate Mass Starting resistance Rolling resistance Max Duty Cycle Drive 300 ≤ 300kg ≤ 30kgf ≤ 24 kgf Where to position the gate motor. Liquid ingress: The ET Drive series motor models all carry an ingress protection rating of IPX4. This means they are protected from splashing water. They are not water tight as there are sensitive electronic and electrical circuits that require uninhibited airflow to remain cool and dry.
- Page 8 • The Drive 300 motor is designed to facilitate 1 x 20mm conduit going directly into its housing from below. If more cabling needs to be routed to the motor, we suggest that a weatherproof electrical box be installed as a distribution box. All of the circuits can then be extended to the distribution box and terminated there.
- Page 9 Baseplate and fastener kit assembly. Diagram Description number M10 Machine nuts. M10 Flat washers. M10 J-Bolts for concrete casting method. Cabling conduit piping. Baseplate. Installing the baseplate. There are a number of different fastening techniques that can be used to fasten the baseplate in position. The standard kit is supplied with J-bolts so that the baseplate can be cast in concrete.
- Page 10 Cabling conduits height: Trim the conduits o where the ends are level with the top of the baseplate. If any part of the conduits protrude above the top of the basepate, it will be di cult to adjust the position of the gearbox on top of the baseplate.
- Page 11 Mounting the operator onto the baseplate. Removing the cover: The cover is secured in place by means of four screws. One of which is secured beneath the manual override lever. Unlock and lift the manual override. Using a Philips ® screwdriver remove the Lift the main cover to remove it.
- Page 12 Installing the rack. Rack to pinion spacing. Correct. Incorrect! Incorrect! The driving surfaces of each tooth are 1 to 2mm This will cause skipping of teeth at the slightest This will cause unwanted rolling resistance apart. Allowing for slight variance in the height resistance to the gate travel, resulting in the especially in colder conditions.
- Page 13 • Move the gate towards the open position. Far enough that you can access the last mounting slot at the opposite end of the length of rack to the end already fastened. Fasten the next “TEK” screw here while the rack still rests atop the pinion. •...
- Page 14 Electrical and electronic installation and setup. As a gate motor vibrates when in use, it is strongly recommended that only multiple strand flexible cables be used. Before closing the unit, always remember to double check that all connections are securely made, that there are no stray strands flaring out that can short circuit against other adjacent connections or bared wires and that no cables will be pulled loose when the cover is replaced on the unit.
- Page 15 Wiring and termination of the control card. Manual release monitoring switch. 2A Aux Relay Fuse AUX Rly LED 10A Motor Fuse Gate closing Gate opening Limit LED Motor Limit Aux Relay Ancilliary connections VAC Supply used Auxiliary Earth relay for use in a courtesy 29Vac light, electric...
- Page 16 Wiring and termination of the control card - Auxiliary relay examples. Magnetic Lock Example Strike Lock Example AUX Relay AUX Relay IN4007 back IN4007 back Battery back-up Battery back-up EMF diode. EMF diode. power-supply rated power-supply rated to match the lock to match the lock load.
- Page 17 Using the control card display and dashboard. The Drive 300 is equipped with an LED display and interactive keys for simplified programming and diagnostics. All setup of the various features requires that the control card dashboard be used. Below are the functions of each key on the dashboard.
- Page 18 Control card programming and setup.
- Page 19 Setting up the gate runtime. (Mandatory) Before continuing with the runtime setup ensure the limit actuator has been installed correctly as per page 16 in this manual. Begin with the gate midway in its travel. From Ready status NB. To speed up the gate while running during this procedure, press and hold either the <...
- Page 20 Selecting a safety level. This adjusts the force level, over and above the nominal gate resistance, needed to trigger the safety overload routines. From Ready status Level 1 being the most sensitive and 8 being the least sensi- tive. The factory default is level 3. Response Action Description...
- Page 21 Selecting a BT operating mode and adjusting the BT auto-close time. The factory default is standard 3 step mode. The factory default auto-close time is 15 seconds. The timer range is 1 – 254 seconds. PLEASE NOTE!! A set of safety infra-red beams must be installed using the technique indicated in this manual before se- From Ready status lecting any of the auto-close modes.
- Page 22 Setting up the pedestrian open distance and pedestrian auto-close time. NB! The runtime setup must be completed first before the pedestrian setup can be attempted. The factory default pedestrian opening is 1000 mm. The factory default auto-close time is 2 seconds. The timer range is 1 –...
- Page 23 Receiver programming and setup. Setting up a new user. The gate can be in any position when performing this routine. Please note that if an ET BLU MIX © transmitter is being used and From Ready status not all of the buttons have been set to the same format, then the receiver will allocate 2 user addresses for the various buttons.
- Page 24 Receiver programming and setup. Setting up a new user. (Corresponding 4 function learn option) From Ready status The gate can be in any position when performing this routine. Response Action Description Display Buzzer Gate To enter the program menu. Press and hold the Display and buzzer ...
- Page 25 Receiver programming and setup. Erasing a single user from the memory. From Ready status The gate can be in any position when performing this routine. Response Action Description Display Buzzer Gate To enter the program menu. Press and hold the Display and buzzer confirms.
- Page 26 Receiver programming and setup. Master erasing all users from the memory. From Standby status The gate can be in any position when performing this routine. Response Action Description Display Buzzer Gate To enter the program menu. Press and hold the Display and buzzer ...
- Page 27 Receiver programming and setup. Using the diagnostics feature. The gates can be in any position when performing this routine. From Ready status Response Action Description Display Buzzer Gate To enter the program Display and buzzer menu. Press and hold Not appicable.
- Page 28 Receiver programming and setup. Viewing the receiver version and information. “inF” The gates can be in any position when performing this routine. From Ready status Response Action Description Display Buzzer Gate To enter the program Display changes to menu. Press and hold “Prg”...
- Page 29 Switching the AC Monitoring and/or built-in charger on or off. The gate can be in any position when performing this routine. The factory default is: From Ready status AC Monitoring - On Charger - On Response Action Description Display Buzzer Gate To enter the program Display changes to...
- Page 30 Adjusting the length of the slow speed at the ends of travel. The gate can be in any position when performing this routine. From Ready status The factory default is: 200mm Response Action Description Display Buzzer Gate To enter the program menu.
- Page 31 Selecting the Auxiliary relay’s mode of operation. The gates can be in any position when performing this rou- tine. From Ready status The factory default is Lc1 Strike-lock mode. Response Action Description Display Buzzer Gate To enter the program menu. Press and hold the Display changes to “Prg”...
- Page 32 User manual reference - Collision sensing and safety overload routines Basic operating features. Page 7 In the case of the gate colliding with an obstruction, such as a person passing through the entrance way, the collision sensing will automatically detect the collision and the system will run a safety overload routine. If at anytime the gate collides four times consecutively with an obstruction without reaching either the closed or open position succesfully, the unit will initiate multiple collision lock-out.
- Page 33 Safety infra-red beams function. User manual reference - Basic operating Page 8 All modes except P.I.R.A.C. auto-close. features If the safety beam input has been switched on, the control card will constantly monitor to ensure a set of safety beams is installed. NB! A set of safety beams must be installed and the safety beam input must be configured .
- Page 34 “BT” Button triggers. Basic operating User manual reference - features Standard mode. Page 9 The BT functions are the primary full gate opening functions for motor vehicle access. There are two ways of activating the “BT” functions on this control card. Either via the hardwired BT input or the BT receiver channel. In Standard mode the gates respond to each BT trigger.
- Page 35 “BT” Button triggers. User manual reference - Basic operating Page 10 Simple auto-close mode. features The BT functions are the primary full gate opening functions for motor vehicle access. There are two ways of activating the “BT” functions on this control card. Either via the hardwired BT input or the BT receiver channel. Simple auto-close mode functions exactly the same as standard mode except that the gates will close automatically after the programmed BT auto-close timer has timed out.
- Page 36 “BT” Button triggers. Basic operating User manual reference - features Condominium auto-close mode. Page 11 The BT functions are the primary full gate opening functions for motor vehicle access. There are two ways of activating the “BT” functions on this control card. Either via the hardwired BT input or the BT receiver channel. In Condominium auto-close mode, all BT triggers are treated as open, keep opening, keep open or re-open triggers.
- Page 37 “BT” Button triggers. User manual reference - Basic operating Page 12 P.I.R.A.C. auto-close mode. features The BT functions are the primary full gate opening functions for motor vehicle access. There are two ways of activating the “BT” functions on this control card. Either via the hardwired BT input or the BT receiver channel. In P.I.R.A.C.
- Page 38 “PED” Pedestrian trigger. Basic operating User manual reference - features (With no safety beams installed) Page 13 The PED trigger is a higher security option and is used when access to or from the property is limited to exclude motor vehicles. In the case of no safety beams being installed then the pedestrian auto-close functionality is disallowed for safety.
- Page 39 “PED” Pedestrian trigger. User manual reference - Basic operating Page 14 (With safety beams installed) features The PED trigger is a higher security option and is used when access to or from the property is limited to exclude motor vehicles. If the safety beams are triggered while the gate is closing in pedestrian mode, the gate will only return to the preprogrammed pedestrian open position.
- Page 40 Auxiliary relay modes. Basic operating User manual reference - features Strike lock mode. Page 15 With Strike lock mode selected, the auxiliary relay will pulse momentarily, half a second before the gate opens. Whenever a lock is installed with the system, a separate battery backed up power supply matching the lock load must be installed. Failure to do this can damage the charger and battery of the control unit.
- Page 41 Auxiliary relay modes. User manual reference - Basic operating Page 16 Magnetic lock mode. features With Magnetic lock mode selected, the auxiliary relay will activate, half a second before the gate opens and remain active until half a second after the gate has closed again.
- Page 42 Auxiliary relay modes. Basic operating User manual reference - features Receiver relay mode. Page 17 With Receiver relay mode selected, the auxiliary relay will operate in exactly the same way as a single channel receiver would, whenever a trans- mitter button programmed into the “Relay” receiver function is pressed and released. Latch mode.
- Page 43 Auxiliary relay modes. User manual reference - Basic operating Page 18 Courtesy light mode. features With courtesy light mode selected, the auxiliary light will switch on as the gate begins opening and remain on for 3 minutes after the gate has closed.
- Page 44 Auxiliary relay modes. User manual reference - Advanced features Alarm modes. Page 19 Beam Tamper Alarm. In cases where the safety beams have been tampered with, the safety protocols will still allow the gates to open but will not allow the gates to close. This safety feature can be turned into a security risk by anyone with ill intention.
- Page 45 User manual reference - Positive close mode. Advanced features Page 20 With positive close mode activated, the gate will surge onto the closed stopper after seeing the closed limit. This feature is useful when installing an electric lock or when trying to ensure an electric fencing gate contact always closes when the gate is in the closed position.
- Page 46 User manual reference - Holiday lock-out mode. Advanced features Page 21 This feature is useful at times when access to the property needs to be disallowed to secondary level key holders, such as housekeepers or the gar- den service company, for extended periods of time. An example of when the holiday lock-out function would be useful is when the home owner is away on holiday.
- Page 47 User manual reference - Auto-close override/party mode. Advanced features Page 22 This feature is useful at times when the gate must be kept open for extended periods of time. When cutting the lawn on the pavement for instance. With Auto-close override/party mode active any trigger on any input will simply result in the control card beeping to indicate the gate is being kept open intentionally.
- Page 48 Status LED indications and buzzer guide. Description Visual confirmation Buzzer Reason Static off. None Gate fully closed. Flashing slow 1 second on and 1 None Gate running normally. second off. Static on. None Gate open. 1 x 1 second beep 2 x 0,5s flashes fol- every 15 seconds for AC mains off.
- Page 49 Display definitions and troubleshooting guide. Displayed on Definition. Solution. screen. In normal operating mode. Unit is standing by and ready for next instruction. Trigger to run a required routine. Charger powered down due to Vac mains Check 220VAC or 29Vac supply to the unit. interuption.
- Page 50 WARRANTY: All goods manufactured by ET NICE (Pty) Ltd carry a 12 month factory warranty from date of invoice. All goods are warranted to be free of faulty components and manufacturing defects. Faulty goods will be repaired or replaced at the sole discretion of ET NICE (Pty) Ltd free of charge. This warranty is subject to the goods being returned to the premises of ET NICE (Pty) Ltd.
Need help?
Do you have a question about the Drive 300 and is the answer not in the manual?
Questions and answers
Need help to programme INSTALLED ET DRIVE 300
To program the installed E.T. Systems Drive 300, follow these steps:
1. Ensure Proper Installation: Before programming, confirm that the limit actuator is installed correctly.
2. Access the Control Card: Use the control card display and dashboard for programming.
3. Set Up the Gate Runtime (Mandatory):
- Navigate to the runtime setup in the programming menu.
- Follow the instructions to configure the gate's operation time.
4. Select a Safety Level:
- Choose an appropriate safety setting for the installation.
5. Configure Safety Infra-Red Beams:
- Set up and test the infra-red safety beams if installed.
6. Adjust BT Operating Mode and Auto-Close Time:
- Select a BT mode.
- Configure the auto-close timing as needed.
7. Set Pedestrian Open Distance:
- Adjust the pedestrian opening distance according to requirements.
Use the programming menu quick reference guide for detailed steps.
This answer is automatically generated
how to program the remote gate opener