
Related Manuals for Schneeberger MINISLIDE MSQscale

Summary of Contents for Schneeberger MINISLIDE MSQscale
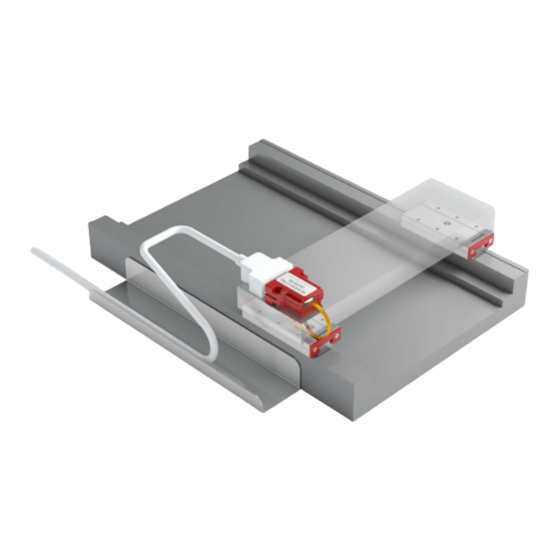
- Page 1 MINISLIDE MSQscale Mounting Instructions | Technical Information Mounting Instructions 2019...
- Page 2 Latest version of the catalogs You can always find the latest version of our catalogs in the Download area of our website. Disclaimer This publication has been compiled with great care and all information has been checked for accuracy. However, we can assume no liability for incorrect or incomplete information.
-
Page 3: Table Of Contents
Table of Contents Page number Safety Instructions Scope of Application Authorized Staff Intended Use General Safety and Protective Measures Environmental Protection Transport Configuration of the Base Structure General Surface Quality Flatness of the Mounting Surfaces Locating Height and Corner Radii Installation Methods Installation and Adjustment Guidelines for the Guideway Preparing for Installation Installing the Guideway Cleaning the Dimensional Scale Lubrication... - Page 4 Periodic Deviations Comparator Errors Sampling Rate Single-Ended Signaling Differential Signaling 7.10 Direction of Travel Application Tips Operating Conditions for the MINISLIDE MSQscale EMC Characteristics of the MINISLIDE MSQscale Magnetic Effects on the MINISLIDE MSQscale Troubleshooting Aligning the Digital Interface Module Error Description...
-
Page 5: Safety Instructions
Country-specific regulations, standards and guidelines for accident prevention must be observed. • The MINISLIDE MSQscale is sensitive to electrostatic discharge! The electronics can be damaged if precautions are not taken against ESD; ESD regulations should therefore be observed when handling ESD-vulnerable parts (EN 100015-1). -
Page 6: Configuration Of The Base Structure
MINISLIDE MSQscale perform best when mounted on a rigid structure with a high level of geometric accuracy. Inaccuracies in the guideway assembly surfaces have a negative impact on their overall accuracy, running behaviour, push force and service life. -
Page 7: Locating Height And Corner Radii
Configuration of the Base Structure Locating Height and Corner Radii Observance of the following height specifications for the locating surfaces guaran- tees secure absorption of force and sufficient clearance for the carriages. The carriages and guide rails feature a chamfer on the edges of the locating surfaces. The corner radii specified in the following table are maximum values which ensure that carriages and guide rails contact the mounting surfaces correctly. - Page 8 Configuration of the Base Structure 2.5.2. Installation complexity Locating surfaces simplify installation and reduce the effort necessary for aligning the guide rails. With careful manual alignment of the guideway, lateral locating sur- faces are not essential. When deciding on a method, installation complexity should be carefully weighed against design and manufacturing complexity. 2.5.3.
-
Page 9: Installation And Adjustment Guidelines For The Guideway
Installation and Adjustment Guidelines for the Guideway Preparing for Installation 3.1.1. Required tools and equipment • Fastening screws • Torque wrench • ESD protection kit • Oil stone • Cleaning materials 3.1.2. Preparing the locating surfaces • Check locating surfaces of the machine bed and mounting plate for shape and position accuracy • Clean all locating surfaces thoroughly. Remove ridges and surface irregularities with an oil stone •... -
Page 10: Installing The Guideway
Before installation, the guideway, machine bed, mounting plate and fastening screws must all be at room temperature. • The MINISLIDE MSQscale sensor is an electrostatically vulnerable component and is delivered in ESD-protective packaging. To ensure the sensor remains pro- tected, the ESD-protective packaging should not be removed during installation of the MINISLIDE MSQscale guideway. -
Page 11: Cleaning The Dimensional Scale
Installation and Adjustment Guidelines for the Guideway Cleaning the Dimensional Scale The MINISLIDE MSQscale is a closed system. Neither the sensor head in the carriage nor the dimensional scale on the guideway can be cleaned completely, and usually this is not necessary. If the dimensional scale is very dirty at the ends of the guideway, it can be wiped with a clean, lint-free cloth. -
Page 12: Installation Guidelines For The Measuring System
These installation instructions are not a substitute for ESD training. They only provide an overview of how to handle the MINISLIDE MSQscale. For installation of the MINISLIDE MSQscale, you need at least one ESD wrist strap with a ground lead or crocodile clip for grounding to the machine bed. -
Page 13: Mating The Interface Module And The Guideway
Installation Guidelines for the Measuring System Mating the Interface Module and the Guideway The rails and carriage of the MINISLIDE MSQscale are labelled with serial numbers. The number is next to the SCHNEEBERGER logo. Serial number on the carriage Serial number on the rail The interface modules are configured in factory and matched to the individual MINISLIDE MSQscale guideways. -
Page 14: Interface Module Installation Options
Installation Guidelines for the Measuring System Interface Module Installation Options Interface module with housing and D-Sub 9 connector Advantages: • Easy screw mounting with M3 screws • Stackable • Industry standard connector (D-Sub 9) for customer connection Stacked interface modules Interface module without housing, with D-Sub 9 connector Advantages: • Board can be clamped on the sides or inserted in guides (board edges allow for 1.5 mm insertion depth) •... -
Page 15: Connecting The Flexible Sensor Print To The Interface Module
Installation Guidelines for the Measuring System Connecting the Flexible Sensor Print to the Interface Module The ESD-protective packaging should not be removed during installation of the guideway so that the sensor remains protected. The ESD-protective packaging can only be removed once MINISCALE PLUS is grounded on the machine bed and the person is properly protected from ESD (e.g. by wearing an grounded wrist strap). Always use personal ESD equipment (wrist strap or equivalent) when removing the ESD protection bag Remove the glue strip A and the ESD protective packaging B... -
Page 16: Extension Installation (Ffc Cable)
For this, pay attention to the color coding. The metalized shield is covered by an insulation layer to prevent short circuits with other machine parts. FFC extension cable (top and bottom views) MINISLIDE MSQscale with FFC extension... - Page 17 Installation Guidelines for the Measuring System 4.5.1. Color coding To avoid confusion and mistakes when connecting the individual components, they have specific color coding. When connecting the cable, ensure that the same color is visible on the cable end and the connector. Adapter board with flexible sensor print and extension 4.5.2.
- Page 18 Installation Guidelines for the Measuring System Folding the FFC cable Single folds in the FFC cable are allowed for cable routing. This allows a large degree of design freedom. Folded FFC extension cable Strain relief • Rear mounting with an M3 screw threaded into the internal M3 thread of the spacer.
-
Page 19: Connecting A Customer-Provided Cable
Installation Guidelines for the Measuring System Connecting a Customer-provided Cable If the interface module is not mounted directly on a PCB, it must be connected to the controller by a customer-provided cable. 4.6.1. Recommendations for the customer-provided cable • In order to ensure maximum resistance to interference, a shielded twisted pair cable is recommended. A cable with additional shielding should be used if necessary. -
Page 20: Commissioning
Commissioning Signal Transmission To increase noise immunity, we recommend using differential signals conforming to the RS-422 standard. Balanced signal transmission with opposing signal phases can virtually prevent interference. Virtually all modern drive controllers support this option. Twisted pairs are used to transmit the signals (A+, B+, R+) and matching inverted signals (A-, B-, R-). -
Page 21: Pin Assignments
Commissioning Pin Assignments 5.2.1. Analog and digital interface module Male 9-pin D-Sub connector or solder terminals: Analog Signal Digital Signal Description Ua1- Quadrature signal Ground Ua2- Quadrature signal ERR NOT ERR NOT Error signal (Low = Error) Ua0 - Reference signal Ua1 + Quadrature signal + 5V DC + 5V DC Supply voltage... -
Page 22: Controller
The step size in the drive controller must be configured according to the selected resolution and type of edge evaluation. The standard resolution of the MINISLIDE MSQscale is 0.1 μm. A resolution of 1 μm or 10 μm can be ordered as an option. -
Page 23: Function Check
Commissioning Function Check The green LED will light up if the MINISLIDE MSQscale is correctly supplied with power. Interface module without MINISLIDE MSQscale Interface module with correctly connected MINISLIDE flexible sensor print. Both the green and red LEDs MSQscale flexible sensor print. The green LED lights light up. -
Page 24: Technical Principles
The short-wave deviation of is always within a range of +/- 0.6 µm. MINISLIDE MSQscale Measure length [mm] Maximum positive and negative long-wave deviation [+/- 3 μm] Absolute deviation of the dimensional scale Maximum positive and negative short-wave deviation of the sensor system [+/- 0.6 μm]... -
Page 25: Interpolation
Technical Principles Interpolation For distance measuring applications, interpolation means the signal conversion of analog input signals into digital output signals with a smaller signal period. This is necessary as counter readings and/or position readings cannot be generated directly from analog signals. The interpolation factor defines the ratio of signal periods from the analog input signal to the digital output signal. -
Page 26: Evaluation Of Digital Signals
Technical Principles Evaluation of Digital Signals The digital signals, consisting of the two incremental signals A and B and the reference signal R, are transmitted to the downstream electronics. This can be a simple display unit, a PC or a machine controller. The downstream electronics determines the position value from the digital signals by counting the signal edges. -
Page 27: Signal Frequency
Technical Principles Signal Frequency The signal frequency at the interface module output depends on the travelling speed and the resolution (digital module) or the increment of the dimensional scale (analog module). To ensure that no steps are lost, the maximum input frequency of the controller must be greater than the calculated maximum output frequency of the interface module. -
Page 28: Terms And Definitions
Terms and Definitions Interface Module In the interface module, the sensor data is converted into standardized analog signals (1 Vpp) or standardized digital signals (TTL). • The signals are amplified • Phase errors between the sine and cosine signals are corrected • The offset is compensated The digital interface module also includes an interpolator that converts the analog signals into digital signals. -
Page 29: Accuracy Class
Terms and Definitions Accuracy Class The accuracy class specifies the maximum expected measuring deviation of a sys- tem under the specified operating conditions. A distance measuring system with an accuracy class of 3 µm allows deviations of +/- 3 µm. Repeatability Unidirectional repeatability of a measuring system is generally understood to mean the ability to repeat the results that a particular system returns under exactly the same environmental conditions. -
Page 30: Comparator Errors
Terms and Definitions Comparator Errors The comparator error, also referred to as the Abbe error, is a systematic deviation which occurs when the axis of the length standards do not coincide with the axis of the distance standards. The causes for the deviation are minute rotary movements in the axis design, which influence the measuring result. -
Page 31: Application Tips
The MINISLIDE MSQscale has an open optical measuring system. As with every optical measuring system, contaminants such as dirt impair the operation of the system. It is therefore not recommended to use the MINISLIDE MSQscale in appli- cations where dust, chips, particles or liquids are expected to be present during the process operation. -
Page 32: Troubleshooting
Move the guideway slowly along the entire stroke length • Release the alignment button • Reset MINISLIDE MSQscale (= switch it off and on again) • Drive the guideway along the entire stroke length and make sure that only the green LED lights up •... -
Page 33: Error Description
D-Sub 9 or Micro Match connector not properly Green LED on interface module not lit Check connection connected The MINISLIDE MSQscale has been damaged by improper handling (not in compliance with ESD Replace the MINISLIDE MSQscale requirements) Incorrect supply voltage on interface module... - Page 34 The number on the interface module does not match the Check matching of interface module and guideway Malfunction in analog interface module MINISLIDE MSQscale carriage number Return system to SCHNEEBERGER for alignment Reference mark not passed Adjust travel distance Clean and coat the dimensional scale as described in Reference mark not detected Section 3.3...
- Page 35 • MONORAIL AND AMS PROFILED LINEAR GUIDEWAYS • GEAR RACKS WITH INTEGRATED MEASURING SYSTEM • LINEAR BEARINGS AND RECIRCULATING UNITS • MONORAIL AND AMS APPLICATION CATALOG • MINERAL CASTING SCHNEEBERGER • POSITIONING SYSTEMS • MINISLIDE MSQSCALE • SLIDES www.schneeberger.com A.MANNESMANN...
Need help?
Do you have a question about the MINISLIDE MSQscale and is the answer not in the manual?
Questions and answers